Copyright © 2016 by Ken Forkish
Photographs copyright © 2016 by Alan Weiner
All rights reserved.
Published in the United States by Ten Speed Press, an imprint of the Crown Publishing Group, a division of Penguin Random House LLC, New York.
Ten Speed Press and the Ten Speed Press colophon are registered trademarks of Penguin Random House LLC.
Library of Congress Cataloging-in-Publication Data
Forkish, Ken, author.
The elements of pizza : unlocking the secrets to world-class pies at home / Ken Forkish ; photography by Alan Weiner.
pages cm
Includes bibliographical references and index.
1. Pizza. I. Weiner, Alan (Alan S.), photographer. II. Title.
TX770.P58.F675 2016
641.82’48—dc23
2015032247
Hardcover ISBN 9781607748380
eBook ISBN 9781607748397
First Edition
v4.1
a
CONTENTS
The hidden reality of pizza is that you can easily make better pizza at home than you can buy at any but the best independently owned, quality-focused pizzerias. All you need are good ingredients—flour, canned tomatoes, and cheese—plus a few tools and a standard home kitchen oven. And some good instruction. Even if you live somewhere that has great pizzerias, imagine making your own—a pizza that you can be proud of and is exactly how you like it. Discover for yourself what different cheeses are like on pizza: splurge on water buffalo mozzarella, see what happens when you seek out caciocavallo cheese, or try adding freshly grated Pecorino Romano. Master thin-crust and Neapolitan-style pizza. Bang out a couple of killer pan pizzas to eat with Sunday football. Serve it with confidence to your family and friends. Making it yourself will give you a greater appreciation for the craft of the pizzaiolos at your favorite pizzeria: you will probably find yourself looking more closely at their shaping technique; the dough they use and its texture; and how it’s topped, loaded into the oven, and baked. By making pizza yourself, you become more intimate with it. It’s seductive. You are more informed, and that understanding leads to better pizza, great pleasure, and plenty of pride.
I grew up in Maryland, and I now live in Portland, Oregon, where I opened Ken’s Artisan Bakery in 2001 after a Silicon Valley career, first as an engineer and then as a sales guy. In 2005 we started making pizza once a week in our big bread oven at the bakery and called it Monday Night Pizza. Then, in 2006, I opened Ken’s Artisan Pizza, a wood-fired-oven pizzeria, with my head baker turned chef Alan Maniscalco. My third venture is a full-service restaurant called Trifecta Tavern & Bakery, open since 2013, where we include flatbreads on our dinner menu that are baked in yet another wood-fired oven. I’ve been to Italy about a dozen times. I wrote about pizza in my first book, Flour Water Salt Yeast. So, what did I know about pizza? Put it this way: the more you know, the more you know you don’t know. As it turns out, I had plenty left to learn.
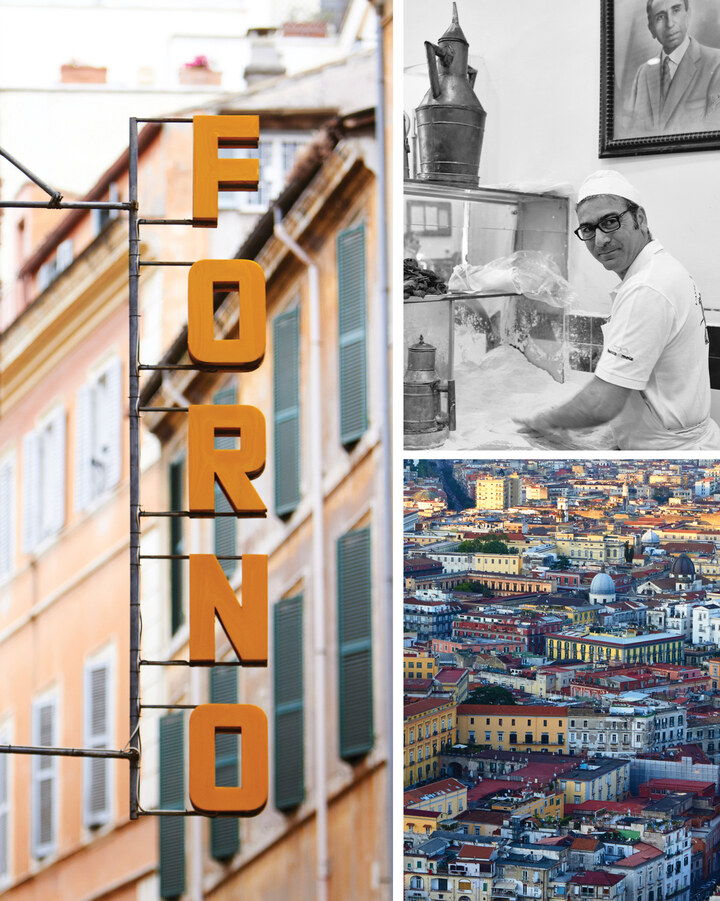
Researching pizza for this book took me to Naples for the first time to visit its pizzerias. Many of the lessons I learned there opened my eyes to another way of thinking about pizza—especially about how to make the dough. It took a while to realize what was right in front of my eyes: think like a pizzaiolo, not like a bread baker. Pizza dough and bread dough have different needs. Bread wants to expand to its maximum volume; pizza does not. Pizza dough has structural needs—to stretch without breaking and without being too elastic. I knew this before, but I was still thinking of pizza as a kind of bread. The bread I like to make comes from wet doughs—made with a lot more water than you’re probably used to—but pizza doughs that are equally wet don’t work very well. And who knew that I should think about matching the hydration of the dough to the type of oven the pizza bakes in? At my pizzeria we long ago figured out the right dough for our oven. What I realized is that finding the perfect dough, and figuring out the perfect baking technique, is different when you’re baking in a standard home oven. What’s more, it depends on the style of pizza you want to make.
The best part of this little journey of mine was affirming that great pizza in the home kitchen is not complicated. It’s really very simple. On the pages that follow I take you through the process—how to make it—and the reasoning behind it so you can learn the same lessons I learned.
Even in Italy, more than 25 percent of households make their own pizza from time to time. It’s an easy meal that comforts—pizza baked in a pan in the home kitchen. I guarantee you can make better pizza at home than you would buy from any chain, and for less money, too. And it’s going to have heart. A decent home oven (not necessarily an expensive one); a baking stone, or better yet, a baking steel; a few baking accessories; good ingredients; and simple-to-follow instructions will get you there. (Trust me, you can buy affordable ingredients that are far better than any chain pizza place will put on your pie.) Making pizza can be a solo effort, where you enjoy the process as much as the result (and get better every time you do it), or it can be a tradition you share with your family or housemates.
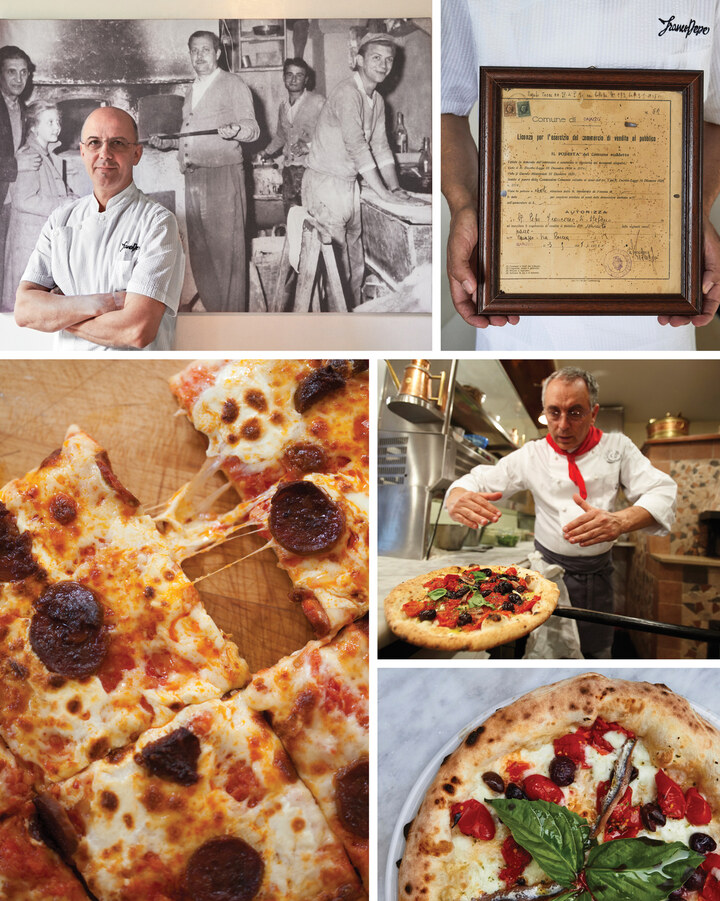
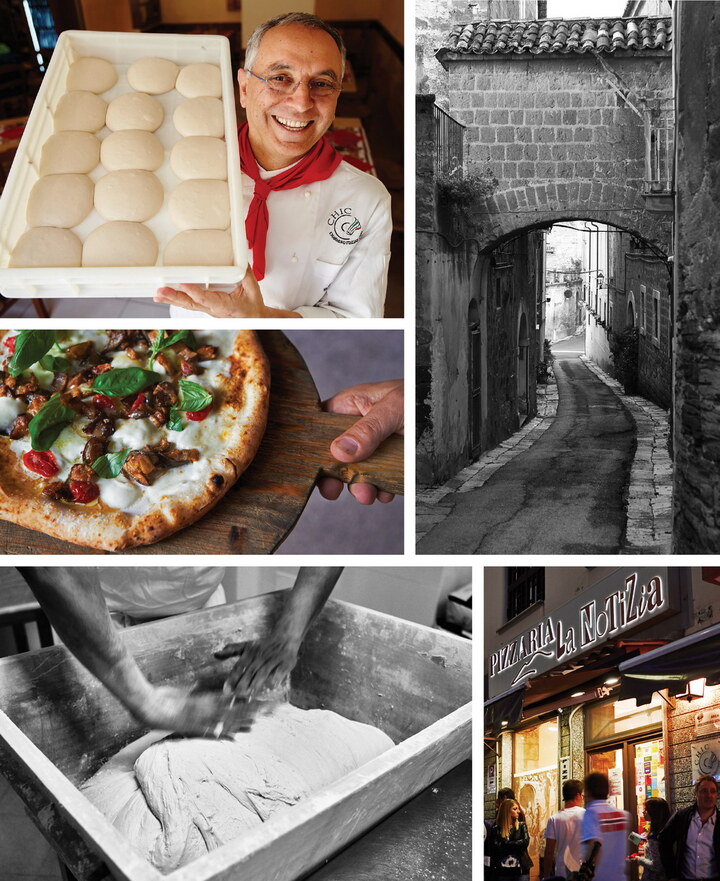
Great pizza as we know it has been happening in Italy for about 150 years, especially in the region surrounding the Bay of Naples. Great pizza is happening in America, too, with a dramatic growth in quality pies around the country in the twenty-first century. And this may not sound like news, but in the last several years a movement has grown that honors traditional techniques and ingredients, then goes beyond the standard to push the quality boundaries higher. It’s in the air. People are traveling long distances to eat pizza made by Franco Pepe at Pepe in Grani in the small village of Caiazzo, about a 45 minute drive from Naples. The queues at Pizzeria Bianco in Phoenix are legendary. Nancy Silverton’s ingredient-inspired Pizzeria Mozza in Los Angeles is known for brilliance on top of a great crust. The Salvo brothers in Naples select from seven different olive oils to match to their pizzas. Enzo Coccia at Pizzaria La Notizia in Naples is packing the house with a fantastic dough, perfectly baked and using the traditional ingredients of a TSG pizza, and then going beyond to source specific flours and toppings. “There are two pillars of pizza: the ingredients and the pizzaiolo,” according to one Neapolitan I met. Paulie Gee’s, Roberta’s, and Franny’s are killing it in Brooklyn and making their own distinctly New York versions of Neapolitan pizza, and Pierre Luigi Roscioli in Rome lists the provenance of his ingredients on his menu using things like Piennolo and Datterini tomatoes, culatello from Podere Cadassa, and mozzarella di bufala from Paestum.
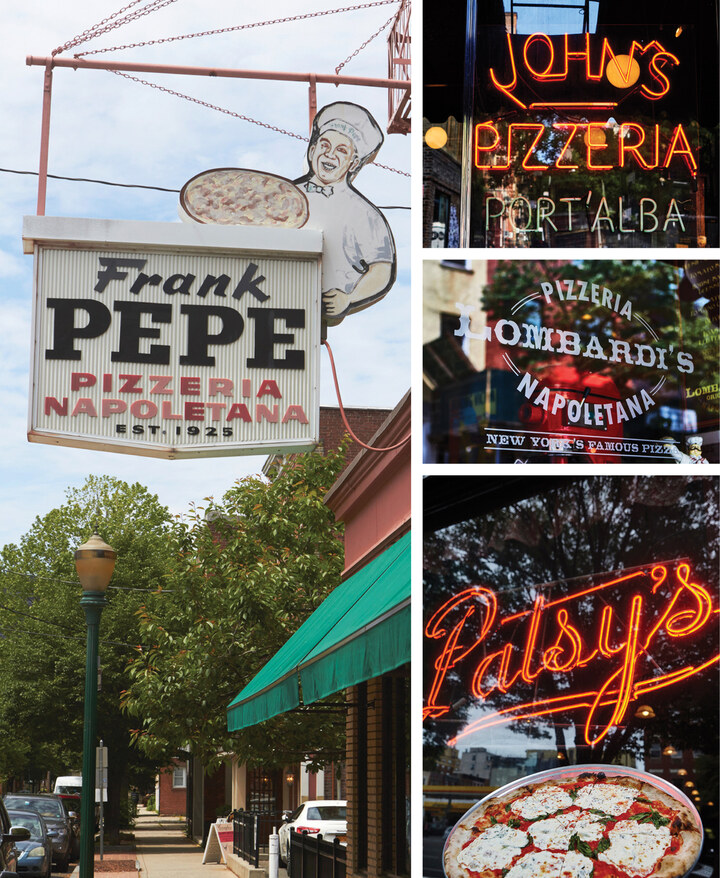
I find great inspiration from all of these people. The pizzas from each of these places are all distinctly their own and reflect a variety of pizza styles. Should the pizza crust be spotted with char on its rim and underneath? Should it be stiff when you hold it on its end, or should it sag? What’s the best kind of cheese to use? Bread flour or Italian 00 flour? The answer to all of the questions is that it depends on what kind of pizza you are making, and even then there is plenty of wiggle room and individual variation. Let’s get this out right now: There is no one way to do it, no one right answer, no one platonic ideal of pizza that applies to everyone. Di Fara’s pizza on Avenue J in Brooklyn is nothing like the pizza at La Notizia, Salvo, or Da Michele in Naples, which are nothing like Frank Pepe’s in New Haven, Patsy’s in Harlem, Buddy’s in Detroit, Totonno’s on Coney Island, Delancey in Seattle, Anthony Mangieri’s Una Pizza Napoletana in San Francisco, or Pizzeria Bianco in Phoenix. All are terrific pizzas. That’s one thing that’s great about pizza, because depending on where you’re from and what kind of pizza is iconic in your memory, there is usually just one right answer to these questions. Pizza is a very personal experience. And you’re likely to forcefully defend your opinion, because in your mind this isn’t even a matter of debate—it’s a clear right and wrong and I’m stupid for suggesting otherwise.
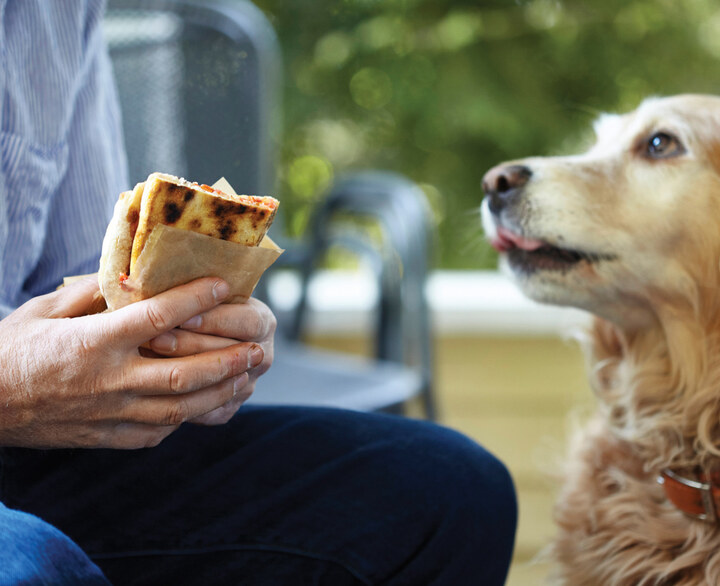
This is a book that tells you how to make really great pizza at home in many styles—Neapolitan, Roman, American pan, New York, creative flatbread, gluten-free. In my first book I wrote how I high-fived my dog, Gomez, when I discovered how good pizza from my standard home kitchen oven could be. Great pizza at home can happen and it won’t break your brain or your daily routine. It all starts with a good dough, and I’ve got you covered there.
The soul of pizza starts with Neapolitan pizza—the soul of pizza is Napoli. It started there and it’s a defining cultural emblem. And after making pizza professionally for a short nine years, I was lucky enough to travel to Naples—to meet some of Italy’s top pizzaiolos, go to a mozzarella di bufala farm and dairy, tour a tomato plant, and visit the flour mill that provides flour for most of Naples’s pizzerias with the idea that I would gather inspiration and knowledge to inform the writing of this book. When I sat down with people whose families had been making pizza for the last hundred years, I kind of had my ass handed to me—gently, for the most part—and I asked myself: Who am I to even think I could represent what pizza is all about? But you know what? I discovered that there is a deep tradition that defines this culture, these people, and their food, and we are lucky to have had it become part of our lives, too. Naples doesn’t own pizza, but it lives and breathes it like no other place. It’s kind of like I’ve been making some nice music for the last ten years, and then I meet Beethoven or Mozart. And these are beautiful people who are willing to share their knowledge and experience that came from generations of hard, hard work and attention to detail. Pizza is a way of life in Naples. It flows through the bloodline. But people everywhere get emotional about the pizza they love, be they from Rome, Detroit, New Jersey, St. Louis, Old Forge, Portland, or the five boroughs of New York City. My goal in this book is to honor the pizza makers everywhere, but to do that, I had to start in Naples. Naples is the root of all pizza that follows.
My first book, Flour Water Salt Yeast, was about bringing methods used in the best artisan bakeries into the home kitchen to make professional-quality bread (with a few pizzas included for good measure). This book has a similar aim, but this time I focus solely on pizza and draw inspiration from several of the best pizza makers in Italy and the United States. I have my own pizzeria too, of course, but instead of an insular “here’s the pizza we make” approach to this book’s recipes, I want to offer you something that’s more representative of the range of pizza styles and traditions that inspire me. These are practitioners of the pizza craft for whom pizza is the principal expression of their lives, and in Naples it is a fundamental part of a regional identity. I’m a big fan of them all. I ask myself what I can learn from them, and how to make my version of whatever they do best. Replicating is not the point. What’s theirs is theirs, and it is of their time and place. But I can look at a Detroiter pizza and make a pan pizza my way that is inspired by it. So here in this book I give you my take on pizza styles I admire.
If you have already read and used my first book, Flour Water Salt Yeast (FWSY), you will find here the same methods for measuring ingredients using a scale, mixing dough by hand in a small dough tub, and making your own wild yeast leavening culture. I made some refinements too, with recipes for smaller batches of dough than those that were in my first book, and for using smaller amounts of flour to start and maintain a levain. This book’s pizza dough recipes are streamlined, and they take less time to make than the pizza doughs in FWSY—but they make better pizza. I decided to abandon my bread baker’s point of view and instead adopt pizza-dough-making methods I learned that are widely practiced in Italy.
Also, as in my first book, I’ve tried to write with the understanding that you need some recipes for dough that work within what I’m assuming to be a standard workweek, where you probably go to work in the morning, come home in the evening, and don’t have a bunch of time to make dinner. My pizza doughs are long-fermented because that’s how you get the best flavors and textures—good flavors build while you sleep. This is ideal. So, as with my first book, time is treated like an ingredient, and I’ve highlighted the dough-rising schedule up front in each recipe. Mix a dough in the evening, shape it into dough balls (5 minutes) a couple of hours later, put them into the fridge, and when you get home the next night you fire up the oven and not much more than an hour after that you have an amazing pizza for dinner that was a total of 30 to 40 minutes of work. Or, maybe it’s a weekend, and you get up on Saturday morning deciding you want to have pizza that night but you were too wacked Friday night to even think about the next night’s dinner. Make a dough first thing in the morning, divide the dough into balls 2 hours later, fire up the oven in the evening, pop open a bottle of wine, put on La Traviata, and the world is yours. Do all your Saturday stuff in between. Be a hero.
“You always have pleasure in doing your thing well; it must give you independence from the whole buffoonery into which we have been born.”
—Albert Einstein
All you have to do is learn the method, and after a few repetitions you won’t even be looking at the instructions anymore; you’ll maybe just double-check the recipe for ingredient quantities.
If you’re feeling more ambitious, I have a dough recipe that uses a pre-fermented dough called biga. And if you really want to go the distance, I show you how to make a naturally leavened dough that uses your own starter and no commercial yeast. You can use any of these doughs—naturally leavened, made with pre-ferments, or straight—to make one of several styles of pizza: Neapolitan; Roman-style with a super-thin, crackery crust; American pan pizzas and bar pizzas; and New York–style classic hearth pies. You can integrate excellent pizza, made at home just the way you like it, into a busy lifestyle. If you want to splurge on ingredients, go for it. If you want to do it on a budget, you can do that, too—and still spend less and make a better pie than you would buy out. Maybe for you pizza making is about engaging your family or housemates in the effort. Maybe it’s a solo pursuit where you take pride in geeking out on the details. Pick your crust. Pick your toppings and sauce. It’s showtime!

CHAPTER 1
THE SOUL OF PIZZA
In 2014, a trip to Italy changed my thinking about pizza forever. I was moved by the way the people I met in Naples relate to pizza: for them, it was a soulful connection, related to the bigger picture of who they are as a culture. And then I became interested in the stories of the immigrants from Naples and the south of Italy who began making pizza in the United States in the early 1900s. I wanted to learn how pizza evolved from its early days to the present, how it stayed true to its roots in Italy, and how it grew to be its own thing in America. The stories always came back to the pizza maker, and how his or her passion was as important as the quality of the tomatoes.
ITALY
Enzo Coccia, a globally celebrated Neapolitan pizzaiolo, altered my pizza reality when he made me stare at a naked truth I had not confronted directly before. “Pizza is not the same as bread,” he said, and I’m glad he said it with force. Meaning I needed to adjust my thinking.
I set out to understand pizza’s place in the culture, which means understanding its history and the role it plays in people’s lives, and meeting the people making it today. During my visit, I focused on Naples and Rome. Naples, because it is where pizza began. Neapolitans bleed pizza—it is a defining element of who Neapolitans are and how they live. Rome, because it has two distinct styles of pizza that I admire: one a super-thin crusted wood-fired-oven style; the other called al taglio, served by the slice, which is found in bakeries. You will find pizza in both of these cities’ styles, with plenty of hybrids of the two, throughout Italy and beyond. In Bologna you will find very thin crust pizza like in Rome, but as a much larger pie, and in Florence it’s possible to find crust even thinner than in Bologna. In this book I focus on the styles of pizza that both interest me most and that I believe can be successfully adapted for the home kitchen. It inspires me that pizza making is not a static craft in Naples and Rome. The best pizzaiolos are pushing their skill to new heights, making extremely high-quality pizzas that are in harmony with tradition but not constrained by it. In my mind, this is the best evolution possible. It’s like jazz to me.
Naples
Naples is the birthplace of pizza, where by most accounts it took its modern form in the 1700s, without tomatoes—which, though they were first imported to southern Italy in the 1500s, probably didn’t make it onto pizzas until the 1800s. Establishing firm timelines for specific evolutionary steps in pizza history (or for any other food that began as a street food) is difficult. One of the earliest Neapolitan pizzerias in the written record is Zi Ciccio, first written about in 1727, located in the Piazza Cavour. Others from that era include Port’alba and, in Porta San Gennaro, the pizzeria Capasso. According to one account, the most successful was called Ntuono, run by Antonio Testa near the church of Santa Teresa, where King Ferdinand I (1751 to 1825), the ruler of Naples, secretly went to eat. Did he wear a wig? (It wasn’t the public he was hiding his pizza habit from; it was his wife, Queen Maria Carolina of Austria, Marie Antoinette’s sister, who apparently dominated her unsophisticated husband and ruled the Kingdom of Naples in his name.)
Earlier forms of pizza described in the sparse historical record were made with eggs, sugar, almonds, and spices and were not food for the commoner but rather for the ruling classes. But the early modern Neapolitan pizzas of the 1700s were indeed for people on the street who were hungry and either had a little money or bought their pizza on credit using a Neapolitan pay-it-forward system that is still in use today. Toppings included inexpensive local ingredients like olive oil, garlic, oregano, grated cheese, lard, and salt. When tomatoes started appearing on pizzas in the 1800s, they would have only been used during their fresh season from late spring through summer and autumn (or, possibly, as a conserva during the winter and spring). By the early 1900s they were being commercially canned in southern Italy and thus were available year-round. Pizza has been called il sole nel piatto—the sun on a plate—and Naples is famously sunny, hot in the summer and temperate in the winter (perfect for out-the-window laundry drying). The climate, the sea air, and the volcanic soil make an excellent terroir for tomatoes, olives, and herbs. Tomato on pizza was magic waiting to happen.
Modern pizza started as a street food for the working classes (and the occasional disguised king), but became an obsession across Neapolitan society once Queen Margherita famously ate what became her namesake pizza at Pizzeria Brandi in 1889. Pizza was sold in outdoor stalls and was also vended by boys carrying pails, called stufa, full of baked, folded pizzas. “In Naples we call these portafoglio, folded like a packet,” a taxi driver in Naples told me. Marinara pizza got its name because it was a favorite among fishermen (mariners), who would take it on board to eat during their workday, folded over upon itself to make it easily transportable. Nowadays we think of “marinara” as referring to an iconic red sauce, but in fact, in its early days the marinara pizza was just topped with garlic, oil, and oregano. Tomato sauce didn’t enter the equation until later. According to a book published by the Molino Caputo flour company (Teri, Oggi e…Domani, la Pizza tra passato e future), the first pizza to have a proper name was called the mastunicola, made by the wife of a mason, Mastro Nicola, to fortify him for a hard day’s work. According to sources, it was topped with cheese and lard. I take most of these recorded “facts” with a grain of salt—the research is scanty and one author’s assertion becomes another’s fact. Still, I like imagining Mastro Nicola going to work with his namesake pizza in his satchel, clueless to his future fame. But didn’t his wife have a name, too?! She made the pizza!
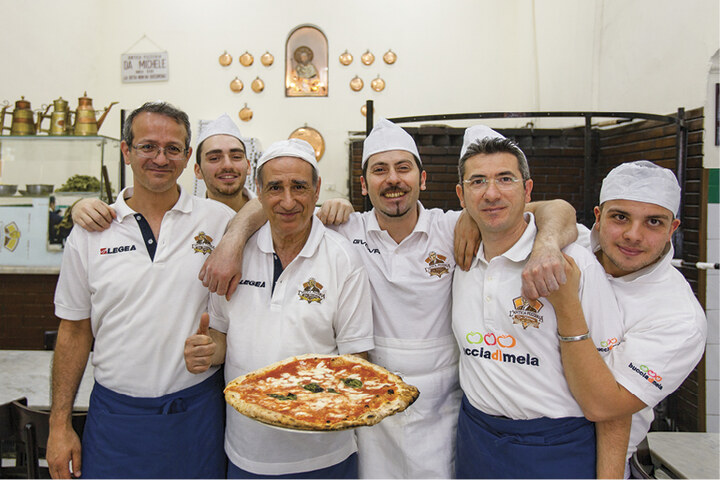
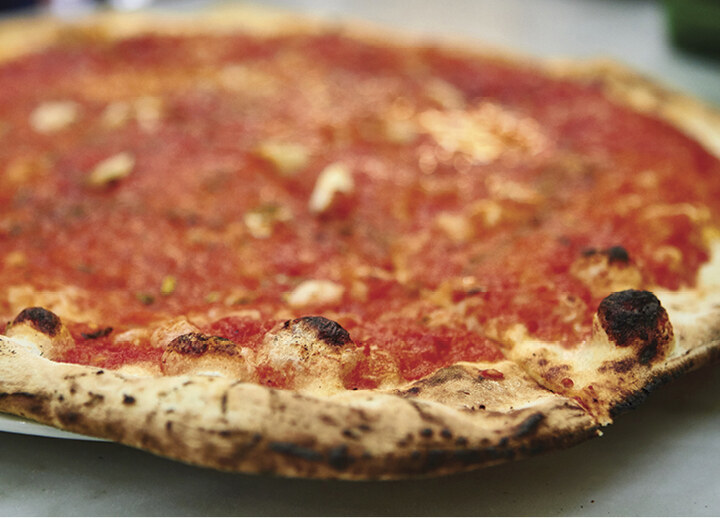
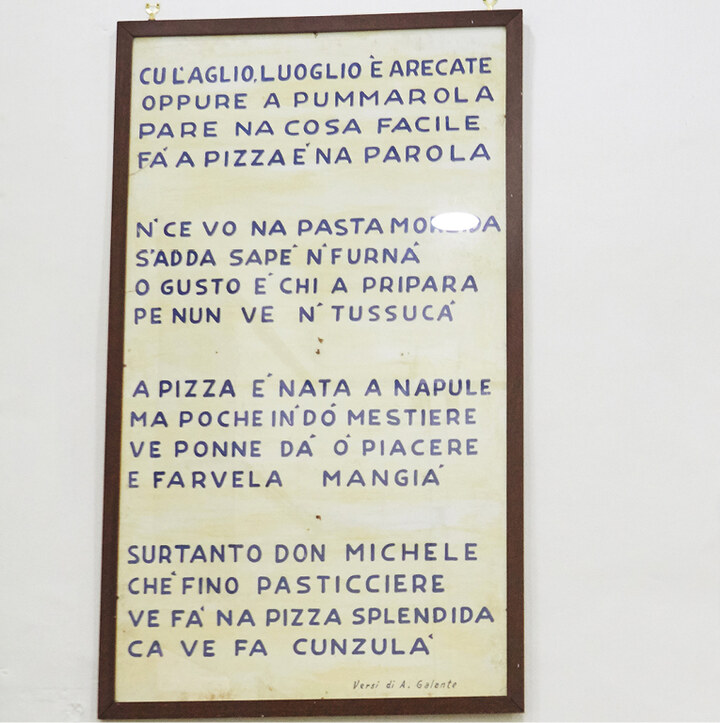
Today, Da Michele might be the most popular of the traditional, old-school pizzerias in Naples. It’s often just called “Michele” by locals, who queue up for one of the eight hundred pizzas (!) made daily at this iconic spot in the middle of the city. Da Michele, founded in 1870 and in its present location since 1930, makes two kinds of pizza: marinara and margherita, costing 4 euros each, 5 euros if you want double cheese on your margherita. There is an old framed poster on the wall at Da Michele; here is a rough translation:
With garlic, oil, and oregano
Or with tomato rather
It seems an easy thing
But making pizza is far from easy
You do not want a soft dough
You need to know how to bake
The flavor comes from he who prepares it
And it’s something wholesome and good
Pizza was born in Naples
But few in the trade
Can enable you to fully enjoy
The pleasure of eating it
Only Don Michele
A pastry chef of refined skill
Makes a pizza so splendid
It will comfort you and make you happy
The original pizzas were made from simple, local ingredients. The flour was from nearby wheat fields and mills; the small, pear-shaped tomatoes that ended up as pizza sauce stared at Mount Vesuvius from the valley floor as they ripened in the ever-present sunshine. Olive oil, oregano, garlic, and mozzarella cheese were all from Campania too. Neapolitans get emotional about the pizza they love. “Pizza isn’t just a food, it’s a way of being Neapolitan,” Enzo Coccia once said in an interview with video journalist Sky Dylan-Robbins.
Pizzeria Brandi, Starita, Di Matteo, Gino Sorbillo, and Pizzeria Port’Alba are but a handful of the classic, old-school Neapolitan pizzerias that serve the platonic form of Neapolitan pizza, a cheap food for all walks that is primal sustenance for the people of Naples. “They are selling an emotion,” said Costantino Cutolo from the tomato processor Compagnia Mercantile d’Oltremare, who grew up just outside of Naples. Other pizzerias, like La Notizia, Salvo, and Pepe in Grani, are still firmly based in tradition, yet focus extra attention on the quality of the dough. They also push the boundaries of what goes on top of the pizzas, thinking more freely but still intent on using the bounty of Campania’s land and sea.
The craft of the pizzaiolo has been handed down from generation to generation. They are not chefs, nor bakers—they are pizzaiolos. It is a very proud and respected profession. Naples is awash in pizzaiolos today who are third- or fourth-generation pizza makers. One said his grandfather, a pizzaiuolo (Neapolitan spelling), had twenty-one grandchildren and every one is a pizzaiuolo. It is a pride of Naples that they have the history and culture that produces generation after generation of serious, dedicated pizza makers for whom this craft is the one profession they will have all their lives. Their work is often a measure of respect for their fathers and grandfathers (there are some, but very few female pizzaiolos; I hope this changes). “The soul of pizza is the pizza maker,” Antimo Caputo, of the Molino Caputo flour mill in Naples, told me. Making pizza isn’t just a mechanical act. “It has to be made with love to be good,” Antimo continued. “He puts in the pizza his passion.”
I asked most of the people I met in Naples how often in a week they eat pizza. The answer usually began with a “pffffff,” as whomever I was talking with had to stop and think to answer this ridiculous question, which is apparently akin to, “How many times a week do you think about sex?” The answer ranged from once a week to too many times to count. Neapolitans are very social, and meeting up with friends at a pizzeria is a very common weekly thing.
Enzo Coccia is one of my pizza heroes, and I met him at his pizzeria, La Notizia. Enzo is a third-generation pizzaiuolo making some of the best pizza in Naples right now, and La Notizia won the Associazione Verace Pizza Napoletana (AVPN) Best Pizza award for 2014, a great honor. Enzo is making pizza with a strong respect for tradition, but he also pushes accepted Naples boundaries by going beyond margherita and marinara, using ingredients you would more likely find in a great salumeria or a top restaurant. This is a touchy, controversial subject for Neapolitans!
In a 2012 article, Sergio Miccu, head of the Neapolitan Association of Pizza Makers, is quoted as saying, “There is no such thing as gourmet pizza; we are not OK with this. Pizza was born as a food for the poor and any complicated pizza loses its identity.” While I don’t completely agree with Sergio—by his logic, anything other than margherita or marinara would be heresy—I appreciate his sentiment. There’s something to be said for preserving traditional pizza, which at its heart was commoners’ food. Putting expensive toppings on the pizza takes it out of that realm. This further explains something Enzo had said to me: “There are a thousand pizzerias in Naples. It’s difficult to succeed with high quality.” Many, maybe even most, Neapolitans aren’t seeking creativity or “gourmet ingredients” on their pizza, and many are offended by pizza that aspires beyond its working-class origins—preservation of traditional pizza is important and is one of the goals of the Neapolitan Association of Pizza Makers. Enzo Coccia is one of Naples’s most famous—and most controversial—pizzaiolos because he is creative and uses better- quality toppings than many of the traditional and more famous places, and charges more for it. Miccu might sneer at his “gourmet” approach, but for me, Enzo deserves admiration. And judging by the line on the sidewalk the last time I was there, he’s got nothing to worry about.
Enzo seems to have a particular point of view about pizza that is grounded in tradition yet a little bit poetic. But it seems modern, too. Maybe he’s a practical, yet very talented dreamer, willing and confident enough to take his own road, follow his own whim. As a craftsperson, what’s wrong with doing what you are inspired to do? It means you can choose pizza at La Notizia that’s traditional, or uniquely Enzo’s own. Others may copy him someday, but he is copying no one; rather, he’s building on two-hundred-some years of local pizza tradition and adding his own next step. For that, he has my admiration. And his pizzas are so good!
Enzo does not speak English, so when we sat down to talk pizza he brought one of his young cooks to sit with us and translate. I arrived at La Notizia with no particular agenda other than to meet him and see what I could find out about how he makes his dough. I was quickly schooled and quietly thrilled that my simple questions and honest curiosity were taken so seriously. Hopefully I’ll be a better pizza man for it. The conversation began with a one-on-one, gentle but stern, 15-minute lecture on the history of pizza—or pizza dough, to be specific. Until about 1920, all pizza was made with a natural levain (also known as a wild yeast culture), levitazione naturale in Italian, and each day’s batch was leavened with a piece of the previous day’s dough. Then, when commercial monoculture yeast (Saccharomyces cerevisiae) became available in Naples around 1920, many pizzerias switched to this because it was less work and demanded less expertise, and was therefore sometimes more reliable. Commercial yeast, for all but the extremely talented pizzaiolos, produces a lighter, more delicate pizza crust, too. But they were still in the habit of using pre-fermented doughs, a portion of old dough to leaven the next batch as they had done before (this is called pâte fermentée in French baking). In the 1950s, many but not all pizzaiolos began making direct doughs (I called direct dough “straight dough” in FWSY), making their jobs once again a little bit easier and producing reliable results. From this point to the present, only a small number use refrigeration to extend the fermentation and stabilize the dough.
Today, the exact fermentation method varies from one pizzeria to the next—many use either a direct dough or mix with old dough to leaven the next batch—but almost all of them use commercial yeast and long, slow fermentation. Most pizzerias tend not to use refrigeration (it takes up valuable space and is an extra expense); instead, they store the dough in the pizzeria at room temperature and mix multiple batches daily, if necessary, to meet demand. The busiest pizzerias sell four hundred to eight hundred pizzas every day. Each dough ball has a window of about 4 to 6 hours for optimum performance when held at room temperature; if left too long, the dough will be too gassy to make a good pizza. What these pizzerias need to do is meet the volume requirements of their business with good dough balls every time.
Enzo shared his dough-making process, which kind of turned my way of making pizza dough on its head (more on this later). He asked me what I am: a pizzaiolo? Enzo said being a baker and being a pizzaiolo are different, and don’t assume because I know bread and croissants that I know pizza. His point wasn’t just that pizza and bread are different, it was that being a pizzaiolo is different from being a baker. The life is different, the dough is different, the baking is different. The end product is different. The oven is different. And pizza is not the same as bread.
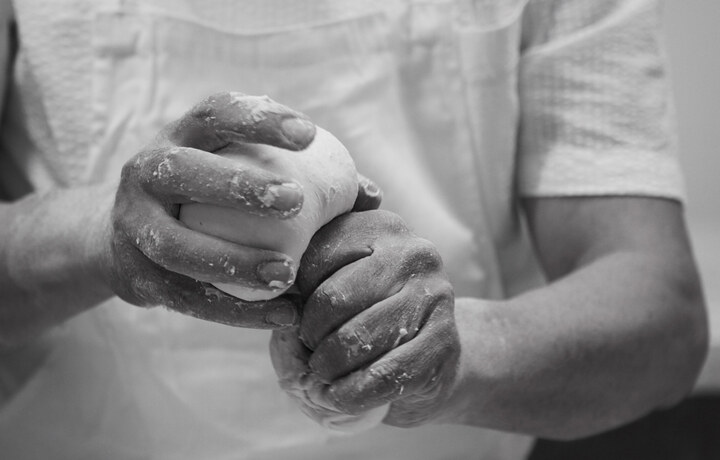
I felt humbled in Enzo’s presence, and a little intimidated. He didn’t crack a smile for ten, fifteen minutes. As he made his point that “making pizza is not the same as making bread,” he said it in a strong voice to communicate that this was inarguable, and to bring the point home, he showed me the palm of his hand. It was a strong hand, with the deeply creased palm of a longtime pizzaiolo who had shaped countless thousands of pizzas for decades. His pride was as strong as his hands. The classic Neapolitan pizzaiolo technique is to hand-cut dough balls out of a larger dough mass to make up hundreds of pizzas every day. It is a pincer motion, similar to how I hand-mix bread dough or cheese makers cut mozzarella (mozza means “to cut”). This repeated cutting motion works the palm creases over and over and over. Somehow, given enough time (decades) and enough dough balls (you do the math), dark gets in there. “Show me your palm” has some significance among pizzaiolos.

After a very serious conversation about pizza dough, Enzo’s warm Neapolitan heart took over and we ended up smiling, and with a mutual respect. When I pulled out my pen and started taking notes, he looked at my notes, and could tell I know my dough, and then he opened up and really told me his exact dough recipe and process. He said pizza dough has just four ingredients, plus time. I added “and temperature,” and showed him the part in Chapter Two of FWSY where it says to “think of time and temperature as ingredients.” Enzo nodded his head and beamed at me. I asked if he would give me permission to include his way of making pizza dough in my new cookbook, and he agreed so long as I would say it’s not the same as coming to his restaurant. (Duh, of course it’s not.)
While I am a strong advocate for using traditional methods in bread, pizza, wine, salumi, agriculture, and so on, I also latched on to what, to me, seems like a new generation of pizzaiolos in Italy and in the U.S. They are (or more hopefully, we are) making great pizza by carefully respecting tradition yet topping the pizzas with rational creativity. Using artichokes and fresh goat cheese, smoked provolone and escarole, figs and honey, or the best culatello I’ve had in my life—this is a good thing. Yes, these pizzas cost more than the 4-euro pizza at Da Michele, but boy are they good to eat.
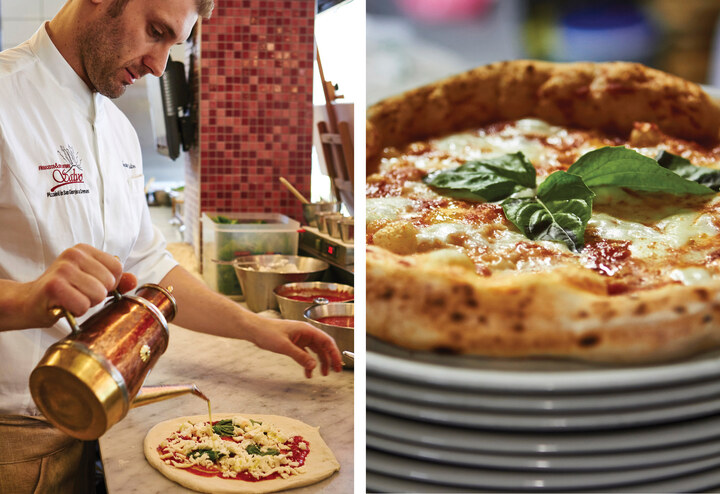
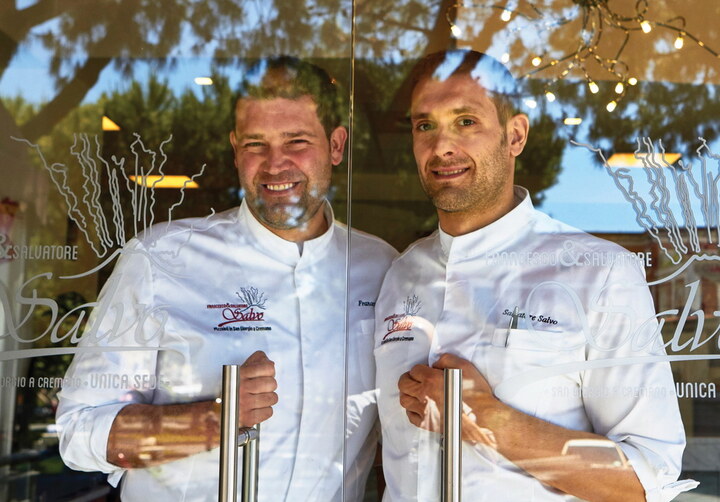
Pizzeria Salvo is another example of a great modern-day pizzeria in Naples. The brothers at Salvo, Francesco and Salvatore, use seven different olive oils to top their pizzas, depending on which olive oil goes best with which pizza. Their brother Ciro Salvo’s place, Pizzeria 50 Kalò, is another example of a younger yet experienced pizzaiolo pushing pizza’s quality boundaries. Neapolitan trash talking (in the press and in personal interviews) suggests that many of the old-school, classic pizzerias were using ingredients of low quality. Still, when you think of pizza as a humble food for commoners, it kind of makes sense that they would use cheap ingredients, but inexpensive doesn’t always mean poor quality. I think this bad-quality-ingredients reputation is only a partial truth, knowing that most use good flour from Caputo, and how bad are the tomatoes and mozzarella from this region going to be? Maybe they use inexpensive oil. What is notable about the Salvo brothers and others that I’m writing about is that now a select group of pizzaiolos is making their reputation with the highest quality ingredients: specifically selected tomatoes, garlic, cheese, oregano, basil, and olive oil. A simple marinara pizza from these impeccable local ingredients becomes an exceptional thing, especially when married with an excellent dough and expertly baked. Take, for example, Ciro Salvo at 50 Kalò. He’s certified by the Associazione Verace Pizza Napoletana (AVPN) but goes beyond that to specifically source garlic from Campania’s Ufita valley, oregano from the Alburni mountain villages near Salerno, and olive oil from Don Alfonso 1890 on the Amalfi coast.
What strikes me as funny is that a classic, old-school pizzeria in Naples—Starita—has sixty-eight different pizzas on its menu, with toppings as varied as mortadella on pistachio cream, yet La Notizia is controversial for making “gourmet pizza.” Familial slings and arrows is all this hubbub amounts to, but it’s a great indicator of how seriously they take their pizza.
Caiazzo
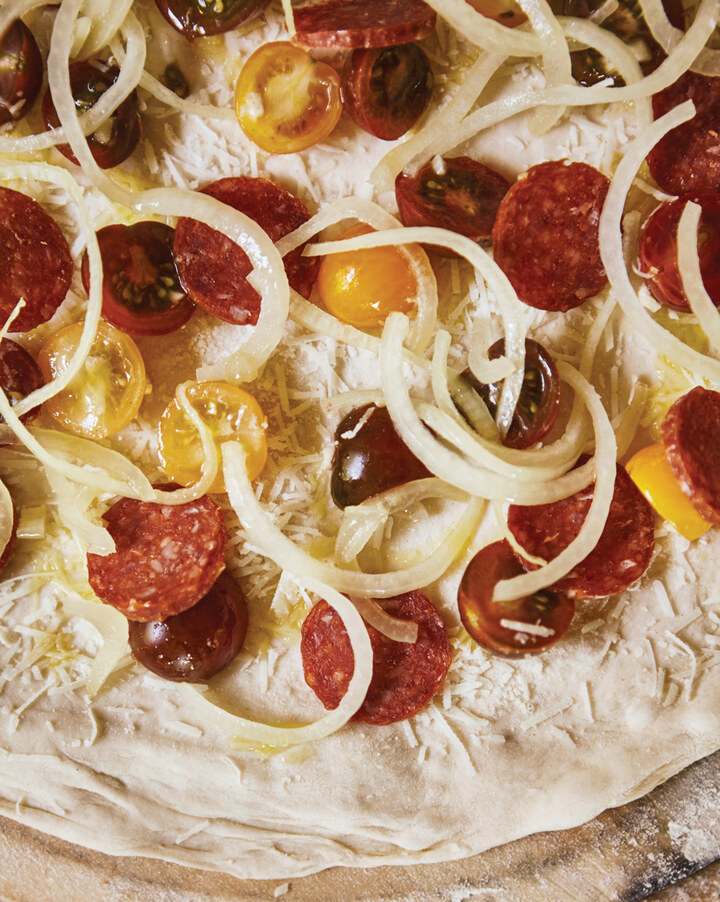
About 50 kilometers (30 miles) outside of Naples, the small, old village of Caiazzo has a beautiful church built around the ancient tomb of Santo Stefano, narrow alleyways, all-stone buildings, a courtyard, and atmospheric lamplit cobblestone streets. The surrounding valleys of Caserta, one of the regions where mozzarella di bufala is made, are fertile with volcanic soil, painted with gentle hills and farmland. This region is a mecca for produce. Outside of the church, the other landmark of Caiazzo is Pepe in Grani, a new pizzeria in a very old stone building that fashions a modern-day pizza built on the foundation of pizza history. Opened in 2012, Pepe in Grani was constructed in a restored circa 700 AD stone building as a place for pizza, research, and hospitality. Franco Pepe is a third-generation pizzaiolo. In 2014, Jonathan Gold pronounced it the Best Pizza in the World in Travel & Leisure magazine. On this trip I brought April, one of the managers from my pizzeria, and we visited Franco and had an epic dinner, two of us eating a crazy six pizzas. “Are you sure?” Franco kept asking, repeatedly checking on us with an amused grin while we ate. I couldn’t travel all this way just to have one margherita, and the menu offered a “tasting menu” of five pizzas for three or four people. It would have been rude to sample each and send back the bones waiting for the next pie, so we just dove in. No regrets, either! Dough-wise, Franco follows the traditional methods of the nineteenth and early twentieth centuries: naturally leavened pizza dough, hand-mixed, no refrigeration. His ingredients are all from his area, seasonal (for example, figs, artichokes, sweet onions, cherry tomatoes, and fresh anchovies from the nearby coast), and of stunning quality. Best pizza in the world? Let’s just say, at Pepe in Grani the dough is mixed perfectly, fermented perfectly, shaped perfectly. The toppings are in perfectly complementary proportions. And, naturally, the pizza is baked perfectly. These were flawless pizzas. His reputation is well deserved. The crust had a very thin layer of crisp on the outside and the bottom, and a feathery light crumb inside the rim. It was almost weightless. The inner base of the crust was very thin and perfectly leopard-spotted on its bottom from the oven’s floor. On this, our fifth consecutive day of eating pizza, April said, “I’ve never had anything like that, ever.” I can’t print the rest of what she said, but it was definitely complimentary.

Our tasting menu at Pepe in Grani was preceded by a folded-over libretto pizza filled simply with tomato sauce, garlic, and fresh oregano, wrapped in brown paper. The libretto, aka portafoglio, remains Naples’s street food, and while later pizzas went in the gourmet direction, Franco started us with this basic pie—where pizza began. I love this respect for tradition. Franco’s crust tasted of lactic fermentation—a flavor that’s sometimes described as milky and fruity, and similar to what you get with a ripe liquid levain (or, for anyone who’s baked out of my first book, from my White Flour Warm Spot Levain Bread). His is a very well-fermented dough, with a beautiful balance of flavors, and as they might say in Italy, it is highly digestible (“digestibility” is loosely defined, but widely regarded as being a benefit of long-fermented, naturally leavened pizza and bread). We put that to the supreme test by eating five more pizzas: a traditional margherita pizza with mozzarella di bufala; a pizza with white fresh anchovies, olives, split Vesuvio tomatoes, and oregano; a folded-over pizza with escarole, ham, and smoked provola (the crust was so soft, so delicate, so delicious); artichoke with melted mozzarella and a light fresh ricotta piped on after the pie was baked; then the fig jam pizza with Conciato cheese grated over after baking. The pizzas looked bready and doughy, but they were ethereally light. Tender. Delicate. Sexy.
I mention that Franco Pepe makes his dough the old-fashioned way, by hand—but this is a point worth reiterating, because it’s ridiculously hard work. Imagine mixing 80 kilos (175 pounds) of dough by hand for 20 or 30 minutes. At the end of the day, so it has time to rise before the next day’s service. Franco said to us, “My pizza is slow food.” He is fond of saying his pizza is “wireless,” meaning no electricity is used anywhere to make it. He mixes it in wooden boxes, and it never sees refrigeration. He uses thin, symmetrical pieces of wood to fire his gold-tiled Stefano Ferrara oven, ensuring even performance.
Pepe in Grani wants to communicate and promote the area’s bounty through its pizzas. Franco has worked with local farms and a local agronomist, Vincenzo Coppola, in one case to revive an ancient indigenous variety of wheat, and in other cases to showcase the local tomatoes, garlic, onions, chickpeas, fruits, and so on. This work and his growing fame have helped revive a declining local economy.
Not content to simply make pizza the same way every day, Franco Pepe continues to experiment with different flours and adjustments to the fermentation of his dough. I get this, and I find inspiration from others like Franco, who are driven to experiment and look for the new in themselves and the world around them. It’s one thing to experiment; it’s entirely another thing to experiment and make it something we all swoon over. Franco Pepe’s gift is combining ingredients that serve as a window on the region that he is proud of, and making them into pizza that stands at the pinnacle of pizzadom. He recognizes that many of the old ways are still the best, even if they mean harder work and more time. My thinking is that by doing something over and over with an open mind, not just repeating but learning, and respecting tradition but building on it with your own inspiration—that’s when new realities, new beautiful things, can happen. Learning from each experiment and applying it the next time is what leads to greatness.
To return to the schooling I received at La Notizia, when Enzo Coccia said, “Pizza is not the same as bread,” he wrote down pizza dough’s ingredients in the following order, to demonstrate how the dough is made: (1) acqua (water); (2) sale (salt) plus impasto (stir to dissolve); (3) lievito (fresh yeast) plus impasto (stir to dissolve); and, finally, (4) farine (flour). In Naples they base their ingredient quantities on one liter of water, whereas in French baking we base ingredients on 1 kilogram (2.2 pounds) of flour. This turned on its head my French baker’s method (and my mind-set) of mixing flour and water, letting it rest for 15 to 20 minutes (what we call the autolyse period), then adding salt and yeast, then mixing the final dough. I later confirmed with Mauro Caputo at the Caputo flour company that the water-salt-yeast-flour approach is the typical Neapolitan way to mix pizza dough.
The second big shift in my thinking was to come from everyone in Naples: rather than mixing the dough and letting it rest for several hours to rise (what we call bulk fermentation), it is customary to mix the dough and then divide and shape it into dough balls early on in the fermentation timeline, often just 2 hours later. Enzo makes up his dough balls just 10 to 20 minutes after mixing. This was crazy to me. A bread baker thinks the bulk fermentation period is critical to allowing complex flavors from fermentation to develop, so it’s important to give your dough enough time for that to happen. And a bread baker is also driven to make a loaf that has its maximum possible expansion without collapsing. A pizzaiolo only thinks of managing the dough’s ability to expand in the context of the rim, the cornicione, of a pizza, and knows that a long fermentation at the second stage, in the dough ball, is sufficient to give that complexity of flavors from the dough’s fermentation (the superb, mellow flavor of Enzo’s crust is a testament to his methods and the flour he chooses). Most of the fermentation takes place in the dough balls, called panetti in Naples, which rest for 10 hours before Enzo’s pizzeria, La Notizia, opens at 7:30 p.m. This change in pizza dough management and its timelines was really intriguing to me. I soon learned from other Neapolitan pizzaiolos and the folks at Caputo that a 2-hour first fermentation is the norm in Naples, with no refrigeration and the dough balls all being made into pizza the same night. Enzo takes the timeline to the extreme.
One of Enzo’s kitchen staff brought out a tray of panetti for us to look at just 30 minutes before the restaurant was to open. They were gorgeous: perfectly rounded, with no hint of collapse; inflated and strong from the rise, beautifully smooth, and boasting a lovely, slightly lactic aroma. The resulting pizzas that we enjoyed not long after were delicate, light, savory, and delicious, with just the right slightly crisp exterior and soft crumb on the rim, the bottoms thin and spotted underneath. There was a very nice aftertaste that only comes from good flour and excellent fermentation. I had read about La Notizia’s dessert calzone, and had to try it. We finished with a chocolate lava calzone that took pizza dessert to new heights. When we said our goodbyes and left the pizzeria, there was a lively, stylish crowd on the sidewalk waiting their turn to eat.
Rome
Pizza occupies an important place in Roman life, too, even if it doesn’t have the deep cultural identity and history that it has in Naples. There are flatbreads in Roman history going back to the day of Caesar. One, called pinza, is a plain baked flatbread that is topped with fresh ingredients and olive oil after baking. Today there are two kinds of Roman pizza: bakery pizza, called al taglio (by the slice); and tonda, or round pizzas, also generically called pizza romana, served for dinner at pizzerias that are open only in the evenings. The beauty of Roman pizza in either form is its lightness; it can be a lunch, a snack, or dinner.
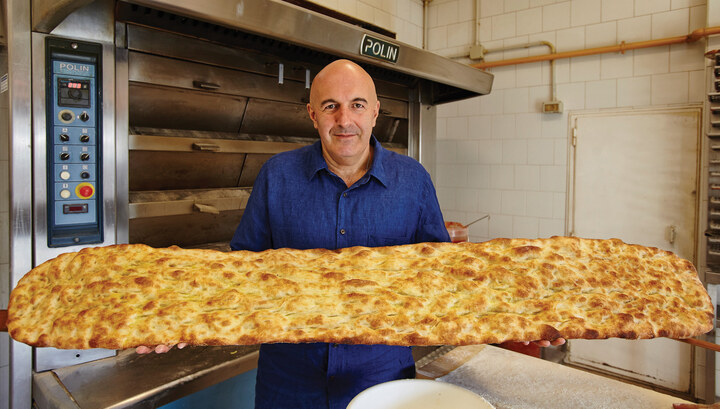
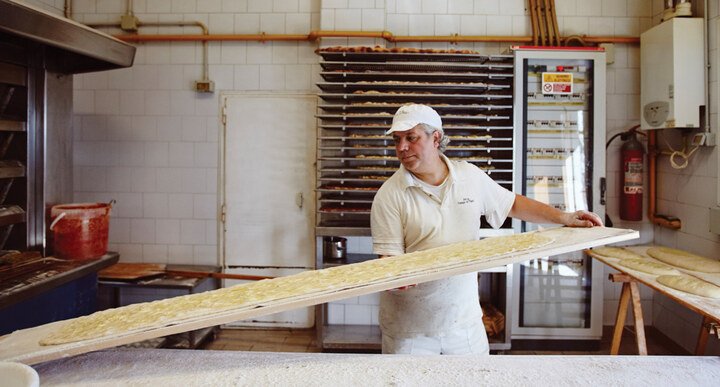
Al taglio pizza is a cheap and easy Roman street food. In the States we might call these sheet pizzas. The most common version is quite long—about 4 or 5 feet—and about 10 to 12 inches wide. It’s baked directly on the hearth or in a large rectangular pan inside of a bread oven, then cut into pieces in a size negotiated at the counter. Typically, as at Antico Forno Urbani, the person behind the counter will position a knife at a spot on the rectangular pizza and look to you to say yes, or smaller or bigger. When you give the nod, he or she cuts the pizza, weighs it, folds it in half, and wraps it up with a ticket that you take to the cash register to pay by the gram. Eat it on the go.
Al taglio always has a thin crust—about ⅛ of an inch thick—if it is a basic pizza rossa or bianca; sometimes it’s thicker if the toppings demand a stronger base. This is not a heavy pizza. Very often the al taglio is made without cheese. The toppings are light and flavorful, and the portion sizes are up to you (but not large). Often the pizza is heated and, usually, served folded in half (it’s a pizza sandwich!) and wrapped in paper with a logo. During the lunch rush, around 1:00 p.m. in Rome, the bakery is pulling fresh pizzas out of the oven and thus they don’t need to be delayed with reheating. They are best at this point, with the most moisture and most tender crust.
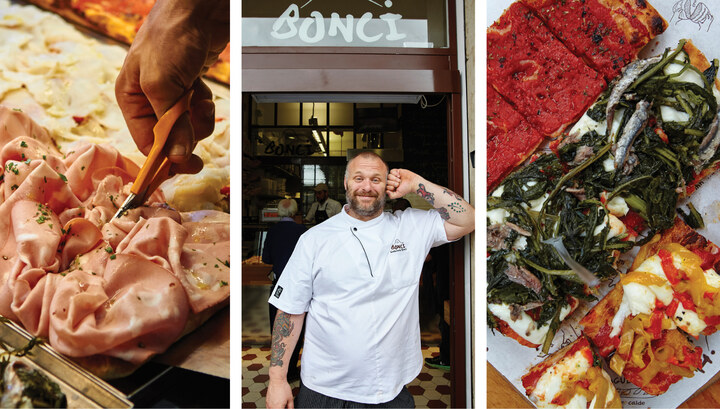
The basic al taglio pizza is either a rossa—tomato sauce, oregano, and olive oil (my favorite)—or a bianca, baked with a very thin film of olive oil and a light sprinkling of sea salt. “It’s just bread” is what the guy at Pizzarium’s counter said to me when I ordered the bianca. The bianca is baked in rectangular sheets and it’s like a thin focaccia, the same as the rossa but without the tomato. Good al taglio pizza has an airiness to its crumb and the character of a long-fermented dough, texturally and flavor-wise, with that retrogusto, the mellow, fermented, wheaty aftertaste you get when you exhale. The top features a bubbly crust from a gassy dough. The pizza is shaped by hand into long, thin stretches of supple, soft dough and stretched on a floured board that is a little bit wider than the pizza, and about 4 to 5 feet in length. It’s just a thin, light board. The dough is stretched from both sides to elongate, and allowed to rest for a bit. Then it’s stretched lengthwise again, lightly oiled with a wide paintbrush, and pressed (docked) with fingertips, like focaccia. At Roscioli they let it rest and then repeat, stretching it out a third time to get the full length and proper thickness of dough. The board can be used as a peel to load the dough into the oven. Later, the baker will use thin wooden peels about 3 feet in length to remove the pizza when it’s finished. It’s fun to watch these come out of the oven, with the baker’s arms stretched sideways holding 5 feet of pizza as it is transferred to a cooling rack. Things really start to get interesting when the bakery goes beyond the rossa and the bianca to more creative toppings. Shredded potato is very common, as are zucchini and eggplant. Cured meats like prosciutto work well as a topping. Then, more recently, some have been going for more expensive toppings like the terrific pesto-and-burrata pizza I had at Roscioli in the Centro Storico, near the Campo de’ Fiori. Gabriele Bonci has found his own personal stratosphere at Pizzarium, with al taglio pizzas done his unique way: naturally leavened dough made up with whole grain flour and using toppings that push the imagination, from mortadella with a chickpea puree to eggplant with red peppers and arugula to wild mushrooms and garlic on top of shredded potatoes. It’s nice to see a baker go beyond the rules to make a very traditional food his own unique offering.
Al taglio pizzas are baked in bread ovens at temperatures between 520° to 590°F (270° to 310°C). This is several hundred degrees cooler than the wood-fired ovens of Naples. Some are baked directly on the hearth of a deck oven, the same kind also used to bake bread, and others are baked in the same oven but in special baking pans instead of on the hearth. Thicker doughs, like focaccia from Genoa, do well baked in pans that are lined with oil beneath the dough. Thin-dough al taglio pizzas, like the rossa and the bianca, bake beautifully directly on the hearth (only the panned pizzas need oil—or very well seasoned pans—to keep them from sticking).
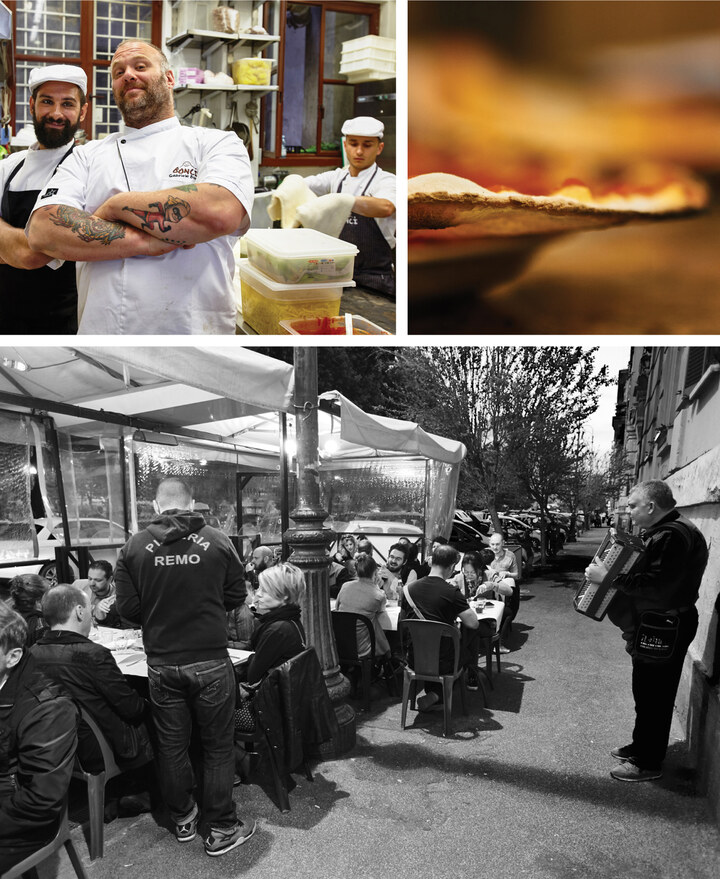
Rome is also known for its pizzerias open for dinner only, baking super-thin-crusted pizzas in wood-fired ovens. To me, Roman al taglio pizza makers are bakers. Roman pizza makers doing the thin, round pizzas are pizzaiolos. I think they’d agree. The pizza romana differs from Neapolitan pizza primarily in the crust. It is a very thin crust with little to no poof in the rims. When I make these—and I love them—I use half the amount of dough I would use to make the same-size Neapolitan pizza, and I use a rolling pin to make the dough as thin as possible. These pizzas are still baked with a little bit of char on the edges, and a nice black spottiness on the bottoms is the best, coming from a very hot wood-fired oven. Excellent examples can be found at Da Remo in the Testaccio neighborhood, La Rioni near the Colosseum, and Pizzeria Emma in the Centro Storico. And while Rome may not be saturated with great pizzerias the way Naples is, it is the style of this super-thin crust that intrigues me and that led me to create a set of recipes in this book modeled after my ideal Roman pies. The thin, crisp crust is satisfyingly light. I can eat an entire pizza of this style without a heavy feeling in my belly for a somewhat light dinner, or have a fried starter beforehand (common in Rome and Naples), like the fried rice balls called suppli, artichokes, or fried zucchini flowers.
I so love these beautiful pizzas for their crisp, practically crackery outer rim. If they’re topped with sauce and cheese, the moisture will put some sag in the middle. If the toppings are more minimal, the entire pizza might retain its crispness all the way through, depending on the pizzeria and how it’s baked. One of my favorite Roman tondo pizzas has no cheese: it’s topped with tomato sauce and a little oregano, and after it comes out of the oven, cured anchovies and a drizzle of good aromatic olive oil.
THE UNITED STATES
What is American pizza? What did we do to it after it hit our shores?
In the beginning…
New York
In the late nineteenth century, pizza existed only in Naples and the surrounding region, Campania, in southern Italy. It was food for the working class. Between 1880 and 1920, over four million Italians escaped poverty and famine in southern Italy and came to America, a land of hopes and dreams, of plenty and opportunity. Their flight was literally a survival mission. Our nations are forever linked by this event. Our American pizza tradition began with Italian immigrants in New York who brought their gastronomic culture—and their love of pizza, a defining component of their diet—with them.
Lombardi’s became America’s first full-fledged pizzeria in 1905, when Gennaro Lombardi abandoned the grocery business at his store on Mulberry Street in New York City’s Little Italy to meet the demand for his popular pizza. Pizza historian Scott Wiener pointed out to me that pizza was actually sold in bakeries all over Little Italy in 1900. Lombardi’s was the first to sell only pizza, and most likely the first with the word pizzeria on the window. The early pizzas from bakeries in Little Italy were baked in coal-fired bread ovens and the pizzas served to cool down the hearth of the hot preheated ovens, preparing them for bread baking. The first pizzas were different from today, according to Scott’s research: the toppings were Romano cheese, lard, tomato, and oregano, resembling the pizzas of Naples. Mozzarella came later. As in Naples, the emphasis was on cheap, affordable ingredients. The pizzas were, according to Scott, breadlike and soft.
Lombardi’s popularity spawned more pizzerias, established by former employees: Totonno’s Pizzeria Napolitana on Coney Island (1924), John’s Pizza of Bleecker Street (1929), and Patsy’s Pizzeria in Harlem (1933). These places marked the birth of the family-style pizza restaurant in America, at a time when it was still a street food in Naples. Italian immigrants longed for the staple food of their homeland, and for their own businesses, and New Yorkers outside of the immigrant community slowly learned that this ethnic food, a thing new to them called “pizza,” was really good to eat. These immigrants told the world who they were through their pizza. But it was going to take some time. These early-twentieth-century New York pizzerias were mostly serving their own Italian communities. Pizza didn’t really catch on in a big way in New York until after World War II.
Trenton Tomato Pies
Maybe there was a time when the word pizza might have sounded too exotic to draw a crowd. Across the Hudson River from New York City, Trenton, New Jersey, is its own pizza vortex, where they call it tomato pie. First there was Joe’s Tomato Pies, opened in 1910. Then Joe Papa opened Papa’s Tomato Pies in 1912. De Lorenzo’s Tomato Pies opened in 1936. All were run by the families of immigrants from Naples. What’s different about tomato pie? The sauce goes on top of the cheese and toppings. The crust is very thin.
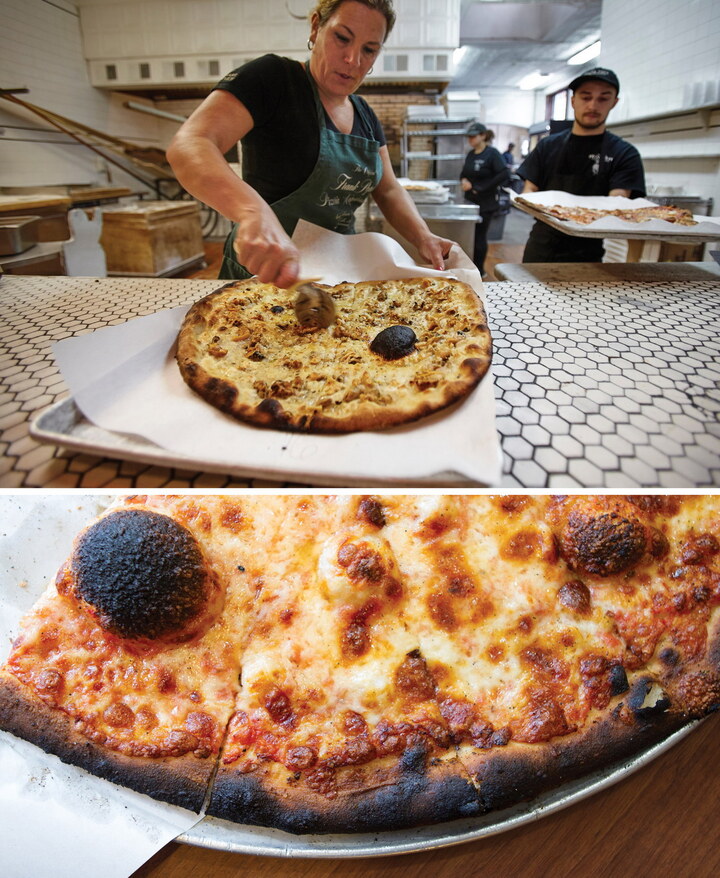
New Haven
Not far from New York City, New Haven, Connecticut, is another place where, in the early 1900s, coal- and coke-fired (hot!) bread ovens were used to bake pizza (coke is converted coal and burns very hot, and is cleaner than coal). But the stories of these historic places go well beyond the pizza itself. It always comes back to the pizza maker. I like this story of Frank Pepe of Frank Pepe Pizzeria Napoletana in New Haven, Connecticut (1925), that romanticizes his heritage and underprivileged beginnings (from their website): “Born in the town of Maiori, on the Amalfi coast southwest of Naples, Frank Pepe was the quintessential Italian immigrant. Poor and illiterate, he immigrated to the United States in 1909 at age sixteen with little more than his health and a strong work ethic. In 1925, with his wife, Filomena, they started making a simple and humble product from their homeland, pizza—or as they would say in their dialect, ‘apizza’ (ah-beets). They baked their pizzas offering two types, tomatoes with grated cheese, garlic, oregano, and olive oil, and the other with anchovy.”
Frank Pepe’s, now run by his five grandchildren, is still iconic today. The neon sign above Pepe’s kitchen reads “The Original Tomato Pies,” and every pizza on the menu is called a “tomato pie.” This makes sense when you think like they do at Pepe’s: that cheese is an optional topping. If you want muzz (see sidebar), you need to ask for it. The Original Tomato Pie has tomato, garlic, oregano, and olive oil and is—as it ever was—topped with grated cheese (grated cheeses as toppings are almost always either Romano or Grana Padano) or anchovy.
Frank Pepe’s was the first of three famous, and now historic, pizzerias in New Haven. Pepe’s was followed by Modern Apizza in 1934 (moved to its present location just two years later, in 1936, when it was called Tony’s Apizza), and Sally’s Apizza in 1938. The style of these New Haven pizzerias, while similar, is not exactly the same. Today Pepe’s and Sally’s still have their super-hot coal-fired brick bread ovens, with the firebox underneath the hearth, while Modern Apizza converted their coke- or coal-fueled brick bread oven to oil-fueled in 1967. Until pizza became more widespread in the United States, there were no ovens that were designed for pizza, because pizza wasn’t a thing yet. All these early pizzerias were making pizza in ovens designed for bread.
Mozz or muzz on the pie? The affectionate slang moniker was adopted from the Neapolitan dialect that remains in use today in corners of New York, New Jersey, and Connecticut. If you listen to Rosemary Clooney singing “Mambo Italiano,” you’ll hear, “Hey Mambo, no more-a muzzarella. All you Calabrese do the mambo like-a crazy.” Thanks, Rosemary.
Each of these three historic New Haven pizzerias makes pizza from a very thin crust, not poofy on the rims, and charred on its edges. Clam pizza, which was born at Frank Pepe’s, has been widely adopted by other pizzerias, for good reason. Fresh-shucked clams, garlic, olive oil, herbs, and bacon make a beautiful combo. Bobby and Rick Consiglio, two sons of Sally’s Apizza founder Salvatore Consiglio (himself a nephew of Frank Pepe, whose restaurant is where he got his start in the pizza business), continue to make the pizzas at Sally’s to this day.
American Pizza: Doing It Our Way
Family-owned pizzerias, run by moms and pops usually of Italian-American heritage, slowly spread around the country, but without the informational interconnectedness we have today, distinct regional styles evolved. GIs returning to the States after World War II who wanted more tastes of the pizza they had in Italy? Many say they were the catalyst for pizza’s spread beyond Italian-American communities. I asked my dad, born in 1929 and raised in a suburb of Washington, D.C., when he ate his first pizza, and he said it was in the early 1950s and it was called tomato pie. The ubiquity of pizzerias that we see today did not begin for another two to three decades.
The distinct American regional styles fascinate me—like Detroit pan pizza (for example, Buddy’s), the New Jersey thin-crust tomato pie (like De Lorenzo’s), Philadelphia tomato pie (no cheese), New Haven tomato pie, and bar pizzas from the Midwest and East Coast. Then there are the unique pies of Old Forge, Pennsylvania, population 8,300, with about twenty pizzerias all making “trays” of Old Forge pizza in the same style—pan pizza made crisp underneath because of a layer of fat or oil under the dough, with onions in the sauce, and no rules about the cheese, though if you go there they will tell you what’s different about each one. In the next chapter, I’ll go into greater detail about the different pizza styles—but their origin stories are fascinating.
A lot of us grew up eating pan pizza. It’s a very different thing than hearth pizza (for example, New York, New Haven, Roman, and Neapolitan-style pizzas, where the pizzas bake directly on the floor of the oven). There’s a reason pan pizzas are often called grandma pies: it’s a commercial version of the pan pizza Nonna would bake at home. Pan pizzas need some fat to keep the crust from sticking, for one thing. The pan gets a thin film of olive oil, lard, shortening, or some other fat so the pizza can come off it after it’s baked. Some will even remove the pizza from the pan near the end of the bake and finish it directly on the oven’s hearth. But if too much oil or fat is on the pan, then the pizza will leach excess oil or fat onto the oven floor if that’s where it goes to finish the bake, and that’s not good. The oil or fat will smoke and somebody’s gonna be mad. When it’s properly baked, the fat gives the crust a nice little bit of crisp and a flavorful browning, too. In Maryland, where I grew up, there were some pizzerias that had slightly flaky crusts, which can only come from fat or shortening in the dough.
The cheese and the ovens are big differentiators for what makes American, or New York–style, pizza distinct. The low-moisture, full-fat mozzarella cheese used on a good American pizza retains its soft, gooey, stretchy texture and its heat for a long time. You can take it home in a box and it’s good to eat later, whether or not you warm it up. (Neapolitan, by contrast, has a shorter lifespan.)Typical American pizza ovens, modeled after bread ovens, bake at temperatures between 550° and 650°F (290° and 345°C) depending on the pizzeria. The longer baking time at a lower temperature than the Neapolitan wood-fired ovens produces a crisper pizza crust. (For comparison, most of the breads we make at my bakery bake at temperatures from 440°F/225°C—for baguettes—to 500°F/260°C—for levain breads.)
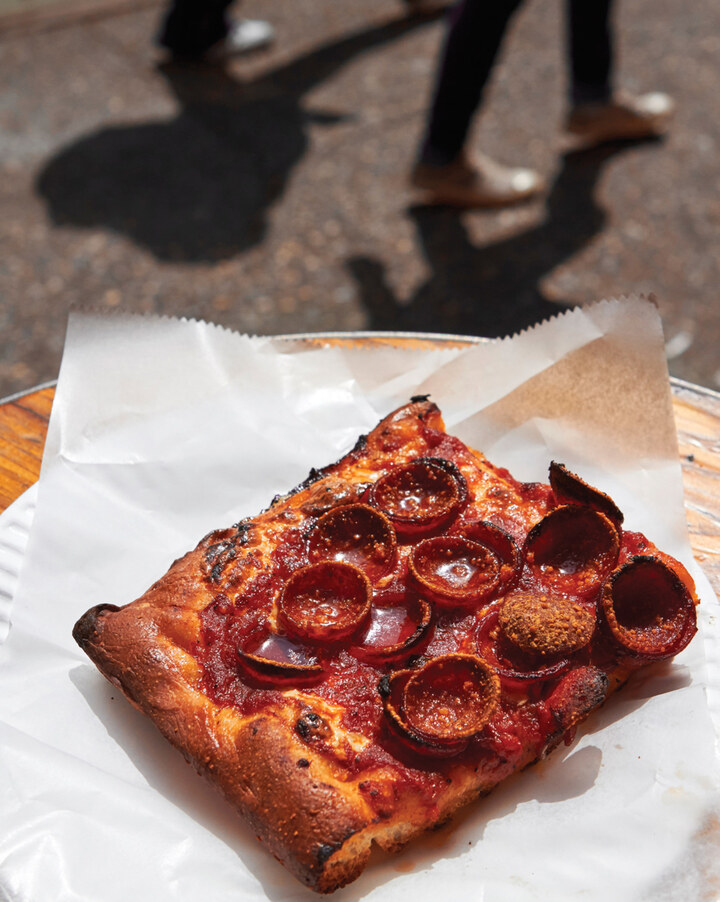
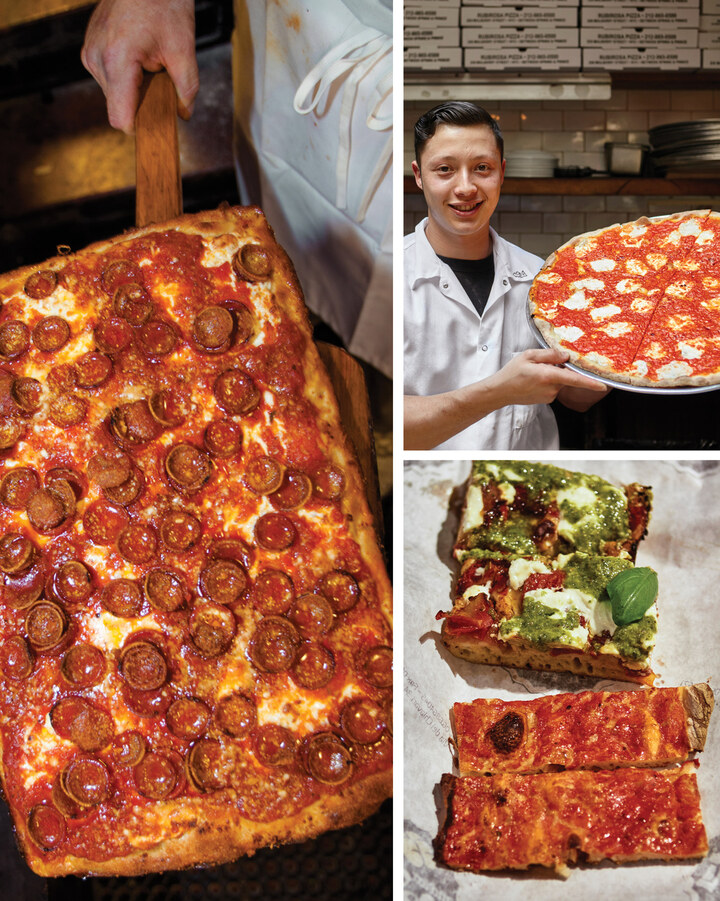
The ubiquitous pepperoni, unheard of in Italy, is a truly great American creation, perfect for crisping up on top of a pizza. Yet it’s hard to pin down exactly what pepperoni is—some is made with beef, some with pork, often it’s a blend of the two—even though it is always characterized by a reddish pigment and a mild spice. It should also be lightly smoky, fine-grained, and semisoft. I don’t care that pepperoni is not Italian. I think it’s a perfect topping for pizza: its meaty, smoky spiciness—with maybe a little puddle of grease in its cup as it curls from baking—goes so perfectly with a good crust, sauce, and cheese.
Pepperoni is a perfect symbol of American pizza evolution: it’s Italian-ish, sure, but more important, it just tastes good on a pie. Today, we have an ever-increasing mash-up of styles and toppings that are all American by virtue of their place and their sense of freedom about what pizza can be. And we continue to innovate and evolve. Some pizzerias, like mine in Oregon, aren’t making pizza to the specific style of other pizzerias so much as we are making pizza that we like, and making it in our own way—although in our case we have a strong Italian influence. Many pizzerias are getting creative with toppings, with some using classic Italian pasta combinations—arrabiata, amatriciana, or cacio e pepe—and others looking to their larder, the season, and their imaginations to see what might go together.
As interesting as the national evolution of pizza in America is, in a way, it all kind of circles back to the original birthplace, New York City. Just like a few of their creative counterparts in Italy, some leading New York pizzaiolos have taken a strong, century-old tradition and really run with it. You want rock ‘n’ roll pizza? Roberta’s in Brooklyn once made a pizza they called Def Aleppo, topped with mozzarella, Parmesan, ricotta, Aleppo pepper, and spring garlic. Or get crazy (and very happy) with Paulie Gee’s (also in Brooklyn) Hellboy, topped with spicy capicola and Mike’s Hot Honey. Oh God, it’s good. Emily, in the Clinton Hill neighborhood of Brooklyn, slings terrific pies with classic, quality ingredients like mozzarella di bufala and Benton’s ham, yet their most popular pie, the Colony, is topped with pickled jalapeño peppers, pepperoni, fresh house-made mozzarella, and a squeeze of honey, post-oven. What’s cool about Emily, Roberta’s, and Paulie Gee’s is they start with Italian methods and boffo Italian wood-fired ovens, then take it their own way with their own inspirations and quality toppings. But the bones are still based on Neapolitan tradition.

Then there are a growing number of Neapolitan pizzerias in Manhattan and Brooklyn—Don Antonio, Kesté, and Motorino—and then, also in Brooklyn, at the aforementioned Paulie Gee’s, Emily, and Roberta’s, plus Franny’s, that are Neapolitan in style but often creatively topped. This Brooklyn family of wood-fired-oven pizzerias is not just an interesting niche; it now represents its own branch on the pizza tree. New York also has thin-crusted bar pizzas, pan pizzas from Adrienne’s, square pies from GG’s, and the particular thin-crust pizza of places like Rubirosa and Joe & Pat’s in Staten Island.
The fact is, even an average crust with sauce and melted cheese still tastes pretty good. For that reason, there are a lot of average pizzas that plenty of people happily eat—and plenty of people for whom pizza is more of a business proposition than a passion for quality. Please ignore them. Then there are purists who have hand-built wood-fired ovens and are using ingredients from Campania as well as their own region, like we do at Ken’s Artisan Pizza and like Mark Hopper, who gets local mozzarella di bufala the day after it is made and imports tomatoes from southern Italy, does at Vignette Pizzeria in Sebastapol, California.
As Americans, we distinguish ourselves with our variety, abundance, and freedom to experiment. And, countering the Pizza Huts of the world, there is now a well-established movement, a rebirth of independent pizzerias committed to artisanal skill and ingredients—not just pizza that sells, but pizza that aspires to greatness. Independent mom-and-pops that have been making quality pies the same way for decades have an important place in American pizza culture. Anything but soulless chain pizza for me, please.
Let’s talk about pizza styles and then cut to the chase and make some pizza.

A Slice of Poetry.
By: Cubs The Poet.
Slices sold to society,
crust crushing the
dough . .
Profit passed for passion,
pepperonies, and
cheese, melting the mind.
Stuffed with shines and
cycles of circles,
we toss the taste of
time towards
the dominos of
r
e
a
m
s.
Pizzas & Poetry, purposing
perfect portions
of pieces
fit to fill the
mouth of the masses.
CHAPTER 2
PIZZA STYLES
Do you want to eat the same kind of pizza all the time? Maybe. You could make the same thing again and again, and hopefully get very good at it. But perhaps you’ll wake up one morning craving something new. Or you traveled and had a different kind of pizza that you liked and decided you want to try your own home version of it. The pizza styles represented in this book will give you enough range that you can successfully make a variety of pies and can switch up your repertoire depending on your mood and who you are serving. These styles are a representation of what many great pizzerias are producing in Italy and in the United States.
Many independent pizzerias are making their own style of pizza and don’t want to be pigeonholed into somebody else’s style or concept. In America, we are maybe not quite as rules-bound as other countries. I still have a hard time saying exactly what style pizza we make at Ken’s Artisan Pizza here in Portland: call it wood-fired-oven pizza inspired by Italian pizzas that our chef, Alan Maniscalco, and I have enjoyed. Ours bake in 2½ minutes, compared with Naples’s 60 to 90 seconds, so I can’t call it Neapolitan, but our influences draw more from Italy than, say, New York. Many American pizza styles have their own defining characteristics—a form that is further adapted by each individual pizzeria into something it calls its own. Sometimes the style is something you know when you see (or eat it), but codifying it—putting it into words—is challenging.
The classic New York pizza is thin-crust, mostly crisp, not poofy on the rims, baked on the hearth of a deck oven, and topped with tomato sauce and with cheese that holds its soft texture for a long time after it’s out of the oven. Look around at any Best-of New York list and you will find a glorious combination ranging from coal-oven thin-crust pizzas from places like Totonno’s and the original Patsy’s to slices at joints like NY Pizza Suprema to square pie slices at Prince Street Pizza. And the conversation always comes around to the legendary Di Fara, which stands in a unique place of its own.
There is only one place in the world where the language of pizza has been codified—and even written into law. The Associazione Verace Pizza Napoletana (AVPN) and the Italian government went to great lengths to protect their cultural treasure, the Neapolitan pizza. They registered with the European Union and, in 2009, gained approval to classify the specific things that are required to make Neapolitan pizza truly pizza Napolitana, even if it’s made in Phoenix, Arizona. You can be TSG (Traditional Specialties Guaranteed, or Specialita’ Tradizionale Garantita; an Italian-speaking American might say either TSG or STG—it’s the same thing) certified anywhere in the world so long as you follow a set of strict rules, have the right kind of wood-burning oven, and use the right ingredients. Neapolitan pizza is the only pizza with specific definitions and instructions dictating its creation: a dough with just flour, water, salt, and yeast in defined ratios, mixed in a particular way for 20 minutes without raising the temperature of the dough, and then fermented for 2 hours, divided by hand into dough balls (panetti), and fermented for another 4 to 6 hours, with the dough balls to be used any time during the next 6 hours, and baked in an oven averaging 905°F (485°C). There’s much more, but this gives you an idea. These rules and actual certification ensure that a TSG-certified pizza is consistently a very specific pizza, and properly representative of the pride of Naples. I’ve been at a restaurant serving pizza labeled “TSG” and discovered they used a gas-fired oven and their pizza takes several minutes to bake. That just isn’t right.
I love that about the AVPN—that the point was to protect a cultural icon in a region where pizza is part of what it means to be Neapolitan.
Other pizza styles don’t involve government-approved certification. However, there are reference points for each pizza style outside of Naples. A New York pizza is often characterized by a stiff, crisp crust and cheesy toppings and by the facts that it’s eaten by the slice, that there’s not too much poof in the rim, and that the sauce and cheese go almost to the edge of the crust, which is baked golden but not often with a char. In contrast, Rome has its own common examples of simple bakery pizzas: pizza bianca and pizza rossa, crisp but with a nice bit of delicate chew, baked only to golden and cut to order in slices about ⅛ inch thick. And then there are the Roman super-thin, crisp-crust, wood-fired-oven pizzas that I love and think fit a platonic pizza ideal.
This book is about being inspired by regional Italian and American pizza styles to make really good versions at home. We’ll never be able to replicate the pizza that comes from a specific pizzeria. That said, the more you know about the history, style, and tradition of a pizza, and the deeper your affection and respect for that tradition, the better your home version of it will be.
This book is not a comprehensive guide to every style of pizza under the sun. But there are a lot of different types of pizzas in these pages; this chapter introduces the styles and their key characteristics.
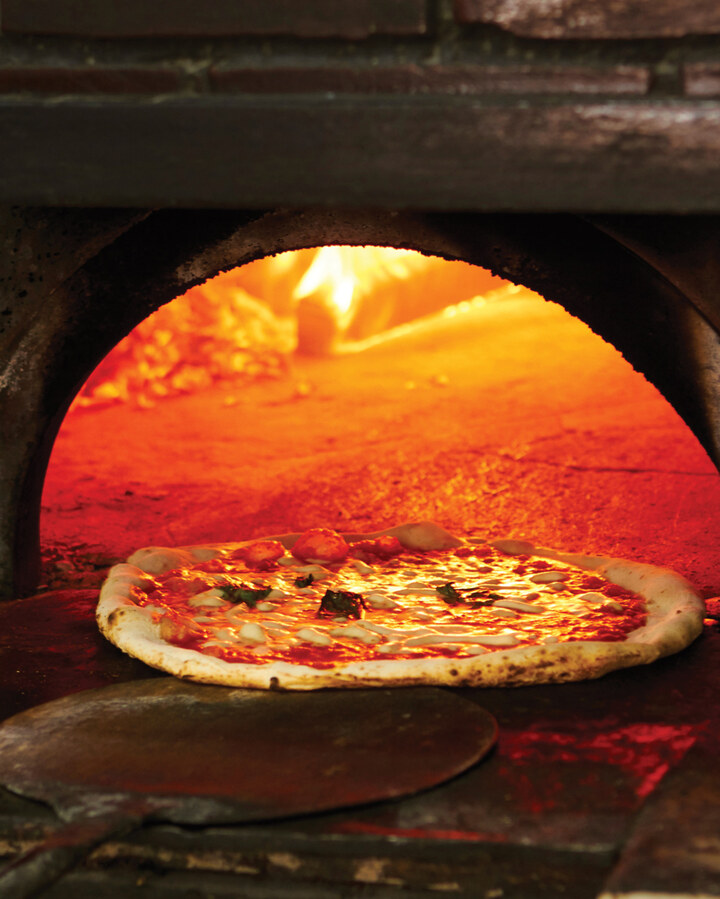
NEAPOLITAN PIZZA
In Naples, pizzas are baked in 60 to 90 seconds in wood-fired ovens at around 905°F (485°C) directly on the hearth. At the table they are eaten with a knife and fork. The sauce is nothing more than canned tomatoes—whole peeled tomatoes from southern Italy—pureed with salt. Toppings are simpler and less cheesy than a New York pizza, and the cheese is one of two kinds of fresh mozzarella, either fior di latte, from cow’s milk, or mozzarella di bufala, from water buffalo milk, often with the addition of a small amount of grated hard cheese such as pecorino or Grana Padano sprinkled underneath.
The Neapolitan-style pizza recipes in this book are baked on a preheated pizza steel or pizza stone in a standard home kitchen oven at 550°F (290°C), and finished with the broiler, taking a total of about 7 minutes. Because the home oven is so different from a 905°F (485°C) wood-fired oven, the pizzas you make using this book are going to be different from a real pizza Napolitana, but they’re still great pizzas inspired by the real deal, so why not? At home you get the same size pizza with a poofy rim; the flavorful crust will be crisper than that in Naples (you get a really nice light, crisp, chewy texture in the crust from the home kitchen oven); and you get the bright and savory flavors of tomato and baked cheese on top of it. My recipe has you adding the cheese 4 minutes into the bake so its finished texture resembles the texture of the cheese on a real Neapolitan pizza.
You cannot exactly replicate the methods of Neapolitan pizzaiolos and expect to get their same results if you are baking in a home oven. That may seem obvious, but it’s significant. The AVPN rules state that the allowed hydration in a true Neapolitan pizza is between 55 and 59 percent of the flour weight. This makes a dough that is perfect for baking in 60 seconds in a 905°F (485°C) oven. It is not perfect for baking in a home oven at 550°F (290°C)! The result would be a very stiff crust, crisp and dry, and nothing at all like a tender Neapolitan pizza that you eat with a knife and fork. The bottom of a Naples pizza needs to set very quickly in the hot oven so it can be turned before the side closest to the fire gets burned. A dough above 70 percent hydration is a disaster when baked at 905°F (485°C)—if you try to slide a peel under the pizza once the back of it is getting charred, it turns to soup in the middle because the base isn’t yet set. But a well made 70-percent-hydration pizza dough works great for making a Neapolitan-style pizza in a home oven at 550°F (290°C). With the 7-minute baking time, this dough retains its softness in the middle, although the cornicione (the outer rim of the crust) in the home oven version will be crisper than that of a true Neapolitan pizza. So I make an adjustment to the dough for home oven baking compared with how it’s made in Naples, adding over 10 percent more water to the dough than in the AVPN formula, though I recommend the same 00 flour they use. It’s not to the AVPN’s code, but I maintain you end up with a pizza that’s as close to the Neapolitan spirit as possible.
The desired results for a Neapolitan-style home kitchen pizza are:
• When fully stretched, the dough is 10 to 12 inches across.
• The underside of the crust has dark brown (and occasionally black) leopard spots.
• The crust at the center of the pizza is soft but fully baked; each slice should flop from rim to tip when held up.
• The rim is poofy with visible air bubbles on the inside and splotches of dark brown or black where the crust has charred.
• The cheese is fully melted but not burned, and not completely liquefied.
• All the elements—crust (underside, interior, and rim), toppings, and cheese—reach their perfect point of baking at the same time. In the home oven, finding the ideal rack position helps make this happen.
PIZZA ROMANA, OR ROMAN DINNER PIZZA
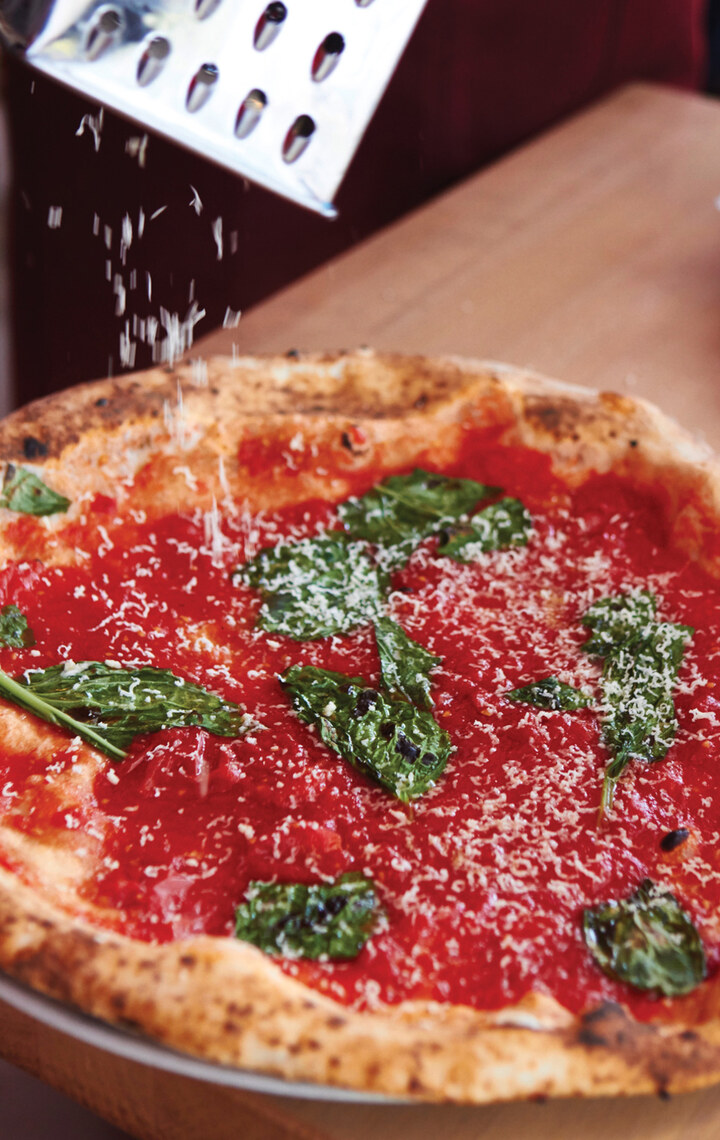
With its ultra-thin, crisp crust, Roman pizza is a study in lightness. Like their Neapolitan cousins, these pizzas also bake quickly in very hot wood-fired ovens. The sauce and toppings are also similar. What differentiates the Roman style, though, is the thinness of the crust. The Roman pizza is the same diameter as the Neapolitan pizza, but uses about half the dough. In Rome, some pizzas are crisp all the way through, while some have cracker-crisp outer edges and a soft interior with a little bit of flop to it. This interior texture is determined by the dough hydration (the less water in the dough, the crisper the whole crust will be), the thinness of the dough, the way it’s baked, the amount of sauce the pizza is topped with, and how much moisture is released from the cheese as it bakes. Crispness will vary from one Roman pizzeria to the next. This pizza in its home kitchen incarnation, baking at 550°F (290°C), is going to be pretty crisp all the way through. One of my favorite versions of this style is called a pomodoro (see my version on this page): crust baked with nothing but tomato sauce and a bit of olive oil, then topped with freshly grated pecorino, caciocavallo (a fantastic stretched curd cheese from Campania), or other cheese right after it comes out of the oven.
If you sit down for dinner at a Roman pizzeria in the evening—and they usually open at 7:30 p.m.—you are likely to be served a pizza that has a very thin, light, crackery crust, with just a little give when you bite into it. These are delightful pizzas and are the exact opposite of a doughier, softer Neapolitan pizza. There are also true Neapolitan-style pizzerias in Rome, and some are excellent, but the pizza tonda style (round, wood-oven pizzas) Rome is known for is this thin, almost crackery crust. Toppings are not heavy, but they should be of excellent quality, and not much different from their neighbors to the south: good tomatoes, olive oil, anchovies, perhaps some dried oregano, fior di latte mozzarella, or for an extra 2 or 3 euros, mozzarella di bufala. In season, fresh and semidried cherry tomatoes are a popular topping.
The desired results for a Roman dinner–style home kitchen pizza are:
• When fully stretched, the dough is 12 inches or more across.
• The sauce is spread pretty close to the edge, say a ¼-inch.
• The crust is medium brown with darker spots, very thin and crisp but bubbled at the rim.
• It’s very light to pick up.
• The underside of the crust is spotted dark brown or even black.
• The interior crust is soft to crisp. Slices might not flop from rim to tip when fully baked, depending on the moisture content of the toppings.
• The cheese is fully melted but not burned, with no oil separation.
• All the elements—crust (underside, interior, and rim), toppings, and cheese—reach their perfect point of baking at the same time. In the home oven, finding the ideal rack position helps make this happen.
ROMAN AL TAGLIO BAKERY PIZZAS
In Rome, al taglio (by the slice) pizzas are rec tangles of very simply topped pizza, usually wrapped in paper, that one takes away to eat as a light lunch or a snack. The bianca and rossa are classics; topped al taglio pizzas get a bit more creative.
These pizzas bake one of two ways in Rome: in rectangular steel or other metal pans; or directly on the hearth in oblong stretches of dough, maybe 12 inches wide by 4 to 6 feet in length. (Fun to watch!) The bakeries use mostly electric deck ovens that can also be used to bake bread, and I’ve observed baking temperatures at a few of these bakeries ranging from 520° to 595°F (270° to 312°C).
These baking temperatures are happily very close to what we can get from our home kitchen ovens. What we can’t replicate is the depth of the Roman deck ovens, which often go 10 to 12 feet deep. To load the pizza the dough is set up on a long, narrow floured board or peel, then lightly stretched until it is the proper length and thickness, oiled, and dimpled. Then, with a well-trained motion, it is quickly and completely loaded onto the deck of the oven. Imagine holding the peel from the back of its handle, placing the entire peel all the way into the oven, and scootching the peel out with a series of rapid jerks while the pizza remains inside. Easy, right? Now imagine doing it while some idiot American (looking exactly like me and wearing a ridiculous grin) is staring at you, taking photo after photo.
Because of the rectangular shape of al taglio pizza, I can’t recommend baking the oil- or tomato-topped dough right on your home kitchen oven’s pizza steel or stone. Our ovens are too shallow, only about 18 inches deep, and trying to load a rectangle of dough sideways onto a hot pizza stone is a bad idea. I do the home versions of al taglio pizza on parchment-lined sheet pans, moving the pizza at the very end of the bake to finish it on the pizza stone for a couple of minutes to get an extra degree of crisp on the crust.
The desired results for a Roman al taglio–style home kitchen pizza are:
• The crust is golden brown with only a little poof in the rim.
• There’s a small amount of bubbliness in the dough and in the finished pizza, but not much rise.
• The crust is about an ⅛ inch thick after baking and is crisp and delicate, not dry.
• The underside of the crust is golden.
• It’s coated with brushstrokes of olive oil after baking.
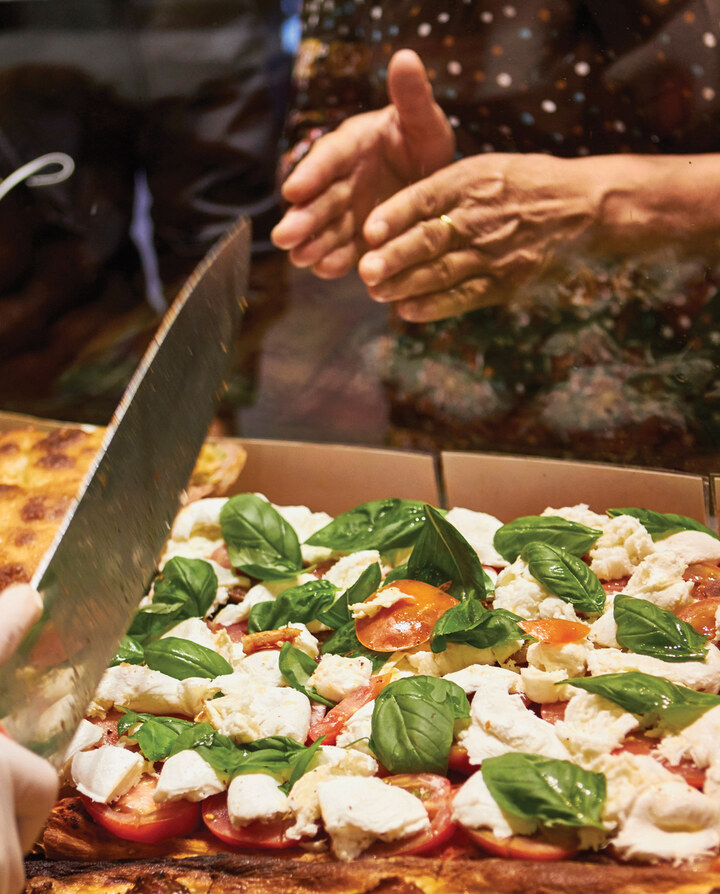
AMERICAN PIZZA, NEW YORK STYLE
This is probably the easiest style to replicate in a home kitchen. The biggest difference between what you’ll get from a pizzeria and what you’ll make at home is the size of the pizza: a New York slice pizza from a pizzeria is usually about 18 inches in diameter, whereas the home version is smaller, about 12 inches, because of the oven depth. For the New York–style pizza recipes in this book, I recommend using a higher protein flour (like King Arthur bread flour) and aiming for less poofy rims than with a Neapolitan pizza. The dough is stiffer too, with less water in it, and it’s good for tossing, if that’s your bag. The goal is for the crust of this pizza to be crisp but not dry. As far as cheese is concerned, I recommend a combination of grated pecorino or Parmesan underneath grated low-moisture mozzarella.
The desired results for a New York–style home kitchen pizza are:
• The crust is golden brown with only modest poof in the rim, which is thin and crisp.
• Unless it’s heavily sauced, there should only be a little bit of “tip sag” when you pick up a slice.
• The underside of the crust is medium to dark brown.
• The sauce and cheese reach almost to the edge of the pizza, leaving a very narrow outer layer of just crust.
• The cheese is fully melted but not burned, with no oil separation.
• All the elements—crust (underside, interior, and rim), toppings, and cheese—reach their perfect point of baking at the same time. In the home oven, finding the ideal rack position helps make this happen.
AMERICAN PAN PIZZAS, AKA THE SQUARE SLICE, AKA GRANDMA PIZZA
This is the kind of pizza I grew up eating in Hyattsville, Maryland. My brother had a job at a place called The Pizza Pan, but I was a Ledo’s fan, which is why my birthday dinner was always there. Ledo’s was not a thick-crust pizza, but it was definitely greasy, and the dough was flaky, as if it had fat in it—probably lard or shortening (Ledo’s ain’t talking). The pepperoni was thick cut, and the pizza was sliced into squares. As another example, Buddy’s in Detroit tops their dough with cheese, sauce, and then cheese again. Their cheese lines the edge of the pizza, where it gets crisp like a frico and frames the rectangular pie. Quality examples of the New York square slice, another gooey, cheesy pan-pizza classic, can be found at Adrienne’s, Prince Street Pizza, and GG’s (where it’s called the Grandma Square). You might call any of these pan pizzas Nonna’s pizza, Grandma pizza, or square pizza. The crust is not as thick as an American “Sicilian” pizza, which is almost as thick as most focaccia. Old Forge pan pizza from Pennsylvania is its own thing; the sauce contains onions and it’s called “fried pizza” by some because fat underneath the dough fries the bottom of the pie. Oh Daddy-o.
The pan pizza recipes in this book suggest you use a half sheet pan and bake the pizza on top of a preheated pizza steel or stone, or on a rack in the lower third of the oven. The most critical thing about making this style of pizza is keeping the crust from sticking to the pan as it bakes. You have two options: line the pan with parchment, or coat the pan with a film of olive oil or clean animal fat like duck fat, bacon fat, or lard. I like the latter option because the oil or fat cooks the dough from underneath and gives it both flavor and a crisp texture.
Pan pizzas allow for more sauce and more cheese, and fresh mozzarella can hold onto its heat and gooeyness much longer when topped with sauce, as on a Detroit pizza. The sauce-on-top configuration keeps the cheese from cooling quickly, and it holds its heat much longer than a Neapolitan- or New York–style pizza does.
I love pan pizza for its ease in the home kitchen, its versatility, and its ability to be a sexy, gooey flavor bomb on top of a crisp yet tender crust. If you’ve never made pizza before, pan pizza is a great intro, as it has fewer creation failure points than hearth pizzas like Neapolitan or Roman style. When you’re making hearth pies, it takes a few tries to learn how to reliably load the pizza from a wooden peel onto a preheated baking stone that’s sitting inside a 550°F (290°C) oven. When you make pan pizza, you use your hands to spread the dough out on a room-temperature pan on your countertop, and parbake it, or top and bake it in a single stage. Easy cheesy.
Strip Pizza
You could call the strip pizza a subgenre of the pan pizza. It’s a strip of dough rolled out with a rolling pin and baked on a pan lined with parchment. Nothing fancy here. It’s just another shape, but the racetrack-like, oblong oval has an aesthetic quality that I like. It is another fun way to make pizza. For the other pan pizzas in this book, I suggest you stretch an entire batch of dough to fit inside a half sheet pan. But for strip pizza, use one of the normal dough balls (roughly 280 grams) if you divide your dough into three. When the dough is ready and it’s time to make pizza, use your hands to decompress and stretch it out. Then use a rolling pin to roll it out to size, as thin or as thick as you like it. I prefer thin crust for strip pizza; I finish it off the pan, directly on the pizza steel, for the last couple of minutes of baking so it’s nice and crisp.
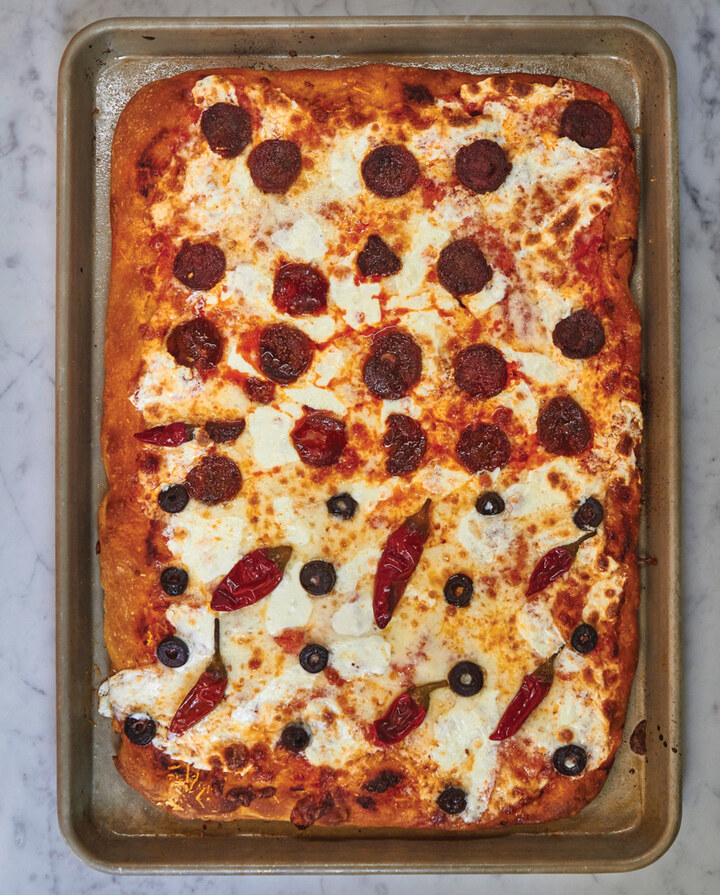
The desired results for an American pan pizza and a strip pizza are:
• Once baked, the crust is about a ¼-inch thick, slightly thicker around the perimeter.
• It has a golden- to medium-brown crust on the edges.
• It has a crisp, golden crust bottom, not soft or saggy.
• The sauce and cheese reach almost to the edge of the pizza, leaving a very narrow outer layer of just crust. Some variations apply cheese all the way to the edge and it crisps up very nicely there.
• The cheese is fully melted but not burned, with no oil separation.
• All the elements—crust (underside, interior, and rim), toppings, and cheese—reach their perfect point of baking at the same time. In the home oven, finding the ideal rack position helps make this happen.
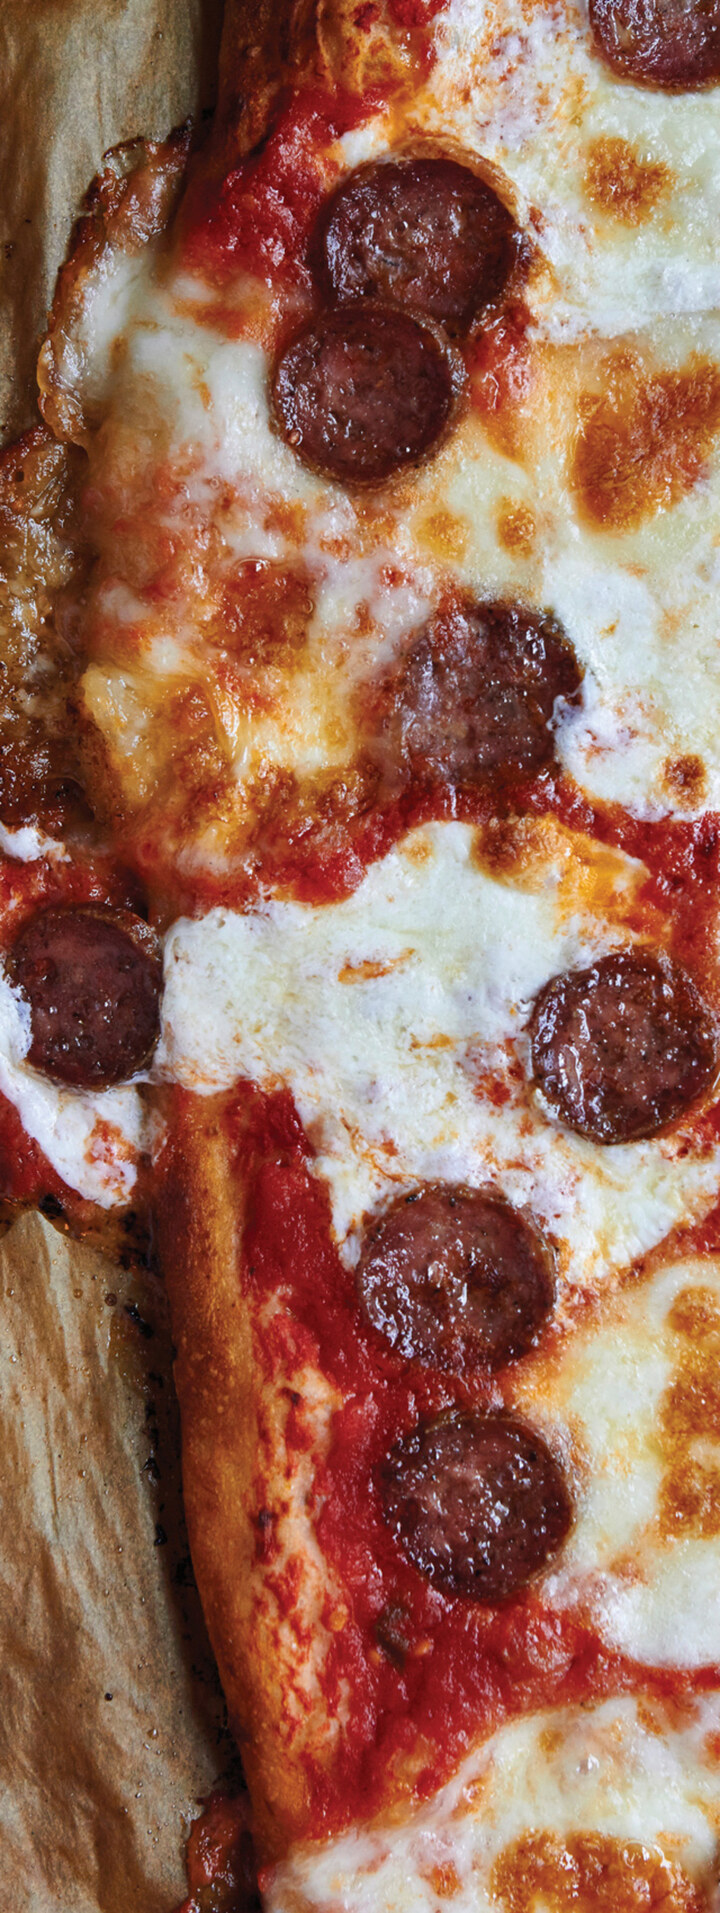
AMERICAN BAR PIZZA
Adam Kuban, the founder of Slice, a popular blog about pizza, is a bar pizza aficionado. As of this writing, Adam is running his own bar-pizza pop-up, Margot’s Pizza, from the Brooklyn pizzeria and restaurant Emily and is planning to open a brick-and-mortar version of Margot’s in New York. Here is Adam’s take on what bar pizza is all about:
“They’re all round, very thin, decidedly crisp pizzas that are usually loaded with toppings and cheese. It’s very much a 1950s/1960s notion of pizza as interpreted by—or for—people who were not necessarily of Italian descent. I don’t think anyone who was making them was historically that concerned with hole structure, rise, fermentation times, etc. That’s not to say the crust is an afterthought or inconsequential, but I would say that at least in the case of bar pizza, I get the feeling that it was something bars started putting on the menu as ‘bar food’—eventually the bars morphed into venues better known for the pizza. Which is to say I don’t think these folks were putting that much thought into all this stuff the way we do in the Internet/blog/online forum era.
“The other notion, too, is that there is even a genre called ‘bar pizza’ or ‘bar pies.’ I mean, there is, but since it’s (as of yet) not super well known and because they’re all a little different, it’s not as easy to point to it the way there are certain hallmarks of Neapolitan or deep-dish or even New York–style. Very few places that make it actually refer to it as ‘bar pizza.’ Only really Eddie’s in New Hyde Park, New York, which bills itself as ‘Home of the Bar Pie,’ really seems to acknowledge it. It seems like a thing that was sort of thrust on the style from the outside. And heck, as the guy who did Slice, I’m as guilty of doing it as anyone. You see the same thing with ‘Detroit-style’ pizza. Whenever I used to write about Detroit-style pizza on Slice, I’d get comments from Detroiters saying, ‘There’s no such thing as “Detroit-style” pizza! That’s just pizza!’ Similar to how a Philly cheesesteak is just a ‘cheesesteak’ in Philly.”
You can make a rendition of Adam’s pie at home if you buy the necessary pan (see this page), and follow the recipes for dough and pizza that Adam offered for this book. It’s a round pizza that you bake mostly in a round deep-dish nonstick pan set on a pizza steel or stone, then remove and finish it directly on the preheated surface if the bottom needs to crisp up. It should be served sliced, in a round pan of the same dimensions. (I bake and serve in different pans, because the baking pan has a rim that makes it hard to eat from.) Cheese melts into the pan on this pizza, so nonstick is highly recommended (I use Lloyd deep-dish nonstick pans. Stretch the dough by hand and then use a rolling pin to finish, making it very thin but not as paper-thin as the Roman style. The dough is less gassy than the other pizza doughs, and is made from high-protein bread flour. It bakes crisp and doesn’t poof at all. These pizzas are topped with a blend of cheeses that includes anything that melts: fontina or provolone are not uncommon; cheddar won’t offend the clientele; low-moisture mozzarella and a hard cheese like pecorino or Grana Padano work, too. Experiment to find the blend you like best, but be sure to use good cheese and grate your own. A box grater is easy to use.
The desired results for an American bar pizza are:
• It has a very thin, crisp dough and is moderately sauced.
• It has golden- to medium-brown crust on the edges.
• The bottom of the crust is crisp and golden, not soft or saggy.
• The sauce and cheese reach to the edge of the pizza—there’s zero outer layer of just crust.
• The cheese is fully melted but not burned, with no oil separation.
• All the elements—crust (underside, interior, and rim), toppings, and cheese—reach their perfect point of baking at the same time. In the home oven, finding the ideal rack position helps make this happen.
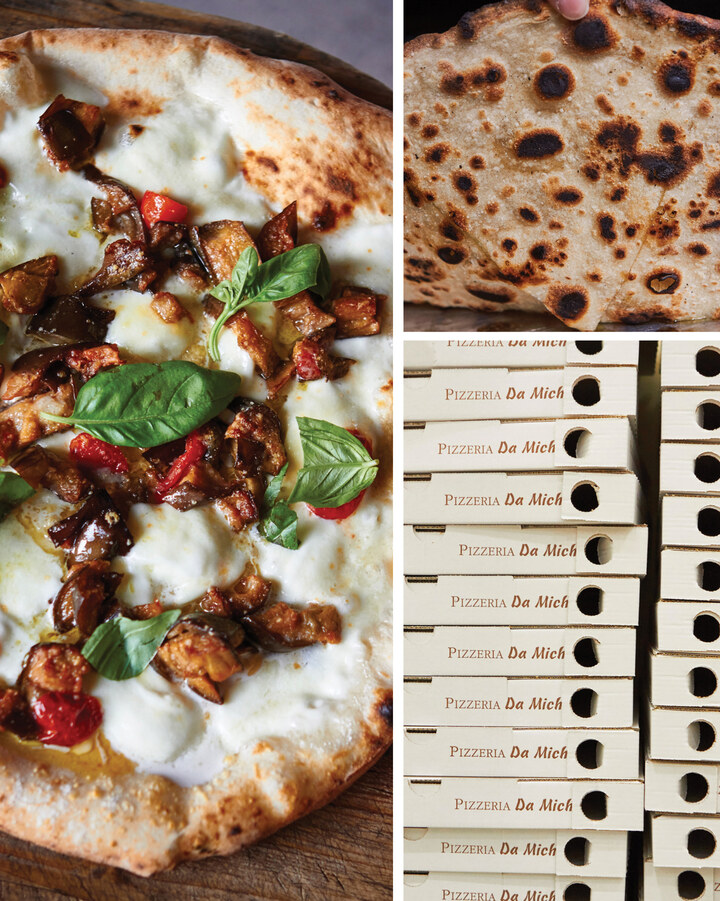
CHAPTER 3
EIGHT DETAILS FOR GREAT PIZZA CRUST
No matter the style, great pizza is not just about the recipe. It’s also about the pizza maker. It’s caring and taking the time. This is true in a pizzeria and it’s true in the home kitchen. It’s also about the quality of the ingredients; the skill, knowledge, experience, and dedication of the pizza maker; and the way the ingredients balance and complement each other. There’s another, slightly less intuitive key to great pizza, too: the type of oven you use, and how you match the dough and baking technique to the oven. No matter what style you’re aiming for, or what your platonic ideal of “the very best pizza” is, there are principles that guide quality. And the best way to ensure the best pizza is to start with the foundation of it all: the crust.
In this chapter I’ll outline eight details that will help make your crust as good as it possibly can be. When you read them, they may feel intuitive to you, but if you think about them and stay engaged while you’re baking, you’ll see a difference. Think of these eight details like the roots, trunk, and major branches of a beautiful tree.
What is the best pizza crust you can remember? Imagine being able to make a home version of it. It’s not complicated, but there are subtleties. If you allow yourself to make a simple dough often enough, you will learn to understand it, and know just when it’s perfect, or when it needs a little more time. Take the time to consider the following details and put them into action, and you will be rewarded.
DETAIL 1: MATCH THE DOUGH AND ITS HYDRATION TO THE OVEN AND ITS BAKING TEMPERATURE
You might do some research and learn that the pizza dough they make at your favorite Neapolitan pizzeria on Via Tribunali, where the pies bake in 60 seconds in a 905°F (485°C) wood-fired oven, follows the guidelines of the Associazione Verace Pizza Napoletana (AVPN) formula for dough: 1 liter of water, 1.7 to 1.8 kilos of flour, 50 to 55 grams of salt, and 3 grams of fresh yeast. (See my adapted AVPN recipe, the Saturday Pizza Dough.) The percentages work out to a dough hydration between 55 and 58 percent. So you decide this is the pizza you want to make at home and you mix this dough, but your oven only heats up to 550°F (290°C) and it takes 7 minutes for your pizza to bake. Don’t be surprised that this pizza crust will be nothing like the pizza crust at your favorite pizzeria in Naples—AVPN pizza dough comes out as a great Neapolitan pizza only when it is baked in the 905°F (485°C) oven. Yours will be crisp all the way through and a little dry, not soft and delicate. But don’t just blame your oven and give up: you can make an adjustment. To come close to that ideal of a delicate, slightly-crisp-on-the-cornicione, yet soft, pliable, and foldable pizza, you need to match the hydration of your pizza dough to your oven.
What’s going on here? The pizza crust, while baking, loses moisture rapidly through evaporation. Seven or 8 minutes of baking at 550°F (290°C) will take much more moisture out of the pizza dough than 60 seconds of baking at 905°F (485°C). The longer it’s in the oven, the more moisture the crust loses. If your goal is to bake a Neapolitan-style pizza in your home kitchen oven, by making a wetter dough, at 70 percent hydration, you can make a terrific pizza that, while not the same as at Da Michele, is firmly in that style. It will be delicate and lightly crisp—way more delicate than if you had followed the strict AVPN guidelines and baked the pizza in your home kitchen oven with a 58 percent dough. In short, there is an inverse relationship between ideal dough hydration (lower) and your oven temperature (higher).
But let’s say you do have a wood-fired oven to bake in, fired for several hours before starting. It’s got a lovely bed of coals glowing in the left half of the oven, with a perfect 905°F (485°C) on the floor and 800°F (425°C) at the dome, and you know this because you bought an infrared thermometer. Then you do need the 58 percent pizza dough. In this baking chamber, the crust has to set very quickly so you can turn the pizza within its first 30 seconds—otherwise, the crust facing the fire burns. If the dough is too soft, like it would be when hydrated to 70 percent or more, you are likely to tear through the dough when you run the metal peel underneath to turn it. Wood-fired-oven baking is a balance between avoidance and achievement: avoid burning while achieving a perfectly baked crust (bottom and rim) and toppings.
DETAIL 2: THINK OF TIME AND TEMPERATURE AS PIZZA DOUGH INGREDIENTS
For readers of my first book, Flour Water Salt Yeast, this detail should be familiar. It applies to pizza dough like it applies to bread dough: in every recipe, time and temperature have target values—the same as salt or water. You could use top-quality flour, measure all your ingredients perfectly, knead with A-plus technique, and still end up with crappy dough that tastes bland and is stiff and dense because you didn’t give it enough time to ferment. Give time its due. The temperature of the dough, the temperature of the room, and the amount of leavening in the dough all need to be in balance to get the proper amount of rise and flavor development. Temperature affects the rate of the dough’s fermentation. Warmer dough and dough in warmer rooms will develop faster. I give specific guidance in each recipe, and I assume an ambient room temperature of 70°F (21°C), but you might want to make seasonal or climatic temperature adjustments to allow the timelines of each recipe to deliver the best results in your kitchen.
Here’s an example of how this plays out in a recipe:
Let’s say the recipe tells you to mix a dough with 90°F (32°C) water and room temperature flour so the dough temperature right after mixing is about 80°F (27°C). Then, it tells you to let the dough ferment for 2 hours at room temperature, then form dough balls and refrigerate them to make pizza with the next day. See Detail 5 for how to make adjustments in your own kitchen according to climate or season.
Keep in mind that yeast dies at around 114°F (46°C), so hot hot water is not a good idea. To help you get consistent, dependable results, I ask you to use a digital probe thermometer to measure water temperature for mixing dough, and to get the dough temperature after the dough is mixed. (A probe thermometer has multiple uses in the kitchen, especially for making sure meats are properly cooked.) My ideal bread dough temperature, for maximum volume and flavor development, is 78°F (26°C) after it is mixed. However, most of the direct pizza doughs in this book use very tiny amounts of yeast, and I have gotten the best results mixing dough that ends up between 80° and 82°F (27° and 28°C), creating a warm, productive environment for the yeast to feed, replicate, and ferment. This is all easy if you keep your flour at room temperature. I’ll tell you what water temperature to use when you mix the dough; pay attention, and adjust it warmer or cooler the next time until you know, in your environment, just what water temperature gets you the dough mixed to the temperatures I advise. All you need is a thermometer that works, plus memory or a notepad. (A little bit of obsessiveness doesn’t hurt, either.)
Use your common sense and adjust if your room temperature is different from my norm of about 70°F (21°C). If your house is colder than mine, consider starting with warmer water and dough, or let the dough rise in a sunny corner of the room, or just take into account the fact that it may take longer for the fermentation to take place.
DETAIL 3: MEASURE YOUR INGREDIENTS BY WEIGHT, NOT VOLUME
Here’s another classic rule that also appeared in Flour Water Salt Yeast. Quality digital home kitchen scales are inexpensive and widely available, and they allow you to accurately and confidently measure ingredients with consistent results. By weight, a cup of flour can vary dramatically depending on how it’s packed into the cup. My cup might be 120 grams, while your cup might be 160 grams—a big difference! The same rationale applies to the measurement of water, salt, and yeast: small differences of weight in ingredients that are the same by volume can make a significant difference in the dough. With a scale, accuracy’s not hard, and will give you a better pizza.
I do give guidelines for making volume measurements for yeast that approximate the weight in a recipe, so you’ll be able to use this book while awaiting the arrival of the scale you just ordered. Some of my recipes use as little as 0.1 gram of dry yeast, which is about 1/10 of a ¼ teaspoon. I was thrilled when I learned there is now an affordable scale on the market (around $13) that can measure these tiny amounts.
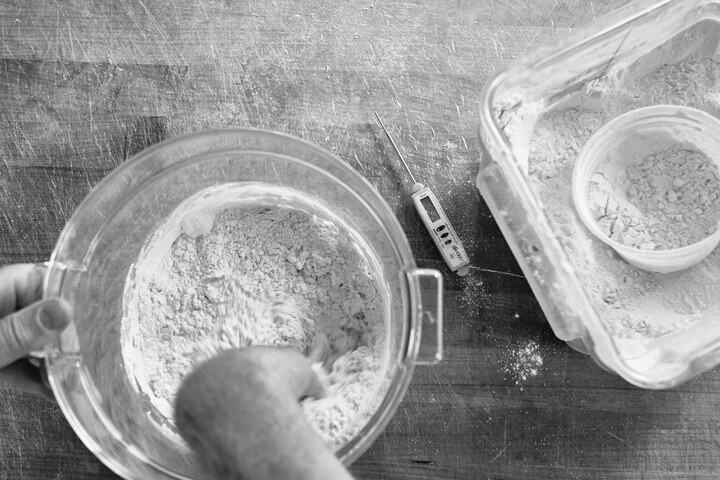
DETAIL 4: MIX YOUR PIZZA DOUGH BY HAND, NOT IN A MACHINE
Mixing most of my pizza doughs by hand is easier than using a mixer and involves less cleanup, plus you get to learn a feel for the dough, which has benefits for the rest of your life as a pizza maker. Hand-mixing also makes dough that creates the most delicate pizza crust. What is delicacy? It’s the opposite of chewiness, an ethereal weightlessness—the experience of picking up a pizza and its feeling lighter than you were expecting it to. It has crispness in its texture, but your teeth go right through it like there’s magic inside. The first time, it’s a surprise. It’s the pizza of your dreams.
Machine-mixing pizza dough works fine, and on one or two occasions I recommend it (more on that later), but only with the minimum amount of mixing needed to incorporate all the ingredients and bring the dough ball together. Machine-mixing the dough for too long puts too much organization into the dough’s gluten network, which will make the dough more elastic and the crust chewier, and it will take away that prized delicacy in the crust that I strive for.
Strong flours are high in protein, up to 14 percent as measured by flour weight, and have long been thought of as ideal for bread making. In fact, they’re really ideal for industrial bread baking, but not so much for high-quality breads. The high protein level works best with the intensive mixing and fast rising production of industrial baking. Yet, an American style of pizza grew from using bread flour in bread ovens to make pizza whose crust has chew and crispness. High-gluten flour is part of what makes a New York pizza what it is. Softer, low-gluten flours that are still suitable for making bread or pizza have 11 percent protein or even a little less, which is about how much protein there is in all-purpose flour. We use low-gluten flour (even this is a nonspecific term, with no standard definition) for making bread at my bakery, and for making wood-fired pizza at Ken’s Artisan Pizza. The protein percentage in a wheat crop depends on the genetics of the wheat, the climate, and the specifics of a year’s growing season. (Wheat farmers usually measure the protein content before harvesting, as protein in wheat increases as it matures on the stalk. Many wheat farmers get a higher price for higher protein wheat, too, because it’s what their biggest customers want.)
The words protein and gluten are often used interchangeably. When water is added to flour and mixed into dough, gluten is created: a web of interlaced strands of glutenin and gliadin, two proteins that are in wheat flour (and also rye and barley). Adding water to flour lubricates the protein strands, allowing them to stretch. Mixing the dough, either by hand or by machine, organizes the gluten, and folding organizes the dough further. I like to imagine dough as a web of gluten and starch, which holds onto the gas that comes from the dough’s fermentation. Gluten, then, has this specific role of being the backbone of pizza dough. Higher protein flours form a stronger gluten web and can give the dough greater strength than dough made with low-protein flours. High-protein flours can also make dough that is elastic and difficult to form into a pizza—it needs longer fermentation to break down the gluten a bit. In time, the gluten network in dough degrades. Enzymes eat it up, literally. Elastic is not a happy word in the pizza maker’s lexicon, because you need the dough to expand to pizza diameter, not snap back. However, you do want enough strength for the dough to support its toppings, keep its shape as you slide it into the oven, and hold onto the fermentation gases that make it taste good and give open holes in the rim.
Weigh your ingredients into a 6-quart dough tub and mix the dough right in it. Simple. This works great for most of the recipes in this book, where the average dough hydration is 70 percent of the flour weight. As always, there is an exception. Once the hydration of the pizza dough gets down to 65 percent or below, mixing by hand is more difficult because the dough becomes stiff. You can do it, but you should hold back about a quarter of the flour until you have a fully mixed mass of dough, with the water and flour completely integrated. At that point you can gradually add the remaining flour until it is all incorporated into a cohesive dough without any dry flour left.
A stand mixer with a dough hook works fine for stiff doughs (such as my 48- to 72-Hour New York Pizza Dough, at 64 percent hydration); about 90 seconds of mixing time at the lowest speed is all it takes.
DETAIL 5: MAKE ADJUSTMENTS FOR SEASON OR CLIMATE
Temperature and humidity have a direct impact on the metabolic rate of yeast, and thus on the rate of dough fermentation. Depending on where you live, using one recipe faithfully year-round may produce pizza dough that is either overfermented on summer days or underfermented on winter days.
I developed and tested all of the recipes in my home kitchen in Portland, Oregon. The typical temperature indoors overnight is about 67°F (19°C), and the daytime temperature is usually around 70°F (21°C). In the summer the daytime temperature in my home kitchen is typically 5° or 6°F (about 3°C) warmer. The dough timelines in this book are important for flavor development, texture, and dough holding time at room temperature. However, if you live in New Orleans and it’s summertime (and unless you have the air conditioning turned up high), I’d recommend using colder water temperatures, by even 10° or 15°F (5° or 8°C), and try to hit a finished dough temperature in the low 70s (low 20s) instead of my target of 80°F (27°C). You could also try using a smaller amount of yeast, and be willing to make a couple of attempts before you find your sweet spot.
DETAIL 6: ALLOW SECONDARY FERMENTATION TO BE LONGER THAN PRIMARY FERMENTATION
I learned this lesson well when I was in Naples and was guided to think less like a bread baker and more like a pizzaiolo. The typical model in Neapolitan pizzerias—codified by the Associazione Verace Pizza Napoletana (AVPN)—is to let the bulk dough ferment for just 2 hours, then make up dough balls that go through a second fermentation of at least 6 hours before making pizza. This means that the majority of the fermentation takes place after the dough balls are made up. Enzo Coccia of La Notizia takes this to the extreme. Enzo’s dough is divided into dough balls just 10 to 20 minutes after coming out of the mixer, and then ferments for 10 or more hours before the restaurant opens for evening service. The low amount of fresh yeast in the AVPN dough (0.17 percent of the flour weight, or 3 grams per 1.7/1.8 kilos of flour), combined with the high percentage of salt (3 percent of the flour weight; salt slows fermentation), gives the dough a long holding time at room temperature. As a matter of fact, most Neapolitan pizzaiolos advise against using any refrigeration at all. There is no one right way to time this; each pizzeria works to its own timelines.
I was surprised when I learned that the bread baker’s concept of the autolyse—mixing flour and water and letting it rest for at least 15 minutes before adding salt and yeast—is mostly unheard of in the Italian pizza community. The dough-mixing method used throughout Naples and promoted by the Associazione Verace Pizza Napoletana calls for the ingredients to be mixed in this order: water, salt, yeast, flour. The pizzaiolo dissolves the salt in the water, then dissolves the yeast in the salted water, then adds flour. My first book was titled Flour Water Salt Yeast. The AVPN book would have been titled Water Salt Yeast Flour. Why is this?
In bread baking, there are two main rationales for the autolyse: First, the salt in the dough slightly inhibits water absorption in the flour. Therefore, allowing the flour to more completely hydrate before adding salt is a benefit, especially when making artisan bread doughs with a high hydration level. Second, as water activates enzymes in the flour, if you autolyse the dough it will be in a more “ready” state when the yeast is added to start fermentation. (These enzymes are amylase, which breaks down the starch into simple sugars that the yeast feed on, and protease, which acts on the gluten network to allow the proteins to more easily expand and make a more extensible dough—good for both bread and pizza.) You can physically feel the difference between a dough that has had autolyse versus one that has not. The autolysed dough comes together more easily and it smooths out quicker. It just feels better in some intuitive way, especially when you’re mixing by hand.
In Italy, the mechanical dough mixers used in a commercial pizzeria mix the dough very, very slowly, usually with a pair of metal arms turning in a motion that mimics the way dough was mixed manually in an earlier era. And these pizzerias use very small amounts of yeast in their pizza doughs, followed by lengthy fermentation. With such small amounts of yeast, their dough is essentially getting a natural autolyse, as it takes longer for the yeast population to build up (yeast replicate as they consume the starch in the flour). The equivalent process in my instructions for pizza dough at home is to give the dough a quick, gentle kneading 20 minutes after the initial mix. These pizza doughs have a much lower hydration than do artisan bread doughs, and with less water, it takes less time for the flour to absorb it all. The autolyse benefit of more complete hydration of the flour is more applicable to bread’s wetter doughs than it is to pizza doughs.
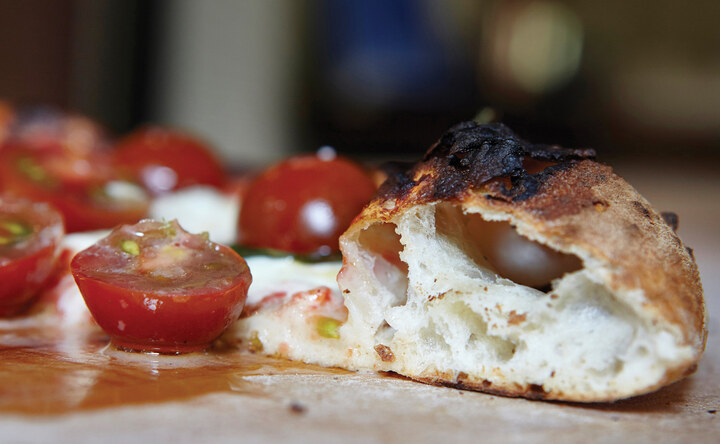
A long fermentation of the bulk dough is better for bread dough than it is for pizza dough. This is about the difference in the end products. For a loaf of bread you want maximum volume, and to achieve that you need enough organization in the dough’s gluten to hold onto all the gas that its fermentation produces. Bread dough has its gluten network built up first in the mixer and then from a series of folds to the dough. The gluten then gets additional development, without outside assistance, while the dough ferments. The goal of pizza dough is different: you need just enough physical structure to keep it cohesive when you stretch it into shape. Shaping dough balls early in the fermentation timeline means there is less gluten organization in the dough and the result is a more delicate crust.
What I like about the Neapolitan dough process is that the amount of time the dough ball has to rest before being stretched into pizza shape allows it to be physically very relaxed from when it was first shaped. The pizza dough becomes very extensible: easy to shape with little resistance, yet with a very delicate and lightly textured crust when baked.

DETAIL 7: MAKE PIZZA WITH MATURE DOUGH BALLS
In other words, allow for a complete fermentation and physical development of the dough. To get the best flavor and best texture of the pizza, you can’t take shortcuts and rush your dough. Cutting the timeline short will give you dough that is too elastic and difficult to stretch easily into a disk; you will get a bland, flavorless crust that is dense and chewy. Why bother if you’re not going to do it right? Give time its due and when its work is done, what you will see is the expansion of the dough ball and the small bubbles of fermentation gases that form. What you will feel is a relaxed stretchiness to the dough, which still has the tensile strength needed to make pizza. If you don’t follow this important rule, you won’t get the complex development of biochemical reactions that make dough taste good and give it a light texture. All the great pizzerias you’ve ever heard of have long-fermented dough. Time is a free ingredient. Too much time, however, is sometimes like too much to drink: the dough expands too much, loses its integrity, and gets too full of hot air.
A dough ball that has reached its mature point, where it is ready for shaping into a pizza disk, will be relaxed and will stretch out easily. Before you work it, turn it over. You should see gassy holes on the bottom and it should feel soft and pliable. You should sense the gas in the dough with your hands. I like it to feel both delicate and structurally sound at the same time. When I visited Franco Pepe in Caiazzo, Enzo Coccia in Naples, Roberto Caporuscio in New York, and Mark Hopper in California, they all showed me their mature dough balls. Maybe it’s a guy thing.
DETAIL 8: UNDERSTAND THE ROLE OF SALT IN PIZZA DOUGH
The first rule to remember is that salt slows down fermentation in any leavened dough. The second rule to remember is that there is no one right amount of salt to use to make a great pizza dough. A typical bread dough recipe calls for 2 percent salt, by weight, as measured against the total flour in the recipe, although I usually push it to 2.2 percent because I like the way it affects flavor. Most published pizza dough recipes I’ve seen use about 2 percent salt, as do we at Ken’s Artisan Pizza. Researching for this book, I discovered Neapolitan and Roman pizzaiolos using salt up to 3 percent in their recipes, and at first I thought it was a typo. Then I reviewed the Associazione Verace Pizza Napoletana rules and saw that the dough recipe called for 3 percent salt. I matched that to my understanding of two things in Italian pizzerias: First, there is agreement among them that they get the best results when making their style of pizza from dough at room temperature, not from refrigeration. Second, many don’t even have the option of using refrigeration due to space and other concerns. Then I thought, okay, in a pizzeria if you don’t have refrigeration and you want a long-fermented dough for the best texture and flavor, you have to use more salt; otherwise, the dough blows out (that is, it gets too gassy) halfway through an evening’s service. Salt tempers the fermentation and allows the dough balls to hold longer without overfermenting.
BEYOND THE DOUGH: BE GUIDED BY YOUR OWN TASTE
I guess this is sort of a bonus detail, but I’d argue it’s the most important one. You have your own taste memories, preferences, quirks, and aesthetics. Let them be your ultimate guide rather than what you believe others think you should like. Once you get familiar with what works in your kitchen, you will have a platform that you can use to make pizza that is really what you want to eat. It’s an awesome thing to confidently put together a pizza that you know is going to make you happy, that you thought of yourself and knew how to make.
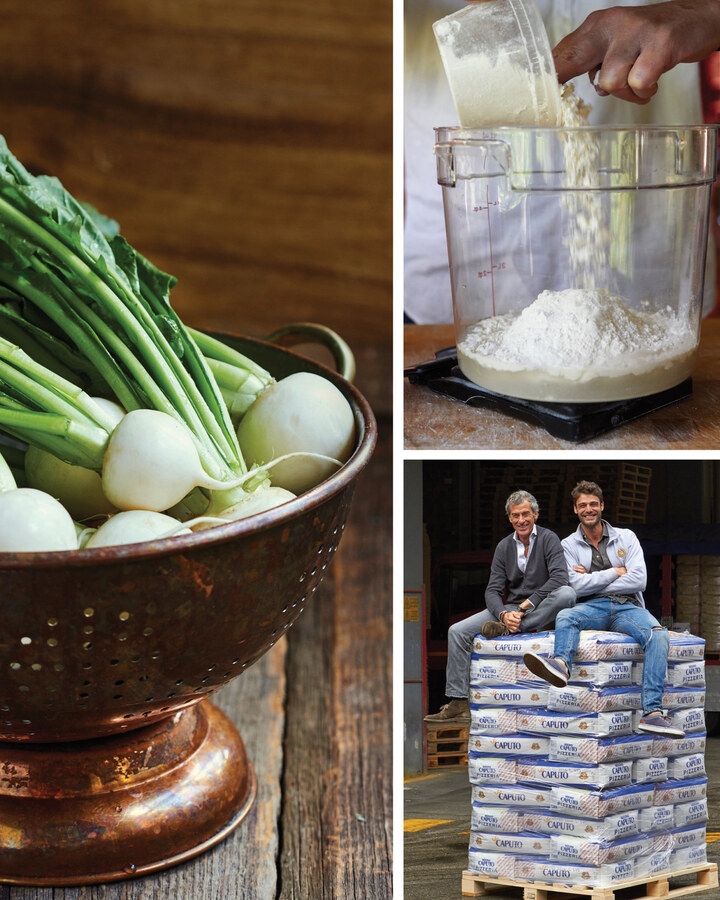
CHAPTER 4
INGREDIENTS AND EQUIPMENT
What do you need to be your own pizzaiolo? A handful of items for baking pizza, a standard home kitchen oven, and a few good ingredients: this chapter is where I’ll talk about those. (You maybe need some good instructions too: we’ll get to those next.)
INGREDIENTS
Quality rules here. Try your farmers’ market for vegetables and your butcher for cured meats. Support your independently owned food purveyors—they know and care about what they are selling you. If you have access to a good cheesemonger, take advantage of it—because, man, theirs is a hard business. You should feel lucky they’re there for you, and I’m sure they would appreciate seeing you more.
Above all else, you need quality flour, tomatoes, and cheese. Here’s what you should know about these essential pizza ingredients, with some added recommendations regarding salt and yeast.
Flour
In Naples and the surrounding areas, the overwhelming majority of pizzerias—about 90 percent—use flour from a single mill in Naples: Molino Caputo. The Caputo family has been making flour for pizza for three generations, since 1924. It is the only example I know of a mill making flour designed specifically for pizza. Most mills are making flour as a general-purpose product in a variety of types, each suitable for many uses.
Caputo pizza flours blend several kinds of wheat selected to produce flours with good flavors and the right physical characteristics for pizza baking. The milling meets a specification called “00” (doppio zero in Italian, commonly called “double zero” in the United States), and it gives the flour a refined, almost powdery consistency. (The 00 designation is a reference to how fine the flour is, and in Caputo’s case it takes twenty-five passes through the roller mill before it becomes 00—this does not refer to the protein content, which in Caputo’s 00 ranges from 12.5 to 13.5 percent.) Today the wheat in Caputo flours is all from Europe (they once imported North American wheat) and is blended to meet strict specifications that give it just the right properties for water absorption, dough formation, fermentation, stretchability, and the baking qualities that work best for Neapolitan pizza. In the U.S., Caputo flour is available in both a blue bag and a red bag. The blue bag, while labeled “Pizzeria” rather than “00,” is still a 00 flour. As Antimo Caputo himself said to me when I visited the mill, “The soul of pizza is the pizza maker. That is why the blue bag says ‘Pizzeria,’ not the kind of flour.” The blue-bag flour is about 12.5 percent protein, and it’s the bag I’ve seen the most in Neapolitan pizzerias. The red bag is labeled “00” or “Chef’s Flour” and has about 13.5 percent protein, giving more elasticity to the dough. This flour works better for very long rising times, like in a biga or an overnight levain starter that gets mixed into the final dough after 10 or 12 hours. (The 48- or 72-hour pizza doughs require refrigeration or the dough just breaks down.) Some pizzerias blend these two flours. Of the two, the blue-bag flour produces more extensible (less elastic) gluten. Antimo Caputo cited the example of Da Michele pizzeria, which makes eight hundred (!) pizzas each day—the pizzaiolos need to be able to finish the stretching of the dough with just three turns in order to keep up the pace. If the dough were too elastic, it would slow them down. They wouldn’t be able to meet the demands of the fast-paced production, meaning you would have to wait even longer to get your Da Michele pizza!

Although these Caputo flours are designed for pizza that bakes in a 905°F (485°C) oven, I really like the results in my home kitchen oven, too. On U.S. store shelves, I’ve more often seen Caputo’s red-bag 00 than the blue bag. But both work great for making home kitchen pizza, and if you can’t find it locally, it is easy to order online. The pizza dough recipes in this book, when made with Caputo flour (either the red bag or the blue bag), are wonderfully soft and make up dough balls that are smooth, and supple. It makes a light, delicate, tasty pizza crust.
Naturally, there are many other flour choices for making good pizza. Know that different flours can have very different water-absorption characteristics, so with one flour you might get a much looser or stiffer dough than with another flour if the water amount is the same. Usually, the higher the protein content in the flour, the more water it will absorb. But high-protein flours make dough that is more elastic, with a less delicate texture once baked. There is a kind of Goldilocks middle ground for protein content. Too little, like in pastry or biscuit flour, and the dough will not hold its gas well enough to give the open and light cornicione, the outer rim of the crust that should be eaten, not set aside on your plate.
At Ken’s Artisan Pizza, we have been using the low-gluten flour from Shepherd’s Grain, a product of the Pacific Northwest, since we opened in 2006. The results are excellent. Dough made with Shepherd’s Grain flour stretches well, has excellent flavor, and has a protein content between 10.5 and 11.5 percent, depending on the previous year’s wheat-growing conditions. A single harvest of spring and winter wheats takes place over a 3- to 4-week span in August every year. That’s the crop until next year. It then goes into storage silos for milling throughout the year. Some characteristics of the wheat, like its protein content, remain constant during storage, while others—starch damage and moisture content, for example—can vary from one milling to the next.
While testing the recipes for this book, I alternated between Shepherd’s Grain and Caputo flours, and each worked well (the Shepherd’s Grain flour is a little more absorbent, meaning a little bit stiffer dough, so I would add a touch more water to soften it up). Other good options include King Arthur flours, which are also of generally high quality, and searching out small mills near you, such as Hayden Flour Mills in Tempe, Arizona. Flour labeled all-purpose, which has a medium protein content (usually between 10 and 12 percent), is worth trying for pizza, too. Be forewarned, though: the protein content is rarely labeled on the bag; you may have to do some sleuthing online to find out.
Many styles of American pizza, like New York and bar pizza, are made with a higher protein bread flour, in the 14 percent range. If you think of an American pizza as sliced, and heavy with toppings, or even as a cheese-and-tomato slice pizza that has a crisp yet foldable crust, then you need more structure, and higher protein flour helps with that. I think the reasons for using high-protein flour in American pizza dough are more historical than intentional. Big American flour mills have long paid a premium for high-protein wheat, so that’s what the wheat farmers grow. American pizzerias used this flour, and the resulting style of pizza became what we were all accustomed to. In this book’s recipes for American pizza dough, I recommend using high-protein bread flour.
When it comes to pizza, I depart from the current bread trend of using whole grain flours. I adore these in bread, but I do not use whole grain flours in hearth-baked pizzas because the crispness and delicate lightness of texture in the crust go away. When making pan pizzas, however, I do sometimes like a blend of white flour with whole wheat, whole emmer, einkorn, or whole spelt flours (I order from Bluebird Grain Farms online).
Because temperature is such an important element of the equation when making pizza dough, and because I calibrated water temperatures for the dough using unrefrigerated flour when writing these recipes, you should use flour at room temperature for all of the recipes in this book.
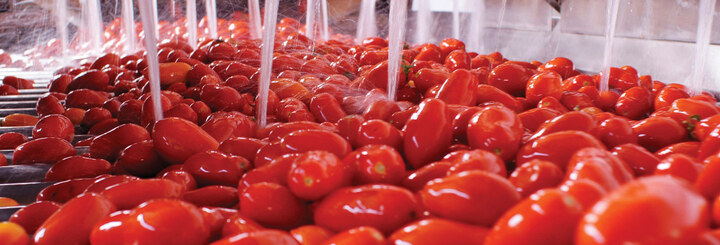
Tomatoes
While the myth of Neapolitan pizza is that they all use San Marzano tomatoes, the fact is that true San Marzano tomatoes are a Denominazione di Origine Protetta (DOP) product (see sidebar) and only represent 30,000 tons of a total of 2.5 million tons of tomatoes harvested each year in the south of Italy. In my first book, describing the secret to a good and authentic tomato sauce for Neapolitan pizza, I wrote “use San Marzano tomatoes.” I have since learned that was an oversimplification, and even looked at my own pizzeria, where we are making a very good pizza sauce using tomatoes that are from near San Marzano, but are not DOP San Marzano tomatoes. This ideal terroir for tomatoes—the climate and volcanic soil—exists throughout the region. No offense intended, but writing “use San Marzano tomatoes” would be like saying “only drink wine from Barolo.” DOP San Marzano tomatoes are wonderful, but they are not the only good tomatoes for pizza.
According to Costantino Cutolo of Compagnia Mercantile d’Oltremare, a Campania tomato processor, “[San Marzano] is a huge ground for fraud. Naples pizzerias don’t even know what they are using…Here they call ‘San Marzano’ what is not San Marzano.” Still, he said, “Quality is almost the same; you don’t realize.” The San Marzano DOP controls the seed bank for these tomatoes. You can grow tomatoes from these seeds outside of the DOP zone and call them San Marzano, but to be DOP San Marzano they have to be grown within its very small, defined territory, in and around the village named San Marzano, located between Mount Vesuvius and Naples (not on the slopes of Mount Vesuvius, as many have written—the slopes are covered in trees and rock). When I asked Cutolo what the accurate description is for good-quality canned tomatoes from around Naples that are not San Marzano, he replied, “Small, pear shaped tomatoes. Whole peeled tomatoes from the south.”
I asked Cutolo the very important question of how they control for consistent moisture content in each can, because from the pizzeria’s perspective, you can’t have one day’s sauce be thick and the next day’s sauce be thin. Cutolo replied: “You have to control the Brix of the tomato to get consistency from one can to the next. This is the average ripeness of the crop at harvest and before processing.” Cutolo’s average desired post-production Brix level (see sidebar) is 7.0, but the tomatoes have an average of about 4.5 at harvest. During production, the juice is concentrated to a degree that will result in the final can of juice and tomatoes reaching the desired Brix of about 7.0. This is Cutolo’s target (as of this writing), and their Ciao brand canned tomatoes are indeed a little bit sweeter and also thicker than others I’ve tried. The industry in general has a target of 6 Brix in the can, and these are very good tomatoes, too. Lower Brix means a thinner, more watery sauce that is also less sweet, and sometimes a pizzeria will drain some of the cans to obtain a thicker sauce. More often they do not—they just have a thinner sauce. Cooking the sauce to thicken it before making pizza removes the freshness of flavor and is rarely done in Italy, although it is not uncommon in New York pizzerias.

Denominazione di Origine Protetta, or DOP, translates as “Protected Designation of Origin” and is a certification for many Italian heritage food products intended to discourage fakes from using a heritage product name without merit. DOP products include balsamic vinegar from Modena; Parmigiano-Reggiano cheese from near Parma; Prosciutto di San Daniele and Prosciutto di Parma; mozzarella di bufala from Campania and Lazio; and of course, San Marzano tomatoes from the village of San Marzano and a defined area around the village. The DOP does not just protect consumers; it also protects the producer, who uses time-honored methods to make traditional products of quality that characterize the pride of a town or a region and ultimately the pride of Italy. To get DOP designation, a producer needs to meet strict standards for each product, all the way through packaging and labeling. So if you want to buy real DOP San Marzano tomatoes, look for the sunburst “DOP” logo on the can.
At harvest, about two-thirds of the crop is collected when the vines are shaken by hand over low truck beds filled with metal containers. Then, in a second pass, mechanical harvesters pick up the rest of the crop.
We took a fun tour of Cutolo’s processing plant and watched how the tomatoes go from delivery to can. Shifts of women (all women; it’s a village tradition) sort the tomatoes on a very rapid manual sorting line after they are steamed just long enough to loosen their skins, which are then removed by blasts of air in a machine. Then the underripe and imperfect tomatoes are removed to a secondary channel. Only the best tomatoes move on to be canned whole. It’s difficult work, fascinating to watch. The women start their shifts at 4 a.m. While we stood on a platform above them, observing, with me taking pictures while they were focused on their sorting, not one of them had the time to notice us staring at them. They were absorbed in their work as tomatoes on the sorting line flowed past at a steady pace, endlessly.
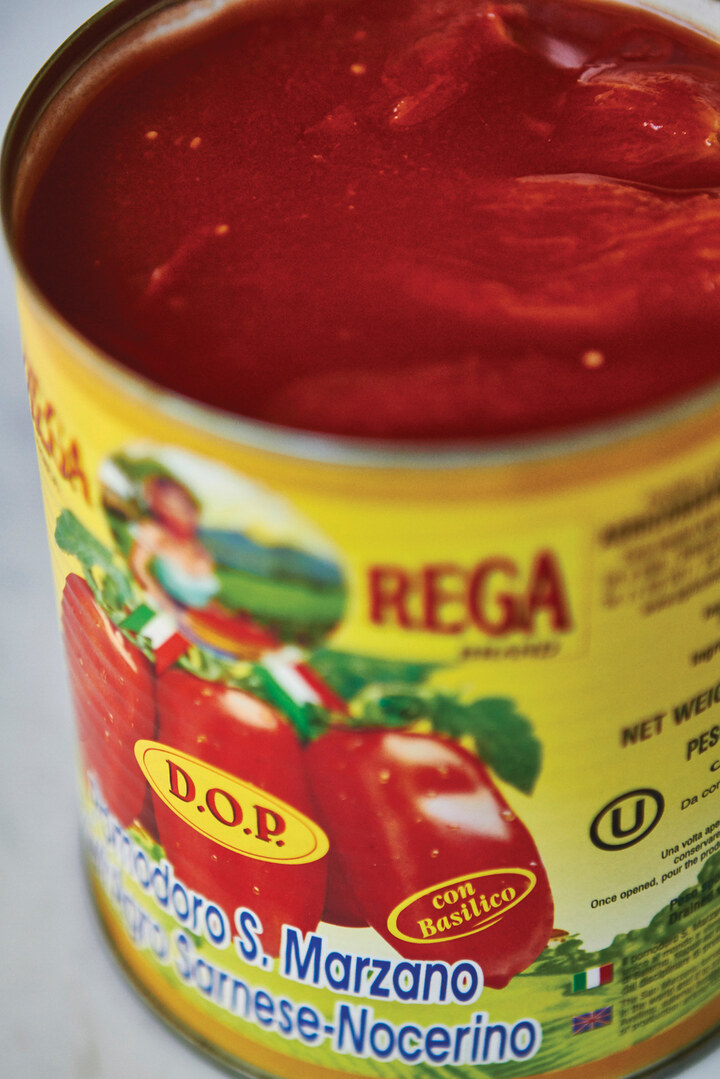
Why use whole peeled tomatoes? There are also cans of crushed tomatoes or tomato puree on supermarket shelves, but the highest-quality tomatoes are reserved for canning whole. Others are sorted out to make into juice or into cans of other tomato products, like tomato paste.
Many Americans prefer canned whole peeled tomatoes from the U.S. or Canada. I’ve read reviews on Serious Eats and in Cook’s Illustrated that rate North American brands, such as Whole Foods’ 365 and Trader Joe’s, higher than Italian canned tomatoes. Bianco DiNapoli is an American brand that I like. We have tried several options at Ken’s Artisan Pizza, including Alta Cucina brand California tomatoes, which we substitute when there is an interruption in the supply line from Italy. However, we always end up returning to our preference: Italian whole peeled tomatoes. The richness of their flavor and their balanced acidity—perfect for pizza. Right now we are blending Rega and Ciao brand tomatoes to get the flavor and consistency that work for us.
Here’s an explanation of Brix, courtesy of Teri Wadsworth at Cameron Winery in Dundee, Oregon:
The Brix scale is named after nineteenth-century German scientist Adolf Brix, who invented the hydrometer, an instrument that could measure the sugar content of grape juice for wine. Before this, ripeness could only be determined subjectively, by taste. The Brix scale can also be used to measure ripeness in the juice of other fruits, like tomatoes. In winemaking, 1 degree Brix is equivalent to 1 gram of soluble solids (the sum of sucrose, fructose, vitamins, proteins, and so on) per 100 grams of grape juice. In winemaking, an effort is made to harvest at a particular Brix level, and this measure of ripeness and its corresponding sugar content in the fruit directly relates to the fermentation potential in the wine, its flavor, and ultimately the conversion to alcohol. In theory, alcohol is produced at a rate of approximately 51 percent of fermentable sugar. Variables such as exposure to oxygen and temperature, the amount of yeast, and yeast diversity determine the actual conversion rate from fermentable sugars to alcohol and carbon dioxide.
Tomatoes go through the same seasonal harvest variability as grapes and other fruits of the earth do. There is a right time to harvest, and measuring Brix in tomatoes is as important to timing harvest as it is for grapes, when the desire is to produce canned tomatoes that have consistent flavor, acidity, texture, and water content (think of it as thickness or thinness of tomato sauce from one can to the next, from one day to the next). Fruit ripening involves a series of related and complex enzyme-catalyzed transformations. When starches are converted into simple sugars by natural enzymes, the fruit sweetens. A tomato changes from green to red as chlorophyll breaks down to reveal underlying pigmented compounds such as anthocyanins and lycopenes. It becomes less tart as organic acids are converted into less acidic molecules; softer as pectin is broken down; and more fragrant as volatile aromatic compounds are synthesized. Brix is an extremely useful objective marker for ripeness.
Some Italian pizzaiolos are seeking out tomatoes that are not from San Marzano. Roscioli’s Emma in Rome uses Pomilia-brand pomodorini, small or cherry tomatoes. Corbari tomatoes, also commonly referred to as Corbarino, are on some menus. Then there are Piennolo tomatoes, well known in the south of Italy and some of the coolest looking tomatoes ever: small, grapelike fruits that are woven into tight bunches. They look like little red water balloons with tiny nipples. Piennolos are regarded in Naples as a specialty tomato and are used on certain pizzas, whole or split.
Tomato Sauce
The typical sauce at a Neapolitan pizzeria is simply pureed canned whole tomatoes and salt. Most pizzerias empty cans into a big bucket and use an immersion blender to mix the sauce, while some use a more labor-intensive manual food mill. Olive oil does not go into the sauce. It goes on the pie as a dressing after the sauce and the cheese. If oregano is going to be on the pizza, it is sprinkled on top of the sauce.
I had a great conversation about tomato sauce with Orlando Foods co-owner Fred Mortati, an importer who was the first to bring Caputo flour to the U.S. and who is an expert on southern Italian tomatoes, as well as Neapolitan pizza in general. I asked Fred if he knew about the relationship between the Brix level and consistent moisture content in canned tomatoes, not realizing that Fred could take about anybody down in a do-you-know-this? contest about Italian tomatoes. (And I mean that in the best way.) Fred expanded on the subject of Brix and moisture content, explaining that cans of whole peeled tomatoes contain a precise ratio of tomatoes to juice to deliver a consistent product to pizzerias. Because the juice is cooked at the beginning of production, it becomes concentrated through evaporation. This means there are more tomato solids in the packing liquid than in the whole fruits. Fred’s slam-dunk tip was this: if you overpuree the canned tomatoes with an immersion or kitchen blender, you release more liquid from the tomatoes themselves, and that’s when the sauce becomes too watery. For this reason, some people will say the best way to make pizza sauce is to use a food mill.
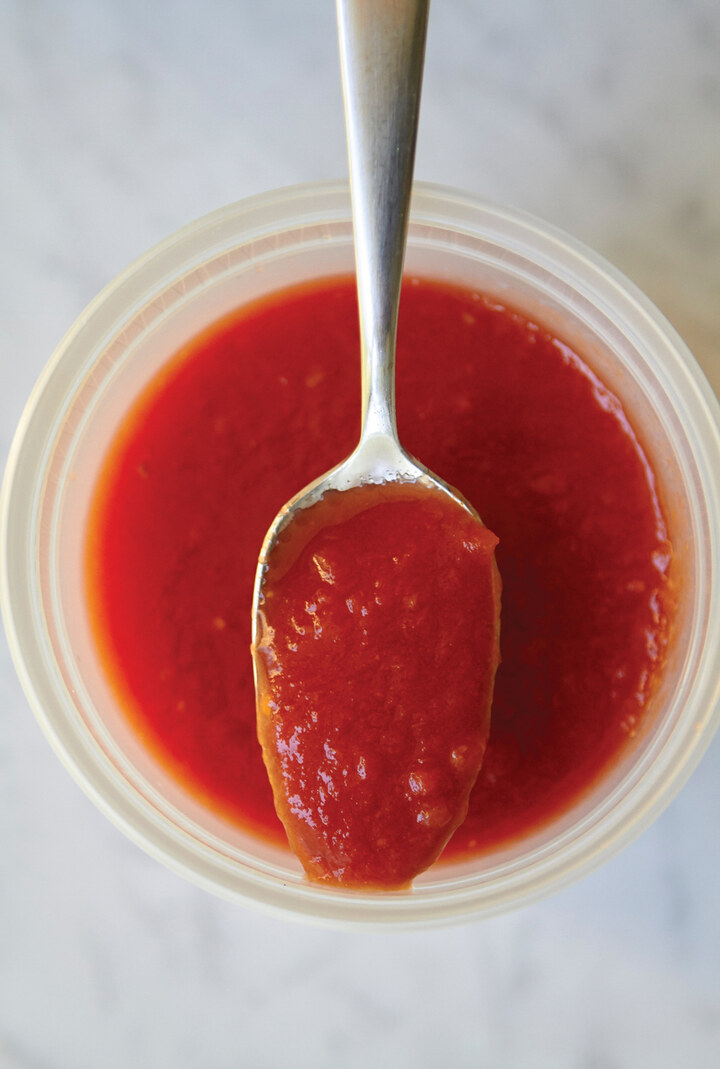
My personal taste wants it somewhere in the middle: if I pulse the blender just to the point of pureeing the tomatoes and do not overmix, I get a smoother sauce, which I often prefer to the slightly chunkier hand-milled tomato sauce. I do not see any quality loss by using the blender carefully; it’s just different, that’s all.
The moral: be mindful of how much you pulse your canned tomatoes, especially if you’re using a blender. Going from perfectly thick to overly watery can happen very quickly.
Fred’s point about the juice in a can of tomatoes changed another step in my pizza-making process: to get my desired thickness of sauce, I had always drained the can of tomatoes and juice in a colander (reserving the juice for another use). Now I know this extra, sometimes wasteful step is not necessary—all I have to do is mix the tomatoes correctly in the first place. Duh.
Mozzarella Cheese
Pizza wouldn’t be pizza without mozzarella. (If you’re a New Yorker, you might pronounce the first syllable “muzz”—rhymes with “boots”—not “mozz” to rhyme with “bots,” but it helps if you have a little pizza cred before using this insider’s dialect.) “Mozzarella” comes from the Italian word mozza, meaning “to cut,” referring to the action of the hands when mozzarella cheese is made using the traditional manual method: stretching the curds in a hot water bath until they come together like a dough, with a satiny smooth, shiny, supple finish, then cutting the finished cheese with a pincerlike grip between the thumb and the forefinger. (The mozza cut is the same as the pincer method I use to mix bread and pizza doughs.) The cheese is formed into balls, blocks, or tubular strips several inches in diameter, which go into a quick brine bath where the cheese absorbs salt through osmosis.
Mozzarella comes from a family of cheeses called stretched curd cheeses (pasta filata in Italian) that includes provolone and caciocavallo. Stretched curd cheeses, and especially mozzarella, are ideal for baking if you like that soft, gooey, string cheese effect.
I have used five different mozzarellas in this book’s recipes, and they’re all very different: fior di latte (packed in brine); mozzarella di bufala (packed in brine); burrata (wrapped in plastic, with a very short life-span); low-moisture mozzarella (wrapped in airtight plastic); and fresh mozzarella (wrapped in airtight plastic). Smoked mozzarella (wrapped in airtight plastic) is a sixth mozzarella you might find at your market and it, too, is a worthy pizza cheese. You want a grated mozzarella? Use low-moisture mozz. You want sliced mozzarella, New York style, like they use at Patsy’s? Use fresh mozzarella packaged in plastic. You want Neapolitan-style pizza? Use brine-packed fior di latte or mozzarella di bufala.
Two main types of mozzarella are used in Italy: fresh cheese made from cow’s milk, called fior di latte, and fresh cheese made from water buffalo milk, called mozzarella di bufala. Bufala is both richer in fat and more acidic (a perfect complement!) than fior di latte; it tastes like the cheese we’d eat if we all had Italian grandmothers. Bufala also has a higher water content than fior di latte, and thus can sometimes make for a watery pizza (this cheese can be squeezed a bit to remove some moisture and patted down before the pizza is baked). Both mozzarellas are fresh milk products, packaged in brine, and will go sour within a week or two from the date of production (always check the date on the package). Fior di latte has a light, fresh milky flavor, and is preferred by many as a pizza cheese. It is also less expensive and often easier to find than the bufala cheese. There are good fior di latte mozzarellas made in the U.S., packed in brine in the Italian style. We use Grande brand fior di latte mozzarella at my pizzeria.
The mozzarella used for many American-style pizzas—whether it’s in the New York style, the Connecticut style, or a Detroit pan pizza, a Grandma pizza, or a bar pizza—is a low-moisture whole-milk mozzarella, the kind you find in supermarkets packaged in airtight plastic (make sure you buy the whole-milk cheese; it melts and tastes much better than low-fat versions). These have a slight yellowish color, are a little saltier than fresh mozzarella, and grate easily. I liked Galbani brand when I was recipe testing. Low-moisture mozzarella can be stored for weeks under refrigeration without spoiling. This is really the definitive cheese for American-style pizzas. Some American companies make a fresh mozzarella (for example, Calabro’s fresh fior di latte, wrapped in plastic and not packaged in brine), which has a shorter shelf life and a white color. I like the fresh milk flavor in these and also the way they melt: they don’t brown as fast as low-moisture mozz does. I also just like the way they look. The fresh American fior di latte mozzarella cheeses are best sliced, not grated. In commercial use, these milky white fresh mozzarellas come in blocks and are typically sliced at the pizzeria.
USING FRESH MOZZARELLA
The way that brine-packed fior di latte mozzarella cheese bakes at home is quite a bit different from the way it bakes in a much hotter wood-fired oven. Because pizzas bake longer in the home kitchen oven, the cheese spends more time in a temperature above its melting point, resulting in more liquefaction. The same mozzarella in a wood-fired oven will retain much of the shape of its solid form, even though it is mostly melted, because it has spent less time above its melting point. To prevent over-liquefaction in the home oven when using brine-packed fior di latte, add the cheese about 4 minutes into the baking cycle.
For delicately flavored fresh cheeses like burrata, the magic mozzarella that’s filled with whole cream, put it on top of the pizza right after it comes out of the oven.
Fior di latte and mozzarella di bufala cheeses do not make for a great to-go pizza, as they have about a 10-minute ideal window for eating after the pie comes out of the oven. Then the cheese starts to solidify, losing its stretchiness and softness. A margherita pizza made with fresh mozzarella is fantastic when it’s at its prime, which is why you want to eat these pizzas either at the pizzeria or at home right after they are baked.
The way the cheese is cut makes a stylistic difference in the pizza. It is very common in Neapolitan pizzerias to crank blocks of fresh mozzarella through a mechanical extruder that cuts the cheese into strips about the width and size of my pinky finger. If you look at photos of the margherita pizza at Da Michele, you’ll see what this looks like. A number of New York pizzerias (Patsy’s, for example) that use fresh mozzarella have a signature look that comes from thin, wide slices of mozzarella. We used to cut cubes of fresh mozzarella at Ken’s Artisan Pizza, but we changed to cutting larger pieces that cover more of the pie, which helps retain the moisture of the sauce underneath. Some places tear off pieces of the balls of fresh mozzarella by hand for an organic look. These are stylistic differences and I encourage you to experiment with the size and shape of your sliced or torn cheese to find your own pizza cheese sweet spot.
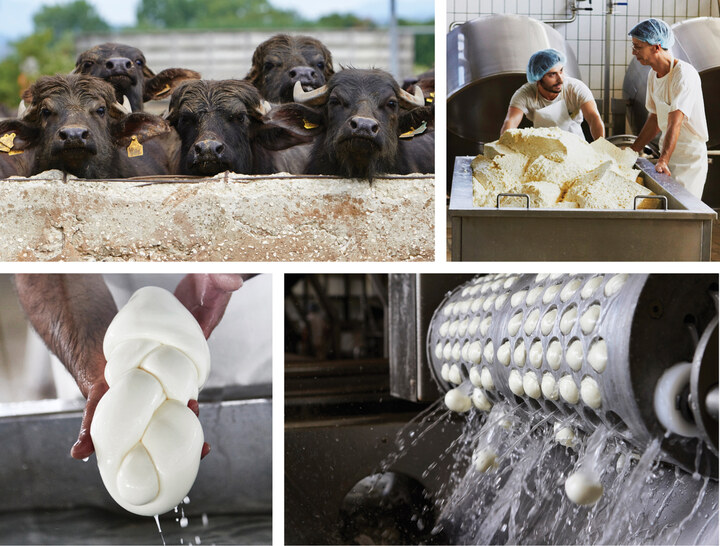
Mozzarella di bufala loses a good bit of its unctuousness if it is overbaked. When I use it in home baking (say, in a margherita), I either place it on the pizza several minutes into the bake or I don’t bake it at all and just lay it onto the pizza immediately after it comes out of the oven—or give it a short oven blast to barely heat it (as in this book’s Prosciutto and Bufala pizza). In Campania, restaurants serving fresh mozzarella di bufala serve it at 68° to 77°F (20° to 25°C) for the best flavor. If you are in Campania and are served fresh mozzarella di bufala, it was probably made that day and never refrigerated. You will at that moment count yourself among the lucky ones. The next day and beyond this cheese would be used in baking. For special occasions there is a braided version of mozzarella di bufala, called treccia.
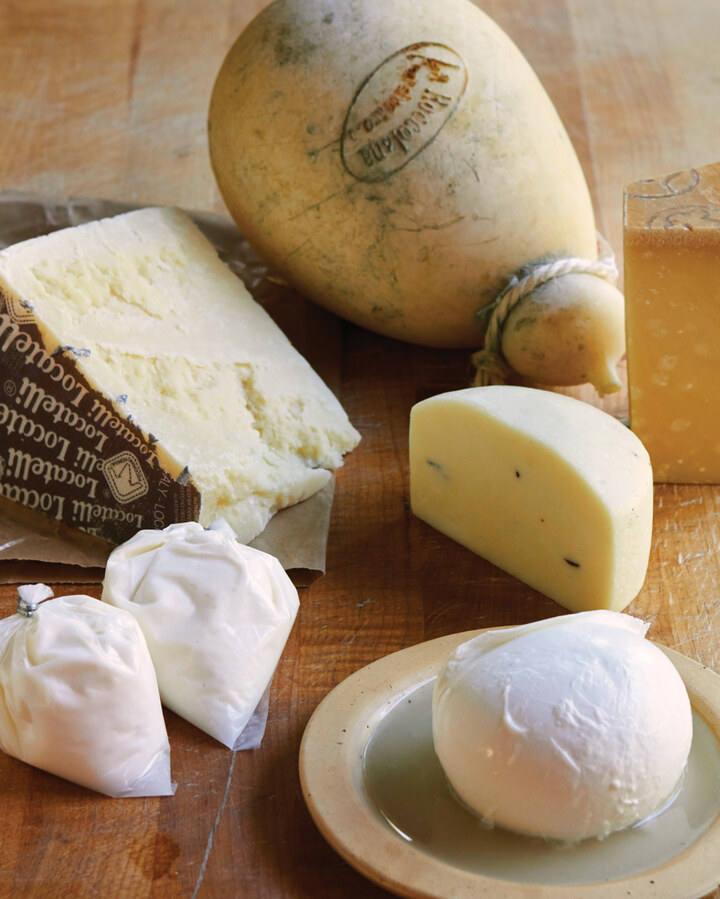
USING LOW-MOISTURE MOZZARELLA
I like low-moisture mozzarella for the texture of the cheese after the pizza bakes. It’s really the cheese for that iconic American pizza flavor and texture. Low-moisture mozzarella cheese holds its semi liquid, melted, hot-and-stretchy state for a very long time, often with more browning than its fresh, brine-packed counterpart. It’s why an American pizza in a box with this cheese is good to eat long after the pizza is baked—unlike a pizza with fresh mozzarella, which really needs to be eaten within 10 minutes of baking.
Texture is as important as taste with low- moisture mozzarella. It is nothing if it doesn’t deliver an oozing, elastic, stringy pull when you bite into it. Low-moisture mozz is shredded before topping the pizza, and it melts evenly to cover the pizza in a gooey cheese lava halfway between liquid and solid. Whole-milk low-moisture mozzarella gives the sexiest mouthfeel and the richest flavor compared to low-fat or skim-milk mozzarella (imposters!). The yellower the mozzarella, the more age and saltiness it is likely to have. Try different kinds of low-moisture mozzarella to find the one you like best. As a rule, I prefer whiter, fresh brands like Calabro and Losurdo for American pizzas.
If you’re using low-moisture mozzarella, shred your own cheese. It takes just a minute with a decent box grater. Grate over the large holes. The shredded cheese you find at the store has a coating of starch and other stuff over each strand to prevent clumping, and it costs more. You don’t want to eat that, do you?
Aged Hard Cheeses
Hard grating cheeses such as Parmigiano-Reggiano, Grana Padano, and pecorino are very commonly used in both Neapolitan- and New York–style pizzas. The AVPN definition of pizza margherita includes two cheeses: grated hard cheese and fresh mozzarella. One treatment I’m very fond of is to top a pizza with grated hard cheese immediately after it comes out of the oven. For recipes in this book that call for Parmigiano-Reggiano cheese, feel free to substitute Grana Padano. These two cheeses are made in the same places using the same techniques and have a very similar character, but Parmigiano-Reggiano is finer—made from a higher quality milk—and is aged longer.
Salt
Please use fine sea salt in this book’s pizza dough recipes. Do not use iodized salt, because it tastes like iodine. I recommend fine sea salt as opposed to coarse because it dissolves quickly in water. You can use whatever grind or texture of salt you want for topping your pizza—enjoy the variety of textures and mineral flavors of finishing salts from Hawaii, Oregon, Portugal, and wherever else you find them. I’m a big fan of my neighbor Jacobsen Salt, down the street from Trifecta Tavern here in Portland, which specializes in hand-harvested salt from Netarts Bay, Oregon. Jacobsen’s flake salt has a beautiful texture and appearance with a very clean taste.
Consider the salt content in the pizza’s toppings, too, and balance the saltiness of them all on the baked pizza. Most of the salt on the pizza is going to be in the cheese and in the toppings—especially cured meats. Low-moisture mozzarella will have more salt than fresh fior di latte mozzarella. Hard grating cheeses like pecorino and Parmigiano-Reggiano are aged 12 to 24 months typically, and sometimes more. They are saltier. If you generously top a pizza with grated pecorino and then an aged low-moisture mozzarella (like Grande brand), you might get a pizza that is very salty. You can combine cheeses, a practice common in good pizzerias everywhere, but be careful not to overdo it with the amount of aged or hard cheese. As in cooking generally, if one ingredient is salty, balance it with other ingredients that are not.
I sat down with my friend Steve Jones to talk cheese and pizza. Steve is a Portland cheesemonger who owns Cheese Bar; Cheese Annex in The Commons Brewery down the street from my Trifecta Tavern & Bakery; and Chizu, a sushi-inspired cheese bar downtown.
Turn for a recipe for raclette pizza from Steve Jones. You can thank him later. It has beer-braised leeks, raclette cheese, and roasted potatoes. Yes, please.

Ken: You have had a series of pizza nights at Cheese Bar. What were your favorite cheeses on the pizzas you made?
Steve: Taleggio, raclette, and washed-rind stinky cheeses. These are really good with spicy cured-pork products like soppressata or spicy capicola. Taleggio I like with tomato sauce. Raclette is great with potatoes and leeks, no tomato sauce, and we’ve even served it with chopped cornichons.
Brebis, a fresh sheep’s milk cheese, is great and we look forward to its season every year. We treat it like fromage blanc. It comes in the spring when the sheep have just finished lambing, so the milk is at its richest and tastes a little grassy. We pair it with other springtime ingredients: peas, spring onions, even mint. Crescenza, also called stracchino, is another favorite: it’s yeasty, gooey, and spreadable. This cheese is good paired with speck and arugula. Bellwether Farms in California makes it.
K: What do you consider when choosing a cheese to pair with other pizza toppings?
S: Meltability first. Flavor offsets that are compatible as well, of course. Some cheeses just don’t melt well, including most sheep’s milk cheeses that are not fresh; same goes for aged goat cheeses. As far as flavor offsets, we don’t want to marry powerful cheese with another strong-flavored ingredient, so raclette goes great with potato, and if we add a pork component it is in small pieces. We always find the happiest combinations of toppings when we stay within a geographic region or within a season, so Taleggio and speck, raclette and potatoes, spring cheeses with springtime crops.
K: What are your favorite melting cheeses?
S: The list could begin and end with raclette. It is inexpensive and loaded with flavor, and it melts beautifully.
K: What about acidity in cheese?
S: Goat cheese when it’s young and fresh has a nice tang to it, kind of a citric tang, quite often lemon, whereas an aged goat cheese goes tropical, more sweet than bright. Time produces more complex flavors in cheese as it ages.
K: I love topping a pizza with burrata after the pizza is baked. Do you know how it’s made? I just know that it’s mozzarella on the outside and cream in the middle.
S: I’m sure the first burrata that was made was at the end of a batch, using up remnants of a mozzarella batch, including the stringy ribbons that are formed. Burrata is made by hand, making a purse of stretched mozzarella, and as they pull it together they are putting cream and the ribbons in the middle. It’s yet another example of a great thing to eat coming from a “waste nothing” mind-set.
K: I’m having a hard time finding an American aged mozzarella for melting that doesn’t brown too fast, or isn’t too salty in flavor. Any recommendations or ideas?
S: Try Polly-O brand. That’s a big delivery pizza cheese. It’s a national brand.
K: Why is it that the more age a cheese has, and the harder it becomes, the saltier it gets? Is this entirely from moisture loss, or are aged cheeses made with more salt to preserve them?
S: It’s both. For preservation for sure. Most people nowadays don’t think of cheese as what it was originally: preserved milk. The cows, the sheep, the goats don’t naturally produce milk year-round; they produce milk after birthing, in the spring and summer months. Today we artificially inseminate cows to get milk year-round. You still can’t trick sheep—they make milk on their own schedule. Tradition guides a lot when it comes to salt content in cheese and aging it. Cheese traditionally was made to be consumed in the late winter when other food supplies—grains and storage crops—were running low. You were left with cheese and beer, and that’s what would get you through until spring.
K: When is salt introduced to the cheese as it’s being made?
S: The salt comes from a brine bath for many cheeses, like Parmigiano-Reggiano (which is in the brine bath for many days) and mozzarella (in a short brine bath, for minutes). In other cheeses salt is added to the milk before the break happens, or after the whey is drained.
Yeast
Considering there are about fifteen billion viable yeast cells in one teaspoon of instant dried yeast (yes, I checked—they are really small), accurate measurement is helpful for getting consistent results. A ¼-teaspoon of instant dry yeast conveniently weighs very close to 1 gram. Since some people will not have a digital scale that measures accurately to the small weights I sometimes call for—as little as 0.1 gram of dry yeast—I use fractions of a ¼ teaspoon to approximate the measurement, and the recipes will work fine with some wiggle room. (However, see this page for information about an affordable scale that accurately measures from 0.1 to 100 grams.) Another option is to measure ¼ teaspoon of yeast (about 1 gram), spread it out in a line, and then divide the line into tenths. Then you can fairly easily measure out 0.1 gram, 0.3 gram, or however much is called for in the recipe.
The pizza dough recipes in this book call for instant dry yeast. You’re likely to find three kinds of dry yeast at the store: active dry, rapid rise, and instant. All of these yeasts are the same species: Saccharomyces cerevisiae. What differentiates them is their coating, the way the yeast is manufactured, and performance. At my bakery, we use SAF Red Instant Yeast. I recommend that you buy a 16-ounce (455 g) package, which is available from King Arthur Flour’s website or other online stores. It will keep for 6 months if stored airtight in the refrigerator. Jeffrey Hamelman, King Arthur Flour’s master baker, told me he has kept a package of yeast in his freezer, wrapped airtight, that has performed consistently for several years.
EQUIPMENT
A few of the equipment items listed here are essential—a baking steel or stone for hearth pizzas, a digital scale for measuring ingredients, and a probe thermometer to measure water and dough temperature (see this page). Others have acceptable substitutes: a large kitchen bowl with a sealable cover can substitute for the 6-quart dough tub; a cookie sheet can fill in for a half sheet pan; a blender can work if you don’t have a food mill for making sauce; and a Lloyd deep-dish pan is only for a single recipe in this book (bar pies).
I’m intentionally leaving the oven out of the equipment discussion. I’ve written this book with recipes tested in my standard, nothing-very-fancy home kitchen oven. Recipe testers using their own home kitchen ovens of different makes have had excellent results, mirroring my own. Most home kitchen ovens can heat on a bake setting up to 525° or 550°F (275° or 290°C) and have a broiler element or gas-fired broiler. That’s all you need to make a good pizza. I do make a few comments about wood-fired-oven baking throughout this book, but every recipe is designed for a standard home kitchen oven.
Pizza Steel or Pizza Stone
A pizza stone in the home kitchen was once the only option for baking pizzas brick-oven style, on a hot, earthen surface. An improvement to the earthen pizza stone is now on the market: the pizza steel, made from ¼-inch-thick steel. Steel is more conductive than stone, and in all of my test baking I get superior results with the steel. The stone doesn’t release its heat as fast as the steel does. A greater intensity of heat hits the bottom of the pizza crust, which is exactly what we want, and you see more of the leopard-spot pocks of dark color on the bottom of the crust, just like at a good pizzeria. Pizza steels are made to the same dimensions as a pizza stone, and the thick steel won’t crack or break like some poorly made pizza stones will. It’s a little more expensive than most stones, but it will last a lifetime and then some.
Andris Lagsdin of Stoughton Steel deserves credit for being the first to market a pizza steel—though he gives credit for the inspiration to Nathan Myhrvold’s Modernist Cuisine. It works so well that he now has competitors. I bought my pizza steel online from Stoughton Steel. It came pre-seasoned and shipping was included in the purchase price ($79). A good pizza stone is less expensive than a steel; before you buy either, I would encourage you to check user reviews: I have heard reports of some brands of pizza stones cracking under the high heat of pizza baking.
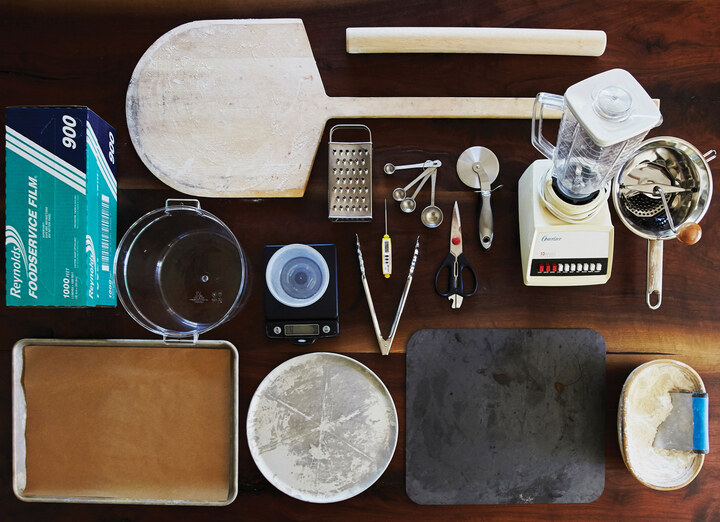
Wooden Pizza Peel
You want a wooden peel measuring about 14 inches wide with a short or medium length handle. I find the dough is more likely to stick to a metal peel.
Dough Tub
I recommend buying a 6-quart round plastic tub for mixing your dough by hand and holding the dough as it rises. I use Cambro brand translucent tubs (they call them “storage containers”) with matching lids; they’re available online and at most restaurant supply stores that sell to the public.
Whatever brand you choose, just be sure it’s food-grade plastic. The size is important: it needs to be big enough to allow you to mix the dough by hand inside the container and to contain the dough as it expands (usually no more than double in size); the Cambro 4-quart tub, for example, is too narrow to allow for easy hand mixing. A round shape makes it easy to incorporate the ingredients; squared edges and corners make it harder. A clear container lets you see through it to chart the progress of the rise. And you need a lid to keep the dough from drying out during its rise.
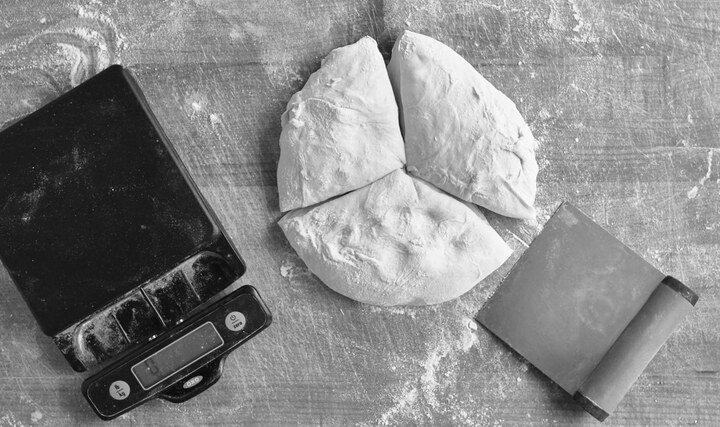
Deli Containers
I use small plastic deli containers for weighing salt, yeast, cheese, sauce, and toppings on my digital scale. These containers are about the size of a single serving or two of to-go potato salad. Very handy. Quart-sized plastic deli containers with matching lids are what I use to store tomato sauce in the fridge. If you don’t have any deli containers, use whatever normal storage containers you have on hand.
Digital Kitchen Scales
It is settled beyond debate that measuring ingredients by weight works better than measuring with cups and tablespoons. Your 350 grams of water will be the same as mine, but I’d be less confident that you and I would come up with exactly the same amount of water if I told you to measure out 1½ cups. A splash of water can make a big difference in the consistency of the dough. The same goes for a tablespoon more or less of flour, which can affect the texture of the finished dough. If you buy a kitchen scale, your baked goods will reliably turn out better, and I promise you’ll find plenty of other uses for it.
I really recommend two inexpensive scales, though you can get by with just one for larger measurements—or, as the market evolves, look for one that can measure from 0.01 gram all the way up to 2000 grams (2 kilos). Almost all scales will convert from pounds and ounces to metric weights. I like OXO scales for their pull-out display. I use them at home and at work.
Another scale (inexpensive—around $13) that measures in the 1/100-gram increments is useful for measuring yeast. I like the American Weigh Scales ACP-200. It measures from 0.01 gram to 100 grams. Several dough recipes in this book call for very small amounts of yeast—0.1 or 0.2 gram. Using volume measures, the closest I can come to describing these amounts is to say what percentage of a ¼ teaspoon to eyeball—one-fifth of a ¼ teaspoon, for example. Using weight measures, I can ask you to measure 0.2 gram of instant dry yeast and know both that the measurement is simple and straightforward, and that you are going to get dependable results. Still, since a ¼ teaspoon of instant dry yeast weighs very close to 1 gram, you can estimate fractions of that ¼ teaspoon to approximate the weight in each recipe.
Food Service Film
There’s something comically insufficient about a narrow box of plastic wrap you buy at the grocery store. Home-use consumer brands of plastic film are oddly much more difficult to use than food-safe commercial wrap. It’s hard to remove from the box, it often doesn’t stick well to what’s it’s supposed to stick to, and it just, it just…sucks. Meanwhile, in the sane world of things meant to be used without giving you a headache, you have a box of food service film, designed for restaurant kitchens where it is used many times each day to quickly and easily wrap anything that needs airtight storage.
In this book’s dough recipes, once you have shaped dough balls, they need to be stored airtight. My recommendation in the recipes is to put the dough balls on one or more flour-dusted dinner plates, wrap it in plastic film, and let it rest until ready to use. Simple and done. While boxes of food service film are rarely, if ever, found in a supermarket, you can buy them online or at restaurant supply shops that sell to the public. One box will last you years, and I promise you’ll never go back to that stuff made for the mass market. Buy in sizes between 12 and 18 inches wide. Reynolds, in the green box, is the brand I most often use.
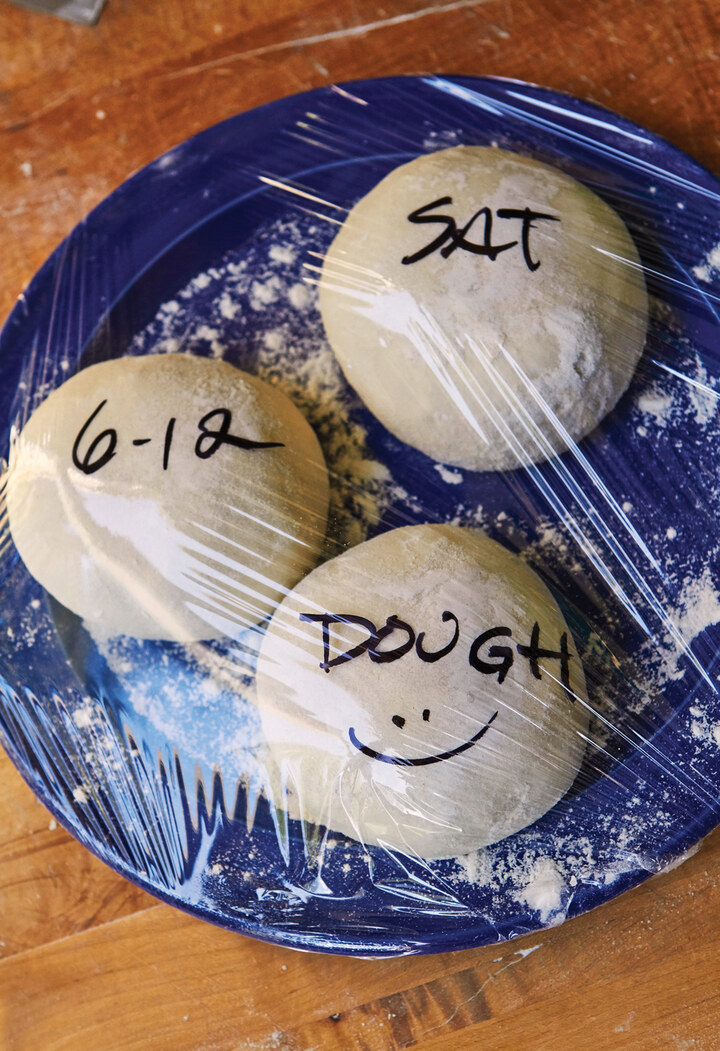
Digital Probe Thermometer
An instant-read digital probe thermometer is essential for making sure you’re using the right temperature of water and for measuring the final temperature of your mixed dough (analog probe thermometers are slower and less accurate). Both of these measurements are easy—they’re also important to ensuring dependable results. The thermometer, which should be less than $15, will have other uses in the kitchen as well, especially for measuring the temperature of meat as it cooks. Taylor, Cooper-Atkins, and CDN are brands I can recommend.
Stainless Steel Dough Scraper
This is a workhorse tool at my bakeries and pizzeria. We call it a bench knife and use it to manually divide bread and pizza dough into individually scaled pieces. These are inexpensive, between $5 and $10, and easy to find online and at most kitchenware stores.
Wooden Rolling Pin
For thin-crust bar pizzas, pizza romana, and thin-crust Staten Island–style pizza, I use a wooden rolling pin to roll out the dough to as thin as paper, if that’s what I want. My pin is 1½ inches thick and untapered. It does not have handles. You only need handles on a rolling pin if you need to really mash down whatever you’re rolling with a lot of pressure, like puff pastry dough. For pizza doughs, using a no-handle pin puts your hands more in touch with the dough. Wood is better than metal, stone, or other rolling pin materials that were designed to stay cold for working buttery doughs. Wood is less likely to stick to the pizza dough.
Half Sheet Pan
Sheet pans are used for baking so many things in a bakery or a restaurant that we have dozens in each of my places. A full-sized sheet pan measures 18 by 26 inches and fits the full shelf of a commercial oven. For home kitchens, the half sheet pan measuring 13 by 18 inches fits nicely in a standard oven. They are not expensive, usually around $8 to $10 at a restaurant supply store, and are mostly made of aluminum. This book’s pan pizzas—Grandma Pie, Simple Tomato Pie, Pizza Bianca and Pizza Rossa—use the half sheet pan, sometimes lined with parchment paper.
Deep-Dish Pan for Bar Pizzas
This item is not a must-have, as it has just one recipe in this book, Adam Kuban’s “Love Supreme” Bar Pizza. Many will find the purchase worth it just for this pizza and variations on it in the bar pie style. The pan is essential for that recipe and if you are going to buy one, Lloyd round deep-dish thick crust pan (RND-14324-PSTK) at $29.99 plus $10 for shipping is the one to get. I’d prefer a lower rim for ease of removal (and a lower price!), but the best part about this nonstick pan is that the perforations make it unnecessary to finish the pizza out of the pan directly on the baking steel or stone (which sometimes put some cheese grease on the stone, and that begets smoke in the kitchen).
12-Inch Round Aluminum Pizza Pan for Bar Pizzas
This too is not a must-have, especially because it is only used as a service item, but there’s something about the context of a bar pie that just seems right this way. Once the pizza is baked in the nonstick pan, I transfer it with a pair of tongs to the aluminum pan, slice it, and eat it off this pan that cost me $4.99. Totally not a must-have. Still…
Parchment Paper
For baking pan pizzas in half sheet pans, I often recommend lining the pan with parchment paper. You can buy full sheets of parchment paper that fit full-sized sheet pans and cut them in half, or you can also buy precut parchment paper that come in 12 by 16-inch rectangles that fit the half sheet pans perfectly.
Food Mill or Blender
The recipes in this book offer two options for making sauce: in a blender or in a food mill. The blender is easy and it’s my usual choice: toss the tomatoes and other ingredients in, push a button, and pulse very briefly just until the tomatoes are chopped and the sauce is pulpy and not watery. I just give my blender two or three very short pulses and it’s done. Overmixing makes the sauce watery. Some of the very best pizzerias use a food mill and manually process the tomatoes, preserving the texture of the pulp while at the same time blending it with the juice from the cans of tomatoes.
If you have a blender and no food mill, you’ll be fine without the extra purchase, but if you already have a food mill this is an excellent use for it. And if you have a food mill and no blender, you are set, too. Working it is easy: I can process a can of tomatoes with a food mill in about 2 minutes.
Box Grater
Many of the cheeses we use to top pizzas melt best when they are grated. Several of the recipes in this book call for low-moisture (but not low-fat) mozzarella, provolone, Parmigiano-Reggiano, pecorino, and caciocavallo, all of which should be bought in hunks and grated by hand. The box grater is cheap and easy to use. Use the large grater holes for cheeses with a medium-firm consistency, like provolone and low-moisture mozzarella, and medium-fine holes for hard cheeses like Parmesan.
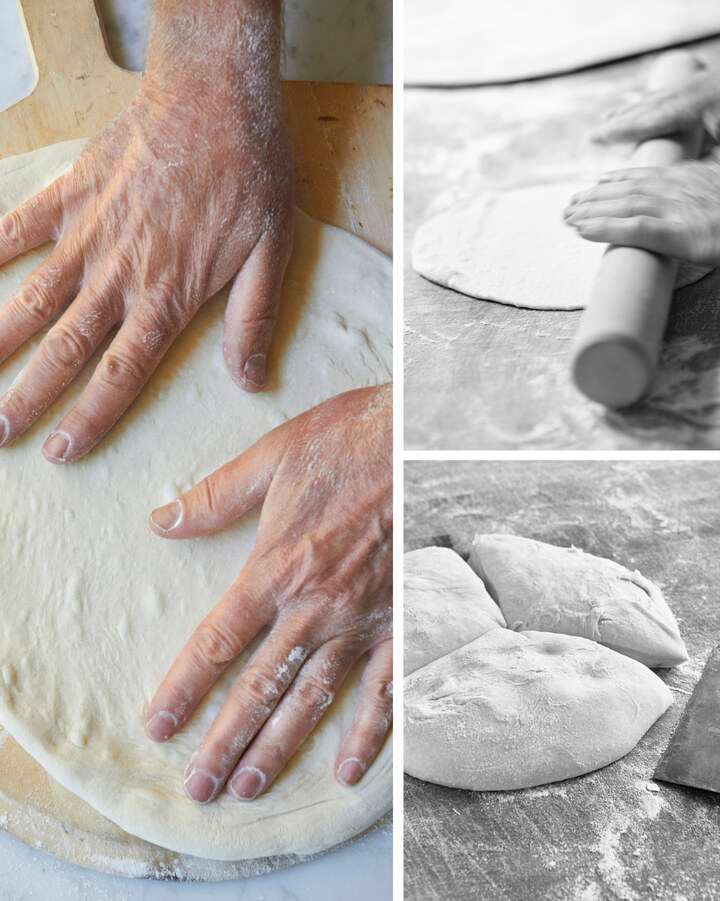
CHAPTER 5
METHODS
Even if you have no pizza making experience, I can give you a start-to-finish method that is easy to learn and simple to execute, and it will last you a lifetime. The dough can be made up in five minutes without using a mixer. Another five minutes’ work two hours later, and your dough balls are shaped. Sauce takes just a few minutes and requires no cooking time. Preheat your oven, cut up some cheese, tear the leaves off some fresh basil, slice a pepperoni, shape the dough into a round or spread it out on a pan, top it, and bake your pizza.
The trickiest part, until you’ve done it enough times for it to be familiar, is going to be stretching the ball of dough into a round disk and learning to load it from a wooden peel onto a preheated baking stone or steel. I recommend you practice loading an undressed pizza (just a stretched disk of dough), first on your countertop a few times so you learn the feel of it, and then into the oven from the peel once or twice. If there’s an accident, there’s no mess. It might take one or two tries to sense the feel of scootching the dough accurately off the peel onto the hot baking steel. If you get the transfer right, you can parbake that crust, then top it and finish baking, so you’re not sacrificing the dough ball. This is the easiest way to learn with the least penalty for screwing up. Detailed instructions and photos follow in this chapter, and I also have a series of instructional videos that demonstrate each step on my website, kensartisan.com.
Enjoy it! Allow yourself a few errors as you learn. Consider doubling the recipe to make more dough balls than you know you’ll need so that if you mess one up, you’re not gonna kill dinner. For the cautious beginner, I’d suggest starting with the pan pizza recipes. This type of pizza is simpler to make—less error prone—and these “Grandma pizzas” are terrific.
In the following chapter, I offer several dough recipes, each with different schedule options, ranging from same-day to 24- or 48-hour dough. Most of the doughs are multipurpose and can work with 90 percent of this book’s recipes (there are a few single- purpose doughs), so pick one whose schedule suits your lifestyle. Good pizza dough does not happen in just a couple of hours, so each dough recipe uses my “time as an ingredient” philosophy. Still, active time on your part consists of just a few minutes to mix the dough.
Once you get familiar with the techniques discussed here, including mixing the dough by hand, forming dough balls, stretching the dough into a round disk, or laying it out in a pan, making sauce, and baking the pizza, you can successfully make any pizza in this book.
WATER, SALT, YEAST, FLOUR
As I described in the introduction, my trip to Italy when I was researching this book absolutely changed my approach to making pizza at home and provided a few course corrections to some of the pizza-making techniques I offered in my first book. The biggest and most dramatic one (at least for the guy who named his first book Flour Water Salt Yeast) was the order in which the Italian pizzaiolos added the ingredients to make dough for pizza. I took their lessons to heart, which is why, in this book, I suggest you mix ingredients as follows:
1 Add water to the dough tub, then stir in the salt until dissolved.
2 Add the yeast. Stir until dissolved.
3 Add the flour and mix the dough by hand.
Readers of Flour Water Salt Yeast may pause and say, “But what about the autolyse?” That step takes around 20 minutes, and while very appropriate in bread making, it is not necessary in pizza dough fabrication (see this page), so I’m scratching it in this book. This is the way it’s done in Naples, it works great, and it saves time.
Learning to think like a pizzaiolo instead of like a bread baker was also necessary for me to adopt the Neapolitan dough-making practice: allowing much or most of the dough fermentation to take place in the dough ball, not in the bulk dough. This was a dramatic change for me, a person who had always applied a bread baker’s point of view to pizza dough, and it took me a while to fully embrace it. But embrace it I did, because the results are undeniably superior: the crust is more delicate and less chewy, while being crisp and light. So instead of making dough and letting it rise until it’s doubled in size, in this book’s recipes we mostly let the dough rise just a little, maybe about a 50 percent increase in size, and then make up dough balls, where the second stage of fermentation takes place, when they will about double in size as they expand (rather than rise).
GREAT PIZZA, STEP-BY-STEP
I recommend taking the time to read through this section and visualizing the process, and you will have less to think through when you are in the moment with your pizza making.
Step 1: Measure and Combine the Dough Ingredients
First set yourself up with your bag of flour, fine sea salt, and instant dried yeast or starter. Complete your dough making setup by having handy a container for water (quart-sized is plenty big, but whatever you have in your kitchen is fine so long as you can pour from it), your scale(s), your thermometer (if you have one; highly recommended), dough tub, a small container for measuring salt and yeast, and another quart (or so) container for measuring flour. (See Chapter 4 if you have questions about any of these things.)
MEASURE THE HOT WATER
Fill your water container from the tap with hot and cold water until you get it to 90° or 95°F (32° or 35°C). If you don’t have a digital probe thermometer, guess at the temperature: water gets pretty hot to the touch at 105°F (41°C).
Use a digital kitchen scale to measure your ingredients. Put your empty container on the scale and push the scale’s “zero” button (sometimes labeled “tare”). After the scale zeroes out, carefully pour in the ingredient until you reach the desired weight.
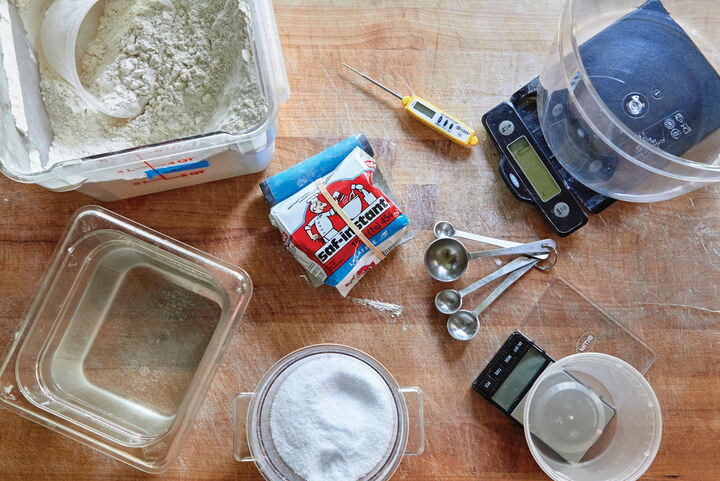
Place your empty 6-quart dough tub on the scale, zero the scale, then add the weight of water specified in the recipe.
ADD THE SALT
Place your small container on the scale, zero the scale, and weigh the recipe’s salt. Add it to the water, and just swoosh the water around in the dough tub to dissolve the salt.
ADD THE YEAST OR STARTER
Place your small container on the scale, zero the scale, and weigh the recipe’s yeast or starter. Add it to the water and salt solution, let it sit for a minute, then swirl the water around to dissolve the yeast. If you are using a levain starter, integrate it into the water and salt solution by hand, knowing that there will be chunks that don’t fully dissolve. They will incorporate into the final dough when you finish the mix.
ADD THE FLOUR
Place the larger container on the scale, zero it out, and weigh the recipe’s flour. Dump it into the 6-quart dough tub.
Step 2: Mix the Dough
I recommend (and enjoy) mixing the dough by hand in the dough tub that the dough will rise in. It is the most efficient way to do it—it can be done in just a minute and there’s very little cleanup.
Once the flour is added to the water-salt-yeast solution in the dough tub, hold the dough tub by the rim with your weaker hand and begin to mix by stirring everything together with your other hand, reaching underneath the dough as it forms to scrape the loose flour into the mixture. Continue working the flour into the dough until it is all integrated.
Then using a pincerlike grip with your thumb and forefinger, squeeze big chunks of dough, tightening your grip to cut through the dough. Do this repeatedly, working through the entire mass of dough. With your other hand, turn the tub while you’re mixing to give your active hand a good angle of attack.
Cut through the dough five or six times and fold it over itself a few more times. The fold comes from just reaching under half the dough, stretching it out, and folding it over the remaining half. Repeat this process for just 30 seconds to 1 minute, alternating between cutting and folding. Then you can squeegee the doughy bits off your active hand with your clean hand.
At the end of the mix, measure the temperature of the dough with a probe thermometer. The goal is to create an environment that will kick-start fermentation; since we’re using such a scant amount of yeast, the dough temperature needs to be warm enough to speed up the yeast’s metabolic rate.
Write down the time your mix ended and the dough temperature. If the dough temperature is well below the target of 80°F (27°C)—for example, if it came out to 70°F (21°C)—then your dough is going to take longer to develop, and it would be a good idea to find a warm spot for it to bulk ferment. In my rise schedules, the amount of time to get the perfect dough development is based on a room at 70° to 74°F (21° to 23°C) daytime, 67°F (19°C) overnight. Dough expands faster in summer and slower in winter. The dough’s final mix temperature and the ambient room temperature, plus the amount of leavening, will determine the amount of development in the dough. Salt is a factor too, as it slows down the activity of yeast. I’ve figured out all of these elements for you, so don’t be concerned that you’ll have to work all this out on your own. But if you decide on a whim to try mixing a dough with cold water, know in advance that it’s not going to work on the schedule I list. It will take much longer. Use warmer or cooler water next time if your mix temperature was below or above 80°F (27°C).
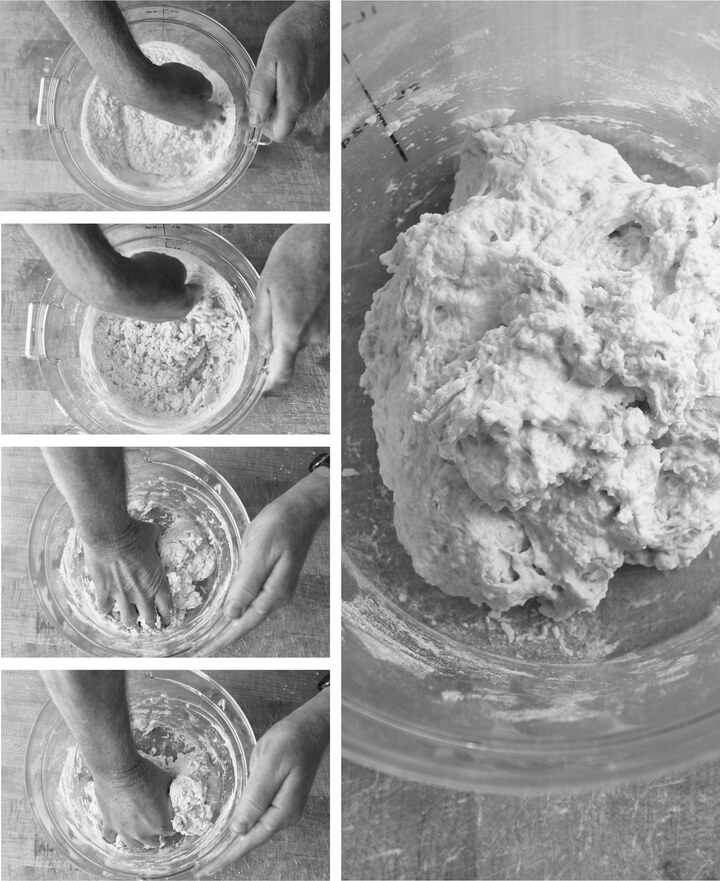
The dough in this book designed for pan pizzas, the Saturday Pan Pizza Dough, is a good place to start to learn the process. But you can go with any of the long-fermented dough recipes in this book to make a medium-thick pan pizza, like the Grandma Pie. Instead of dividing the dough into pieces to make up dough balls, shape the entire batch of dough into a single ball and then follow the remaining instructions for that dough.
Step 3: Knead the Dough and Let It Rise
Fifteen to 20 minutes after you finish mixing the dough, knead it to help the mass of dough come together. I find it easiest to do this on a countertop lightly dusted with flour. Using floured hands, reach under the dough and remove it from the dough tub onto the floured surface. Fold the dough over itself and turn, fold over and turn repeatedly, for just about 30 seconds, until the dough is in a unified mass with a smooth surface. This doesn’t really require one fixed set of motions to work. A general kneading and folding will do the trick—whatever gentle hand action molds the dough into a ball with a smooth surface. Lightly oil the bottom of the dough tub and place the kneaded dough back in the tub, seam side down. Let the dough ferment according to its recipe.
Step 4: Divide the Dough and Shape the Dough Balls
Lightly flour a work surface that’s about 2 feet wide. Set your digital scale nearby. Flour your hands and layer some flour inside the dough tub (it will help the sticky dough come out), around the back edge of the dough where it meets the tub. Don’t just pull the dough out; help it out, using your working hand to loosen the dough from its container. Tip the tub toward your floured countertop and work the added flour around the edges of the dough, using that to help prevent the dough from sticking too much to the tub as you very gently release it onto your countertop. All this care is to keep the gluten strands in the dough from tearing.
Spread a very thin film of flour over the top of the dough. Cut the dough into equal-sized pieces with a metal dough scraper, a rigid plastic bowl scraper, or a chef’s knife to weigh on the scale; eyeball it if you don’t have a scale. It’s best not to have a bunch of small pieces of leftover dough stuck together to make up a single dough ball. If you need to add a piece of dough to one you’ve already cut to bring up the weight, fold the additional dough into the middle as you shape the dough into a ball.
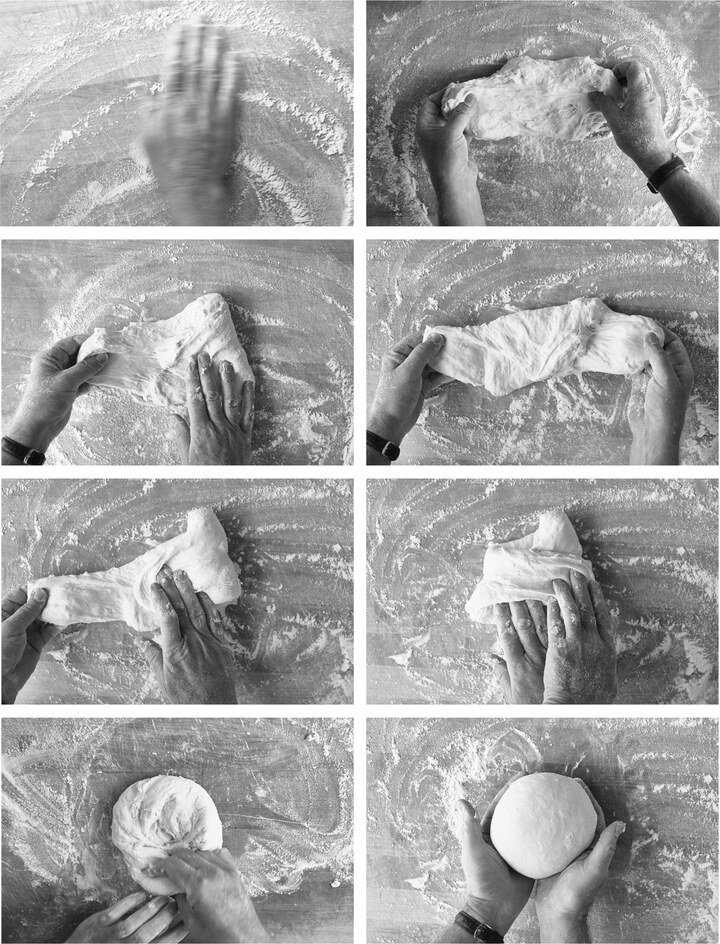
The Neapolitan and New York–style pizza recipes in this book tell you to divide the dough into three equal pieces between 260 and 285 grams each.
For Roman pizzas, you should divide the dough into five pieces of 150 grams each. If you don’t want that many dough balls, just cut the recipe in half.
For bar pizzas, the Bar Pizza Dough recipe yields four dough balls of 190 grams each.
To shape the dough balls:
1 Take a piece of dough and stretch one-third of it sideways until it resists, then fold it back over the main piece of dough. Repeat, working your way around the dough and forming it into a round. The emerging dough ball will develop tension and form a smooth outer skin as you repeat this folding action. Stop when the dough ball is in a roughly circular shape.
2 Then flip it over and put the seam on the work surface in an area cleared of flour (the clean, less-floured surface will provide more friction, or grip, so you can add tension to the dough ball in the next step).
3 Cup your hands around the back of the dough ball as you face it, and with the pinky fingers of both hands make contact with the dough ball where it meets the surface of your countertop. Pull the entire dough ball 4 or 5 inches toward you on the clean, unfloured surface, leading with your pinkies and applying enough downward pressure as you pull so the dough ball grips your work surface and doesn’t just slide across it. As you pull, the ball will tighten up.
4 Give the dough a turn and repeat this tightening step one or two more times until the dough ball is rounded. The dough doesn’t need to be super tight, but you don’t want it to be loose, either. You want to avoid any visible tears on the outer skin of the dough. Maximum dough tension is not necessary; all that’s needed is just a medium amount of tension in the skin of the dough ball.
5 Repeat the process with the remaining pieces of dough.
Step 5: Let the Dough Balls Ferment
In bread baking, vital flavor development and expansion happen during the bulk fermentation stage—after the dough is mixed but before it is shaped into individual rounds or oblongs. The best breads have a lengthy bulk fermentation—as long as 6 hours or even overnight.
The pizza recipes in this book are different, because the majority of the dough expansion and flavor development happen during the second stage of fermentation, after the pizza dough balls are shaped. Two things happen at this stage:
1 The dough balls completely relax after being cut off the main dough and shaped. Ultimately, the gluten will relax and the dough should be easy to stretch while remaining cohesive and retaining its tensile strength.
2 This is the second fermentation of the dough. Additional gas builds up, the balls expand, and the good flavors of fermentation build. This can happen at room temperature in some recipes or in the refrigerator in other recipes. Time does the work for you in this step. Every dough has its own arc for being at its prime point for making pizza. Recipe notes indicate the timelines for each dough.
3 After making up dough balls, lightly dust a baking sheet or a couple of dinner plates with flour. I can often find room for plates in my refrigerator more easily than a larger sheet pan. Put the dough balls on the pan or plates with a few inches between them to accommodate their expansion. Dust the tops with flour and cover with plastic wrap. I expect the dough balls to grow together a bit by the time they are mature. To separate, dust with a bit of flour at the seam between the dough balls and cut with a bench knife or the edge of a spatula through the seam to separate. Don’t tear them apart.
4 When and how to use refrigeration depends on the dough and its schedule. That’s why you will see some variation in my recipe instructions from one to another. The refrigerator is a great tool for slowing down dough when you need more time.
Step 6: Set Up Your Pizza Station
There’s no substitute for an organized workplace in the kitchen. It makes you feel more in control and therefore more confident. The pizza will be better as a result. Good organization will also give you an efficient timeline for dinner. So while your oven is preheating, set up your pizza assembly station. Prepare your toppings, such as cut-up and grated cheeses, salami, and basil leaves. If you haven’t made pizza sauce yet, do it now; it takes just a few minutes (see this page). Have the sauce with a large spoon next to where you’ll top your dough, along with the prepped toppings. Give yourself about 2 feet of width on the countertop to work with the dough, plus enough space for the pizza peel right next to the work area.
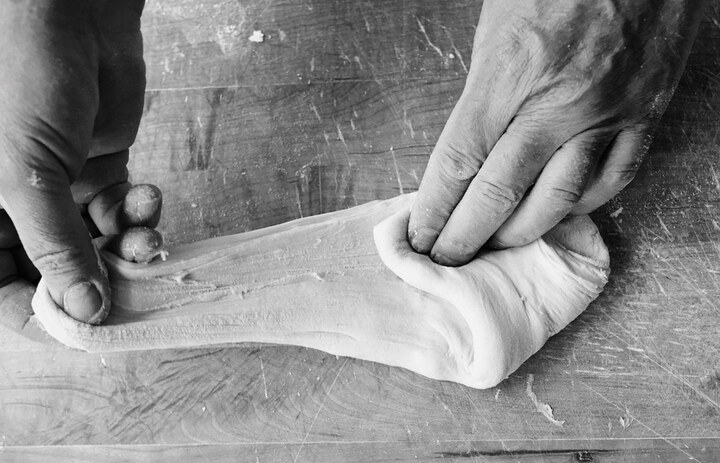
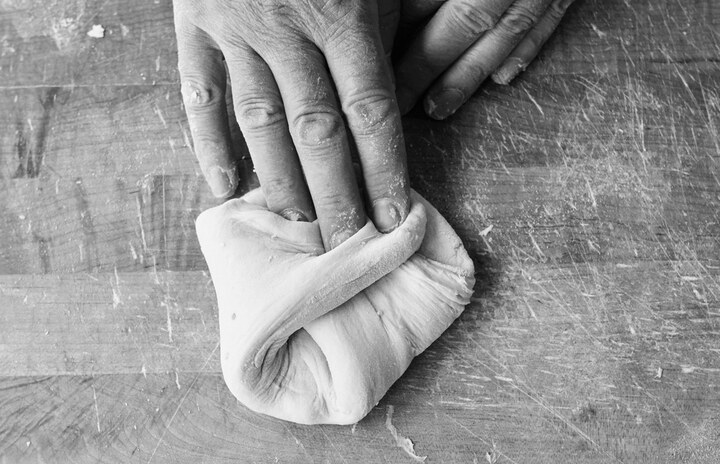
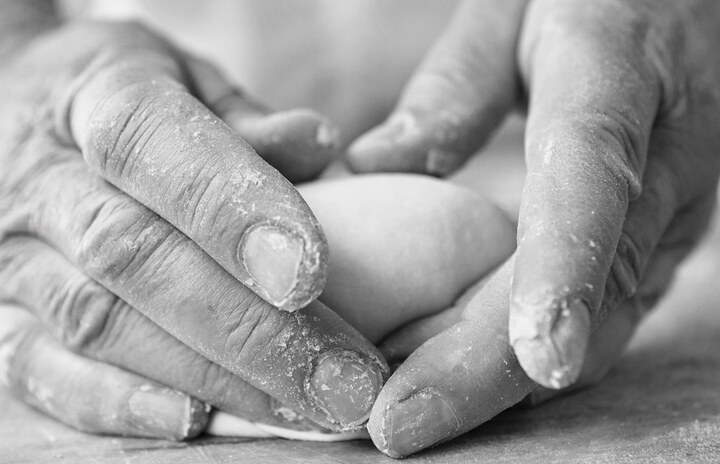
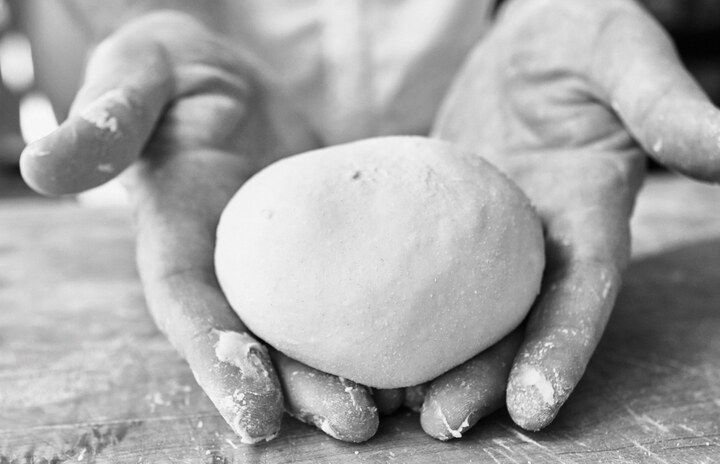
For hearth pizzas, shape the dough and place it on a lightly flour-dusted wooden peel (not metal; the dough sometimes sticks to metal peels), dress it, and then put it in the oven. In American and Italian pizzerias you will frequently see pizzaiolos dress the raw dough on their countertop, then use their hands to pick up the dressed pizza and drag it onto the peel, which is held slightly below countertop level to ease the transfer. At other pizzerias they slide the peel deftly under the dough. There are Italian metal pizza peels that have perforations in them to make this work better, so there is less surface area for the dough to stick to.
But transferring a dressed pizza from a countertop to a peel is really difficult to do without a lot of practice in a professional kitchen. This method also doesn’t work well with the softer pizza doughs I use in many of the recipes designed for home kitchen ovens. All in all, I find it easiest to dress the pizza after the dough has been transferred to a very lightly floured wooden peel. We use this technique at Ken’s Artisan Pizza and for flatbreads at Trifecta Tavern & Bakery.
Step 7: Stretch the Dough to Make Pizza
Pan pizza, Neapolitan pizza, New York pizza, and Roman pizza each have dough-stretching techniques that are ideally suited for their style. Use a rolling pin for thin, crackery, Roman pizza crust and for American bar pizza. Spread and stretch the dough out on an oiled pan for pan pizzas. Neapolitan pizzas and New York–style American pizzas are shaped by hand.
FOR NEAPOLITAN AND NEW YORK–STYLE
The traditional dough-stretching method used in Naples is fun to watch—check out some videos online. It is designed, I think, for both speed and quality. And because it looks really cool. Neapolitan pizza is thin in the middle but not too thin. If you look at pictures of pizza from some of Naples’s most famous pizzerias, you’ll see that many of them are saucy pies. The cheese is moist, too. If the crust is too thin, you risk a perforation in the dough, with the sauce and molten cheese leaking through it onto the baking stone or the floor of the oven, and that’s not a happy moment.
For this book, I’ve modified the traditional Neapolitan method (see sidebar) a bit, to better suit the doughs of this book, and to make it easier. This is the same dough-stretching method I used in my first book, and it’s a very common method I’ve seen used in pizzerias across the U.S.: stretching the dough out with fists balled up inside the dough. It works well with the soft doughs I use, and I continue to get my best results with this technique, whether I’m making New York– or Neapolitan-style pizza. Be careful not to leave the rim of the dough too thick; as the rim expands during baking it pushes all the toppings toward the middle. For stylistic purposes I compress the dough to create a narrow rim for New York–style pizzas, where toppings go almost to the edge, and I leave a slightly thicker rim, about ½ inch, for Neapolitan-style pizzas.
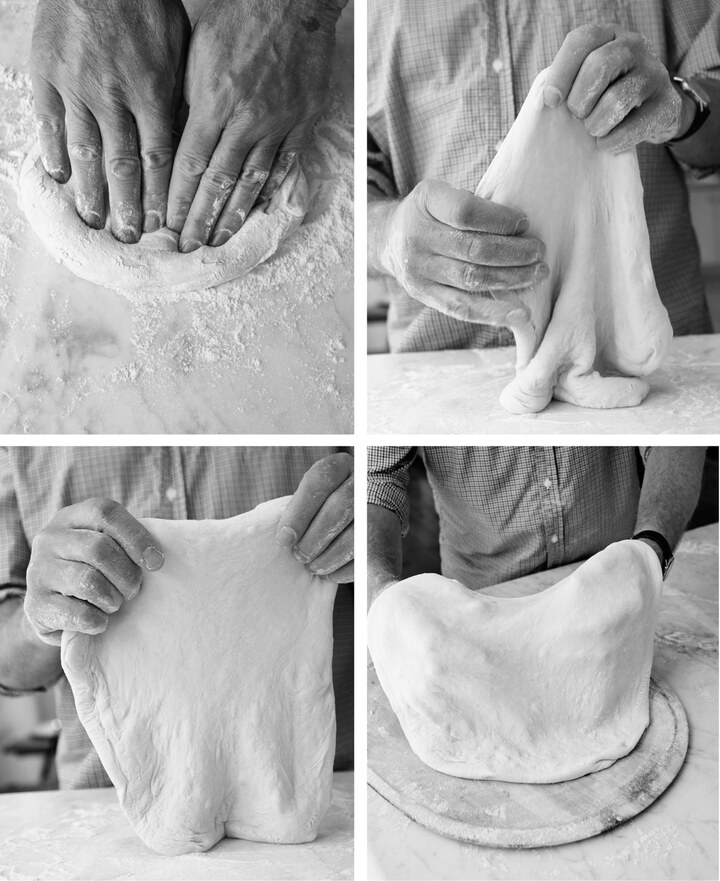
Set your pizza peel on the work surface next to where you are working your dough. A wooden peel is definitely best because the moist, unbaked pizza slides easier off a wood surface than a metal one. Lightly dust the peel with the same flour you used to make your pizza dough. Don’t use cornmeal or other coarse grains, as they interfere with the delicacy of the pizza. Very finely ground semolina flour is often used at good Neapolitan pizzerias, but it’s not necessary to seek it out just for the purpose of dusting your peel.
Make sure you are working with a mature dough ball, according to each recipe’s instructions. It should take very little effort for it to stretch out to the dimensions of a pizza. If it’s too elastic, the dough needs more time.
When working with the pizza doughs in this book, flour is your friend. Generously flour your work surface, then leaving about a ½ inch of the outer rim un-deflated, punch down the middle with your fingertips, pushing the air toward the rim of the disk, then flip the dough over and repeat. (The diameter of the rim of the pizza is determined here—if you want a more bready pizza with big, poofy rims, or if you want a narrow rim, this is the point where you make that happen.)
Using floured hands, grab the rim at about the 10 o’clock and 2 o’clock positions and lift so the crust hangs down vertically; preserve the outer rim by placing your thumbs about a ½-inch from the edge for a Neapolitan-style pizza, or a ¼-inch from the edge for a New York–style pie. Let gravity pull the rest of the dough down to stretch it. If the dough is stretching easily I let the bottom of the dough rest on the counter while I’m turning it so I can control the speed and evenness of its expansion. Run the rim between your hands, working all the way around the circumference of the dough a couple of times. You can work as slowly as you want. If the dough gets sticky, set it down and give both the top and the bottom another dusting of flour. The easiest way to do this is to keep a floured area on your work surface and just plop the dough down onto the flour, then turn it over to dust the other side.
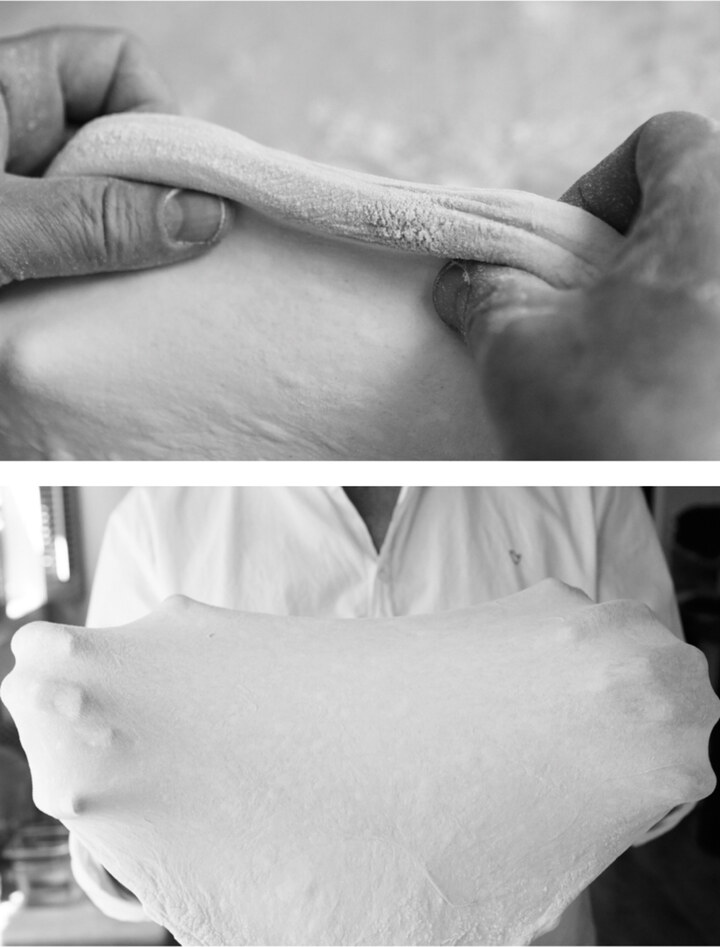
Next, make two fists and position them just inside the rim, with the crust still hanging vertically. Gently stretch and turn the dough repeatedly, letting the bottom of the dough pull down, expanding the surface. Keep a close eye on the thickness of the dough. There is no benefit to overstretching it—when it’s done, it’s done, and then you lay it onto the flour-dusted peel. You want the dough thin, but you don’t want it so thin that it tears or can’t support the weight of the toppings. If you end up with a small tear, don’t panic—it’s okay to patch it by folding a small bit of dough over the hole. The dough balls in this book are designed to give a proper thickness when shaped to a diameter of 12 inches for a New York–style pie, and a bit smaller (closer to 11 inches) for a Neapolitan-style pizza.
Note that at a good pizzeria, they might stretch the dough to where it is hanging over the edge of the loading peel before lifting the edges to fit it back on. This removes any elasticity from the dough, for predictable baking without shrinkage.
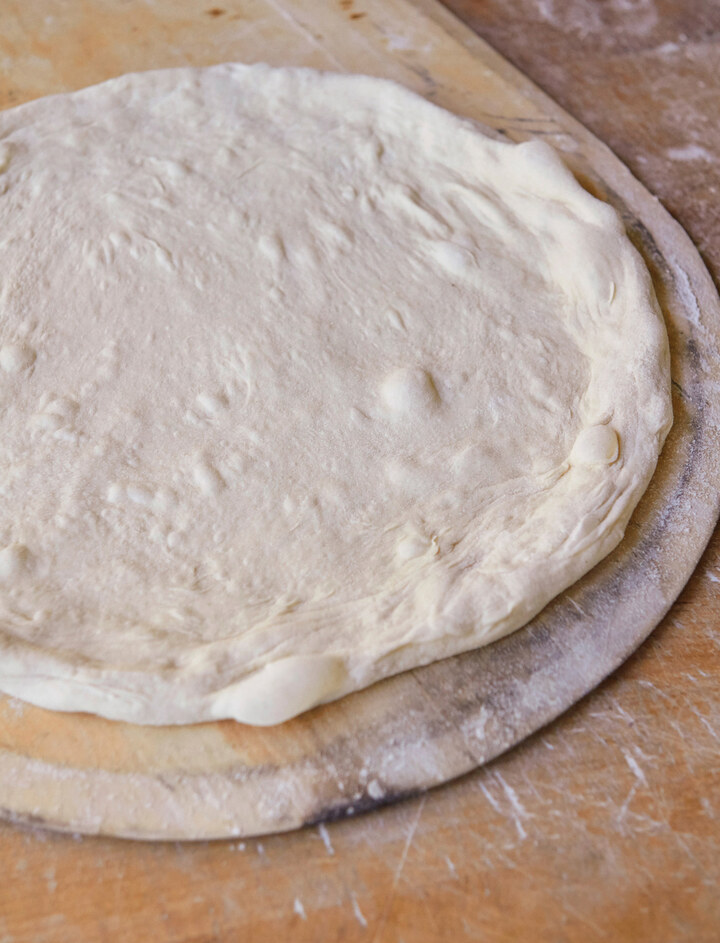
In Italy, pizzaiolos traditionally shape the dough on a floured countertop, first compressing the dough ball before following it up with a “Neapolitan slap.” The dough is pushed gently with all the fingers, from the middle to the rim, then flipped, then the dough is flattened from the middle to the rim again. The goal is to move the gas to the perimeter of the crust. As Enzo Coccia of La Notizia put it, “The hands are essential. You have to push the air out and create that really high, fluffy outer crust.” Then the dough is stretched in a rapid two-handed motion that expands the dough with one hand while the palm of the other hand holds down the other half and the dough makes a light slapping sound. There is a slight turn each time the dough is passed from hand to hand to stretch the dough gently with each motion. With each turn it grows a bit in width and the pizza becomes fully formed. Three to five slaps of the dough from hand to hand is all it takes for these folks. I think there is a special gene in Naples for this.
PAN AND PARCHMENT METHOD FOR ROMAN AL TAGLIO AND PAN PIZZAS
Roman bakery pizzas bake on the hearth of deep deck ovens that are also used to bake bread. The tops of these pizzas have oil and salt (and tomato for the rossa), but the bottoms remain dry. Thus, the design challenge for home baking is to create a hearth pizza with no oil or fat underneath the dough while also using a pan. How, then, do we prevent the dough from sticking to the pan? Easy. Use parchment paper, and, to keep it in place, a trick we sometimes use for pastry in my bakery; water acts like a temporary glue for the parchment. Here’s how:
1 Spray a very thin film of water on the sheet pan; if you don’t have a sprayer, spread a thin layer of water on the pan with your hands.
2 Cut a piece of parchment to size, place it on the watered sheet pan, and seal it with your palms, moving from the center of the pan to the edges. It works!
3 Remove the plastic film from the dough and spread a medium dusting of white flour over the top of the dough to keep it from sticking to the parchment.
4 Invert the plate of dough onto the middle of the sheet pan.
5 With floured hands and fingers, reach underneath the dough and gently pull it to the edges of the pan in each direction. Only stretch the dough to its point of resistance. Let it relax for five minutes, and repeat until the dough is shaped to the dimensions of the sheet pan.
ROLLING PIN METHOD FOR ROMAN-STYLE AND AMERICAN BAR PIZZAS
We use this method at Trifecta Tavern & Bakery and I like how thin we get the dough. To make the same size pizza as the Neapolitan and New York pizzas, about 12 inches in diameter, we use half the amount of dough you would use to make Neapolitan or American pizza crust. Flour is essential to keep the dough from sticking to the work surface or to the rolling pin. Use a wooden rolling pin (the dough is less likely to stick compared to rolling pins made of stone or metal), ideally without handles, between 1 and 2 inches in diameter. Any rolling pin will do, but I prefer the feel and closer connection to the dough when my hands are on the pin itself rather than on the handles.
Dip both sides of the dough ball in flour and place it on a lightly floured surface, dusting the top of the dough ball moderately with more flour. Using a rolling pin, press down from the middle to the outer edges, rolling over the edges in each direction, turning the dough as you go. Do not try to preserve the rim; go over it with the pin, pressing down.
Flour is your friend here. Do not be shy about using it to prevent the dough from sticking to the surface or the pin from sticking to the dough.
If the dough is elastic and doesn’t stretch as far as you want it to, just let it rest for a few minutes and then go back to it. This is the normal situation in my kitchen.
Work the dough with the pin until it is very, very thin—like a piece of paper for Roman-style pizza or like a piece of cloth for bar pizza.
Step 8: Top the Pizza and Load It into the Oven
Spread the dough onto the lightly floured peel, running your hands around the perimeter to shape it into a round and work out any kinks. Before topping the pie, give the peel a test shake to make sure the dough slides without sticking. If it does stick, remove the dough, dust the peel a little more generously, and give it another go.
Once you’ve shaped the dough, spread your sauce over it—not too thickly—using a small ladle or a large serving spoon, smoothing and spreading the sauce with the back of the utensil. Scatter the toppings over the surface, using only moderate amounts (all the toppings in this book’s recipes were carefully measured, so you can use the ingredient amounts by weight with confidence) so as not to add more weight than the dough can handle. Dressing the pizza should take into consideration how much crust you want to remain free of sauce and toppings. A typical New York pizza is dressed almost to the edge, while a Neapolitan pizza preserves more of the rim.
Before sliding the pie into the oven, do another test to confirm that the pizza will slide off the peel: give the peel a quick shake, but not too aggressively. If any part of the dough sticks, first try working it out with a few more quick back-and-forth shakes. If that doesn’t do the trick, you’ll need to gently lift the dough up and toss a bit of flour underneath. Yes, this is a pain, but it’s better to find out in advance and deal with it than to have your pizza do a belly flop into a super-hot oven.
Loading the pizza from the peel onto the baking steel or stone takes a little practice, but it shouldn’t be out of your reach, and again, try the first couple times loading an untopped pizza into your oven, or parbake it with just a bit of sauce. It takes the pressure off. Have an extra ball of dough on hand—the recipes make three dough balls, and you can view your first pizza as a test pie, so you can get the feel of the peel and how to transfer the pie to the pizza steel or stone, and also see what happens after you put it in the oven. After a minute or so, you can remove the test pizza crust, top it, and place it back into the oven to finish. If it’s plain and unsauced, the middle will bubble up, so pull it out after just 45 to 60 seconds in the oven.
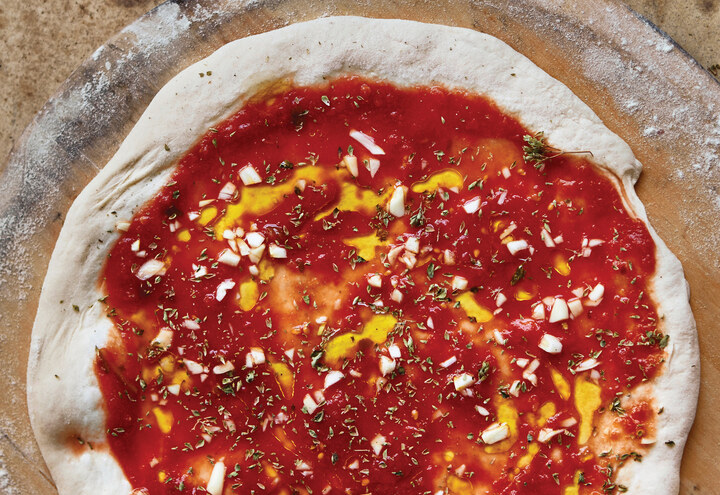
There are two techniques for loading the pizza onto the steel or stone. With both, as you are reaching into the oven with the peel, the dough will come off much more easily and predictably if the handle of the peel is held a few inches higher than its front.
One technique is to place the peel with the pizza on top all the way into the oven, with its leading edge at the back of the stone. Then in a series of stuttered shakes, slowly work the peel back toward you, releasing the raw pizza onto the preheated surface. You need confidence to make this technique work—this is a good one to practice the first time or two with an undressed disk of stretched dough for a quick parbake. With the practice pies, you might learn that you can actually nudge it around a bit if needed, or that it’s okay if a lip of the dough overhangs the baking steel by a ½-inch.
The second technique is the one that probably works best, once you’ve done it a few times and get the knack. Give the peel a couple of quick, easy back-and-forth shakes before loading it, so you can get a sense of control over the sliding of the pizza. Then reach the loaded peel, slightly tilted, into the oven to the point where the front edge of the peel is aligned with the very back of the baking steel. At that moment, and without hesitation, quickly pull the peel back toward yourself in a controlled jerk. You have to commit to this completely—it reminds me of Julia Child’s “confidence-is-required” instructions for flipping an omelet: a half-effort might not work. Once you master this with raw, undressed dough, you will be able to load a fully dressed pizza this way.
Practice loading an undressed disk of dough from your peel onto your countertop instead of into the hot oven, to get the feel for how it slides off the peel. It’s easy to do this over and over until you have the confidence you need.
Step 9: Bake the Pizza
Here’s the basic drill for the five categories of pizza in this book.
NEAPOLITAN, ROMAN THIN CRUST, AND NEW YORK PIZZAS
Preheat the oven to its maximum temperature—550°F (290°C) is very common—with the pizza steel or stone set on an upper rack about 8 inches below the broiler coil, for 45 minutes total. This timeline allows the oven to be fully saturated with heat, and it will bake the pizza better than if you just preheat it to reach the temperature.
Switch the oven to broil about 10 minutes before loading the pizza. Meanwhile, shape the pizza and top it. After 10 minutes on broil, turn the oven off and load the pizza onto the pizza steel or stone. (See Note, below.) Close the oven door and return the oven to its maximum bake temperature. Set the timer to 5 minutes (usually, but check the specific recipe instructions). If one side of the pizza is baking faster than the other side, use a pair of tongs to rotate the pizza, turning the front to the rear.
If the recipe specifies it, switch the oven back to broil and set the timer to 2 minutes, but check after 1 minute and remove the pizza when it’s finished.
If you are going to make more than one pizza, pull the oven rack out (so you don’t risk burning yourself on the broiler element) and use an oven mitt or folded-over thick kitchen towel to quickly but very carefully wipe the left-behind, burned flour from the pizza steel or stone onto a plate; discard it.
Set the oven to broil to reheat the steel or stone for a few minutes while you prep the next pizza. Bake as before, turning off the broiler to load the pizza, then returning the oven to bake at its highest temperature once you’ve closed the door.
Remember the goal: The toppings, bottom of the crust, and rim should all reach their point of perfect baking at the same instant. You may need to play with the position of the baking stone or steel; try it at the topmost rack spot or the second down from the top, to get the best results. Every oven is different.
Note: Some ovens, like mine, will wig out if you switch from an extended broil cycle to bake, because they sense a higher temperature than their maximum baking temperature, and then a safety shut-off throws the breaker. So I wait until I have opened the oven to load the pizza before returning the oven setting to bake at 550°F (290°C). Having the door open for the brief period of loading the pizza releases enough heat to keep my oven’s high temperature limit switch from kicking in.
ROMAN AL TAGLIO AND PAN PIZZAS
Bake it in the middle rack, with the pan sitting on top of the pizza steel or stone, for about 15 minutes or until it is golden brown (check progress at 10 minutes and turn the pan). It should be lightly bubbled. You always have the option of finishing the pizza out of the pan, directly on the steel or stone if the bottom of the pizza needs more color, as long as the pan wasn’t coated with oil (smoke alarm!). Your kitchen’s going to have a beautiful yeasty aroma and your housemates are going to love you.
GETTING TO KNOW YOUR OVEN
Ovens have their own personalities, and it often takes a little bit of experimentation to learn how to perfectly bake a pizza in each one. The timelines for baking pizza using this book’s recipes work in the standard home kitchen oven I have in my kitchen, a Frigidaire (I love the irony of that brand name). When I define a bake time of 5 minutes at 550°F (290°C), then 2 minutes on broil, you might need 5 minutes of bake time followed by 3 minutes on broil if your broiler takes longer to heat up than mine does. The final stage of baking moves very fast at the broil stage, and if you pay attention, you’ll be on top of it and will pull it out when it’s ready. I used a baking steel to test all of my recipes, positioned on a rack 8 inches below my oven’s broiler coil. You might need to adjust the rack position differently in your oven to get exactly the pizza you want. The best bake my oven allows might be a little different than the best bake your oven allows.
I don’t have one checklist for proper baking that applies to all pizza styles. I go for more spots of dark color on the crust of a Neapolitan-style pizza than for a New York pizza, for example. For a pan pizza I want to make sure the crust is fully baked and that the bottom has enough color and crispness to keep it from being too soft. I frequently finish baking a pan pizza directly on the pizza steel or stone to crisp it up.
The bottom of the oven will usually have the most heat applied to the bottom of a pan, so a pan loaded on a bottom rack might scorch the underside of the crust before the rest of the pizza is fully baked. Or, if you are baking two pans at once, one above the other, you might want to switch rack positions halfway through baking.
If you have the mind-set to go through a little bit of trial and error as you bake pizza, you will quickly figure out exactly how to bake good pizza consistently in your unique environment. When the pizza’s bottom, toppings, cheese, and rim all reach their perfect finish point at the exact same instant, you have a perfectly baked pizza.
EXTRA DOUGH BALLS
Most of the dough recipes in this book are based on 500 grams of flour and make enough dough for three Neapolitan or New York–style pizzas, or for five Roman-style thin-crust pizzas. You may not want to make this much pizza in one night. What to do with the extra dough balls?
You could refrigerate the dough and make pizza again the next day or night.
You can freeze extra dough balls, floured and tightly wrapped in plastic. Give them 24 hours to thaw in the refrigerator before using, and then remove them from the refrigerator a couple of hours before making pizza. It’s a good idea to date the frozen dough balls (use tape and a Sharpie) and use them within a week or two from freezing—too long in the freezer will kill the yeast and your dough will be fairly lifeless.
Another option is to make your own pizza shells that you store for next time: parbake the dough with just sauce and then freeze it, wrapped airtight in plastic. (If you want to see a recipe for parbaked crust and how to make pizza with it, check out the Pepperoni, Mushroom, and Onion pizza recipe.)
Storing parbaked pizza shells is a good option to prepare for impromptu meals or snacks. You can parbake the crust and immediately top it while it’s still warm, then bake it to finish (you can parbake an hour ahead of time), or you can parbake unused dough balls, then wrap and freeze for later use somtime in the next week or two. The frozen shell can thaw while your oven is preheating. Top the pizza dough with 50 to 60 grams (¼ cup) of pizza sauce. Slide the pizza onto a preheated pizza steel or stone, bake for 3 minutes, change the oven setting to broil, and remove the parbaked crust after 2 minutes more.
If you just want enough dough to make a single pizza, use the Single Dough Ball recipe. If you just want two pizzas, double that recipe. All of the recipes in this book will scale up or down; just retain the ratios and do the simple math to get you there.
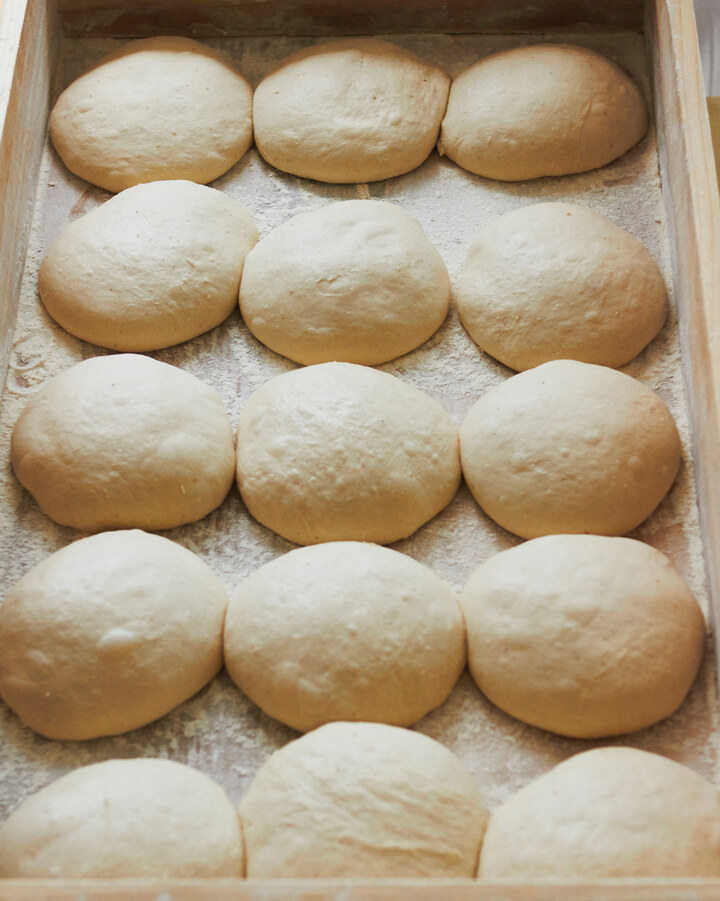
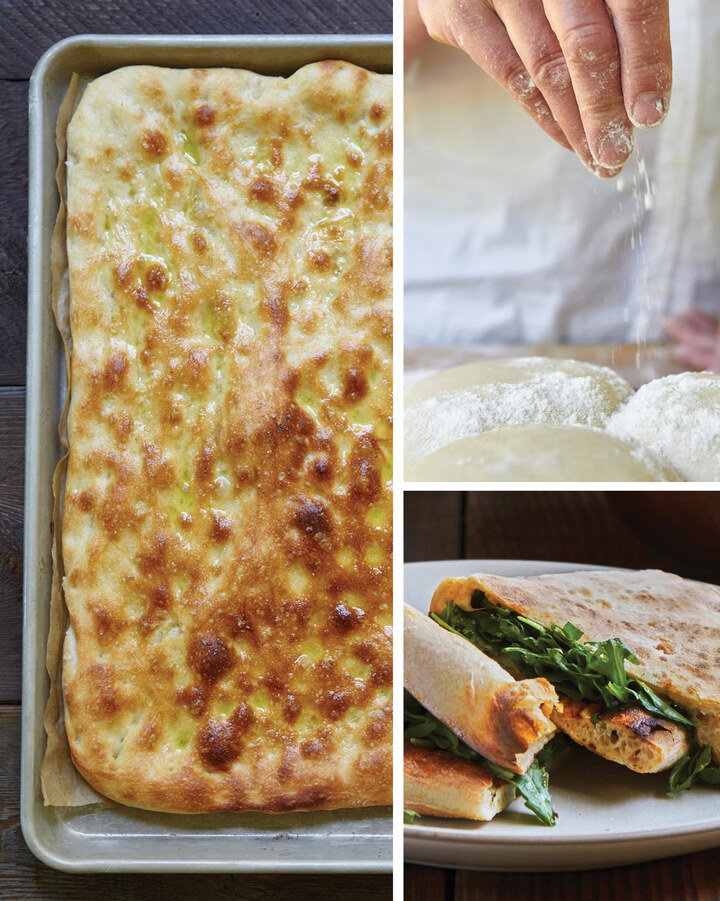
CHAPTER 6
PIZZA DOUGH RECIPES
I could present you with instructions for just one or two simple pizza doughs and then give you a bunch of recipes for pizzas to make, but the fun of this book is that it includes a wide variety of doughs to match different pizza styles, skill levels, and life schedules.
There are many styles of pizza and many ways to make pizza dough. The same basic dough-making techniques apply to all the dough types in this book, so moving from one dough recipe to another uses experience you’ve already gained. The only variance is that a couple of the stiffer doughs are most easily made with a stand mixer or food processor.
People have asked what doughs I used the most and liked the most as I was recipe testing for this book. I found the 24- to 48-hour refrigerated dough to be the most convenient for my own life schedule. I’d mix the dough after coming home midevening from my restaurants, and 2 hours later, just before going to bed, I would make up dough balls and refrigerate them to make pizza the next evening or the evening after. The results were excellent and it seemed effortless. The first time I tried the Saturday Pizza Dough, I was wowed by how delicate the crust was, and friends I shared that dough recipe with had the same comment. My favorite dough overall for texture and flavor is the Overnight Levain Pizza Dough, and I make this on my weekend, as it wants me home around lunchtime to make up dough balls. Every dough here makes excellent pizza. Small amounts of yeast and long fermentation make great contributions to texture, color, and flavor. I’m expecting you’ll choose your dough based on the schedule that works within what you’ve got going on, but I encourage you to try others so you can discover the subtle differences on your own.
The active time to make pizza dough is simply the time it takes to measure the ingredients with a scale (which is faster and more accurate than using cups and measuring spoons) and mix by hand—about 5 minutes total. Then you let it rest for 15 to 20 minutes and knead the dough very briefly, 30 seconds to a minute. The dough rises in the same 6-quart dough tub you used to mix it. There is a relatively short rise for the bulk dough, usually 2 hours, and then you make up dough balls. The elapsed rise time for the dough balls is 4 to 72 hours, depending on the recipe.
I’m not using the autolyse process that I promoted for bread doughs in Flour Water Salt Yeast, as explained on this page, as it’s not commonly used in the pizza world. The brief knead after mixing and resting suffices to get the dough to come together as a cohesive ball with a smooth surface. I found this approach more effective for pizza than folding the dough inside the tub, as in my first book—this remains entirely appropriate for bread, so don’t stop folding your bread dough! Remember, pizza is not the same as bread.
Why such a long time to make a simple dough? Pizza dough, like bread dough, beer, or wine, is a product of yeasted fermentation. Time is the critical ingredient that allows a complex community of flora to build up in the dough and make it taste good. These are yeast and bacteria as well as acids, esters, and other natural by-products of fermentation. Time also allows for a slow buildup of fermentation gases. Good flavors in a leavened dough take time and happen while you are doing something else.
NEAPOLITAN AND ROMAN-STYLE PIZZAS Use the Saturday Pizza Dough, the “I Slept in but I Want Pizza Tonight” Dough, Enzo’s Pizza Dough, the 24- to 48-Hour Pizza Dough, the 48- to 72-Hour Biga Pizza Dough, or the Overnight Levain Pizza Dough.
NEW YORK STYLE Use the 48- to 72-Hour New York Pizza Dough principally, but any of the other doughs except the Saturday Pan Pizza Dough or the Bar Pizza Dough work well too, especially if you want a little extra poof in the rim.
PAN PIZZA Start with the Saturday Pan Pizza Dough, then once you have that, adapt any of the other doughs per the instructions on this page.
BAR PIE Use the Bar Pizza Dough.
AL TAGLIO PIZZA Use the Al Taglio Pizza Dough specifically designed just for the al taglio Pizza Bianca and Pizza Rossa.
Many of the great pizzerias in the U.S. and Italy produce a single kind of dough—one optimized for the style of pizza it makes and the oven it uses. Pan pizzas are best when made with a soft, slack dough, softer than regular pizza dough, which results in a nice, light crumb. Hearth pizzas benefit from a slightly stiffer dough (with not as much water) that matches the desired texture of the pizza, the type of oven, and the temperature the pizza will bake at. The texture of the dough is intended to give just the right level of stretchability without holes forming in the disk of dough. The staff at a pizzeria becomes so intimate with their dough (heck, it’s the same thing every day) that the pizzaiolo need only take a quick glance at any stage to know whether it’s “ready”: whether any water needs to be added to get the right texture of the dough; whether the mix is done; whether it’s fully fermented and ready to be cut and shaped into dough balls; whether the dough ball is relaxed enough to shape into a pie.
READING THE RECIPE TABLES
Ingredients are listed in the order in which they are used. Most of the pizza dough recipes in this book are direct doughs; that is, with no pre-fermented dough or levain added. There is one biga recipe and one levain recipe, both of which have an extra step to show how much of each ingredient is included in the pre-fermented dough and in the final dough. Here’s a quick explanation of the information in the different columns of the dough recipe tables.
Quantity
This column gives the weight of each ingredient you’ll put in your 6-quart tub for the dough mix. All the amounts you need to know are repeated in the recipe steps for ease of use. Again, you will get the best results measuring ingredients by weight, not volume. However, for convenience, I have also included approximate volume measurements of the ingredients you will need to make the dough.
Baker’s Percentage
All ingredient weights are shown as a percentage of the total weight of flour in the recipe. For example, if the recipe has 500 grams of flour and 350 grams of water, then the hydration of the dough is 70 percent. Looking at the ingredient percentages lets you quickly see the entire recipe’s ratios, a valuable metric for understanding the dough.
PAN PIZZAS
Making the dough for pan pizza can be more like the process for making bread than other pizzas—in one respect at least. For bread doughs there is a long first fermentation before the dough is shaped into loaves; for hearth-baked pizzas, like Neapolitan or New York–style pizzas, you make dough balls only about 2 hours after the dough is mixed, then give them a long second fermentation.
The challenge with pan pizza, which is baked in an oiled pan, is that if the dough spends too much time on the pan before baking (for example, all day, or overnight in the fridge), the dough will absorb the oil underneath it, and the pizza might stick to the pan while it bakes. (I discovered this for you, and cleaning that pan wasn’t much fun.) Therefore, if you use a dough recipe for pan pizza that has a long second rise, such as the 24- to 48-Hour Pizza Dough, make up one large dough ball from the entire batch and let it rise on a covered dinner plate or large bowl in the refrigerator as you would for regular dough balls. Then move the dough to an oiled pan as a final step, instead of going for the entire second rise on the pan. These long doughs will have more flavor from fermentation and will be a little more delicately textured than the same-day dough, but you’ll need to give them time to warm up so they can stretch out easily to the shape of the pan and not contract while baking (see instructions below).
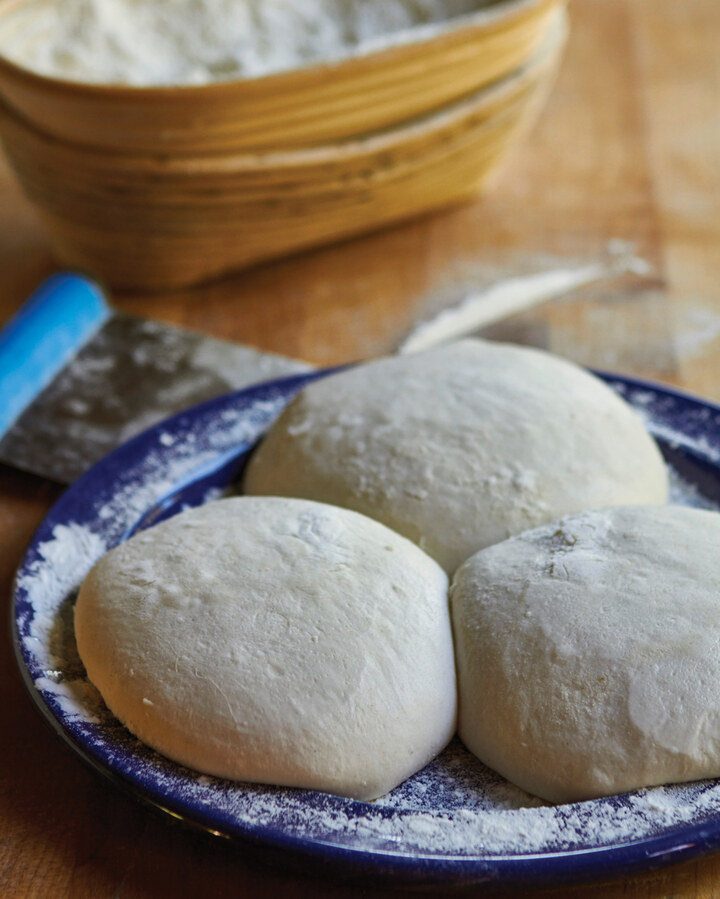
The fat under the dough, whether it’s olive oil, bacon fat, lard, or duck fat, flavors and crisps (some in the pizza business may even say fries) the underside of the dough while it bakes.
The dough recipes in this book make enough dough for a 13 by 18-inch half sheet pan, which fits comfortably in a standard home kitchen oven. Using pans of different sizes will yield thicker or thinner crusts, so you might want to adjust the amount of dough you use depending on the pan.
First-timers should start with the Saturday Pan Pizza Dough recipe, which has a 4-hour first rise and then just 30 to 45 minutes on an oiled or greased pan before baking. This is easy and good.
The possibilities for pan pizzas are endless. You can use a 275- to 300-gram dough ball from one of the hearth pizza recipes and roll it out very thin with a rolling pin to get a thin-crust pan pizza (see the Simple Tomato Pie recipe). These are great! Or, I like to riff and make what I call a strip pizza, taking a 275-gram dough ball and rolling it out into an oval shape—bake that on a pan lined with parchment.
Adapting Dough Recipes for Pan Pizza
You can adapt any of the refrigerated non-Saturday dough recipes in this book for pan pizzas. Here’s how:
1 Increase the total amount of water in the dough to 75 percent of the flour weight: 375 grams of water for 500 grams of flour (most of these dough recipes use 350 grams of water).
2 Instead of dividing the dough into dough balls after its first rise, take the entire mass of dough, form it into one large dough ball, place it on a lightly oiled dinner plate, and cover it in plastic.
3 Follow the rest of the schedule for that dough, up to the point when you are preparing to make pizza.
4 Ninety minutes ahead of time, spread the cold dough out onto an oiled or greased pan, cover with a very light film of olive oil to prevent it from drying, and let it sit out in a warm spot (cold tightens up the gluten in the dough, so it needs a little time and warmth to relax). The dough will need two or three stretches to reach the size of the pan. Give it at least 10 minutes between each stretch and don’t push it beyond what it’s willing to give. There’s time.
5 Forty-five minutes before baking, preheat the oven and baking steel or stone to 550°F (290°C).
6 Top the pizza with a very thin layer of sauce and parbake, or top it completely, with the cheese under the sauce, and bake, with the pan set on the steel or stone, until done.
SATURDAY
PIZZA DOUGH
BULK FERMENTATION 2 hours
DIVIDE, SHAPE, AND COVER DOUGH 10 minutes
SECOND FERMENTATION 6 hours
HOLD TIME FOR USE AT ROOM TEMPERATURE 4 hours, or refrigerate to extend the use until the next evening
SAMPLE SCHEDULE Mix the dough at 9 a.m., knead it at 9:20 a.m., shape it into dough balls at 11:00 a.m., make pizza between 5:00 p.m. and 9:00 p.m. For next-day pizza, refrigerate the dough balls 4 hours after they are made up, then leave them out at room temperature for 1 hour before making pizza.
| INGREDIENT |
QUANTITY |
BAKER’S % |
|
|
Water |
350g |
1½ cups |
70% |
|
Fine sea salt |
15g |
2¾ tsp |
3.0% |
|
Instant dried yeast |
0.3g |
⅓ of ¼ tsp |
0.6% |
|
White flour, preferably 00 |
500g |
Scant 4 cups |
100% |
“I SLEPT IN BUT I WANT PIZZA TONIGHT” DOUGH
BULK FERMENTATION 1½ hours
DIVIDE, SHAPE, AND COVER DOUGH 10 minutes
SECOND FERMENTATION 4 hours
SAMPLE SCHEDULE Mix the dough at 11:30 a.m., shape into dough balls at 1 p.m., make pizza that evening anytime between 5 and 7. Refrigerate if you need the dough balls to hold a bit longer; let them come to room temperature before making pizza.
|
INGREDIENT |
QUANTITY |
BAKER’S % |
|
|
Water |
350g |
1½ cups |
70% |
|
Fine sea salt |
10g |
Scant 2 tsp |
2.0% |
|
Instant dried yeast |
0.5g |
½ of ¼ tsp |
0.1% |
|
White flour, preferably 00 |
500g |
Scant 4 cups |
100% |
SINGLE DOUGH BALL
FIRST FERMENTATION 2 hours
SHAPE AND COVER DOUGH 10 minutes
SECOND FERMENTATION 6 hours
HOLD TIME FOR USE AT ROOM TEMPERATURE 4 hours, or refrigerate to extend the use until the next evening
SAMPLE SCHEDULE Mix the dough at 9 a.m., knead it at 9:20 a.m., shape into dough balls at 11 a.m., make pizza between 5 p.m. and 9 p.m. or the next day; for next-day pizza, refrigerate the dough ball 4 hours after it is shaped, then let sit out at room temperature for 1 hour before making pizza.
|
INGREDIENT |
QUANTITY |
BAKER’S % |
|
|
Water |
116g |
Scant ½ cup |
70% |
|
Fine sea salt |
5g |
Scant 1 tsp |
3.0% |
|
Instant dried yeast |
0.1g |
1/10 of ¼ tsp |
0.6% |
|
White flour, preferably 00 |
166g |
1⅓ cups |
100% |
ENZO’S PIZZA DOUGH
BULK FERMENTATION 20 minutes
DIVIDE, SHAPE, AND COVER DOUGH 10 minutes
SECOND FERMENTATION 10 hours
SAMPLE SCHEDULE Mix the dough at 9 a.m., rest for 15 minutes, knead again for 5 minutes, divide and shape into dough balls at 9:40 a.m., make pizza that evening anytime after 8.
|
INGREDIENT |
QUANTITY |
BAKER’S % |
|
|
Water |
350g |
1½ cups |
70% |
|
Fine sea salt |
13g |
Scant 2½ tsp |
2.6% |
|
Instant dried yeast |
0.1g |
1/10 of ¼ tsp |
0.02% |
|
White flour, preferably 00 |
500g |
Scant 4 cups |
100% |
SATURDAY PAN PIZZA DOUGH
BULK FERMENTATION 4 hours
SPREAD OUT ON A SHEET PAN 5 minutes
SECOND FERMENTATION 30 minutes
SAMPLE SCHEDULE Mix the dough at noon, spread it into the pan at 4 p.m., parbake at 4:30 p.m., and make pizza that evening.
|
INGREDIENT |
QUANTITY |
BAKER’S % |
|
|
Water |
375g |
1½ cups + 4 tsp |
75% |
|
Fine sea salt |
11g |
Scant 2 tsp |
2.2% |
|
Instant dried yeast |
2g |
½ tsp |
0.2% |
|
White bread or 00 flour |
500g |
Scant 4 cups |
100% |
|
Olive oil |
75g |
5 tablespoons |
|
|
Tomato sauce (smooth) |
200g |
¾ cup |
|
24- TO 48-HOUR PIZZA DOUGH
BULK FERMENTATION 2 hours
DIVIDE, SHAPE, AND COVER DOUGH 10 minutes
SECOND FERMENTATION 16 to 48 hours, refrigerated
SAMPLE SCHEDULE Mix the dough at 7 p.m., shape it into dough balls at 9 p.m., cover and refrigerate, make pizza the next evening (optimal) or the day after that (still very good).
|
INGREDIENT |
QUANTITY |
BAKER’S % |
|
|
Water |
350g |
1½ cups |
70% |
|
Fine sea salt |
13g |
Scant 2½ tsp |
2.6% |
|
Instant dried yeast |
1.5g |
¾ of ½ tsp |
0.3% |
|
White flour, preferably 00 |
500g |
Scant 4 cups |
100% |
48- TO 72-HOUR BIGA PIZZA DOUGH
BIGA FERMENTATION 12 to 14 hours
MIX FINAL DOUGH 10 minutes; knead 20 minutes later
FINAL DOUGH FERMENTATION 45 minutes
DIVIDE, SHAPE, AND COVER DOUGH 10 minutes; let rest at room temperature for 2 hours
SECOND FERMENTATION 36 to 60 hours in the refrigerator
SAMPLE SCHEDULE Mix the biga at 8 p.m., mix the final dough at 8 the next morning, shape into dough balls at 9 a.m., refrigerate at 11 a.m., and make pizza any time the next day. The dough will hold for an additional 24 hours.
BIGA
|
INGREDIENT |
QUANTITY |
|
|
|
Water |
165g |
⅔ cup + 1½ tsp |
|
|
Yeast |
0.2g |
⅕ of ¼ tsp |
|
|
White flour, bread flour, or Caputo red bag 00 flour |
250g |
2 cups |
|
FINAL DOUGH
|
INGREDIENT |
QUANTITY (FINAL MIX) |
BAKER’S % (TOTAL RECIPE) |
|
|
Water |
185g |
¾ cup + 1½ tsp |
70% |
|
Fine sea salt |
13g |
Scant 2½ tsp |
2.6% |
|
Instant dried yeast |
0 |
0 |
0.04% |
|
White flour, preferably 00 |
250g |
2 cups |
100% |
|
Biga |
415g |
All from recipe above |
50% |
48- TO 72-HOUR NEW YORK PIZZA DOUGH
BULK FERMENTATION 2 hours
DIVIDE, SHAPE, AND COVER DOUGH 10 minutes
DOUGH REFRIGERATION 48 to 72 hours
SAMPLE SCHEDULE Mix dough at 7 p.m., shape into dough balls at 9 p.m., and make pizza two days later (optimal) or on the third day (still pretty good).
|
INGREDIENT |
QUANTITY |
BAKER’S % |
|
|
Water |
320g |
1⅓ cups + 1 tsp |
64% |
|
Fine sea salt |
14g |
2½ tsp |
2.8% |
|
Instant dried yeast |
1.2g |
¼ tsp + 1/16 tsp |
0.3% |
|
High-protein bread flour |
500g |
4 cups |
100% |
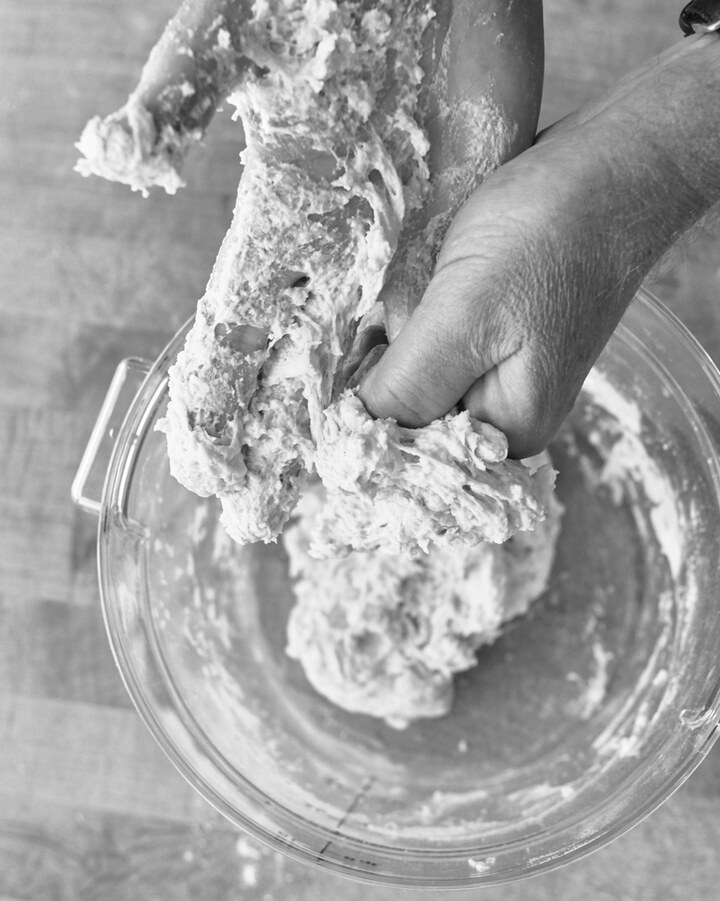
WILD YEAST (LEVAIN) CULTURE
MAKING THE LEVAIN
Start with one empty container with a lid that fits. I use a quart-sized deli container. Weigh the container and write down its empty weight on a piece of tape that you then attach to the outside of the container. You will need this later.
Day 1, any time of day: By hand, mix 100 grams of water (100°F/38°C) with 100 grams of room temperature whole wheat flour in your container. Leave it out at room temperature without its lid for a couple of hours, then put a lid on it.
Day 2, evening: Next, 24 to 36 hours after the first feeding of your new culture, add to it 100 grams of water (100°F/38°C), plus 100 grams of room temperature whole wheat flour. Mix by hand until integrated and let it sit out on the counter. Leave the lid off for a couple of hours to capture some of the natural yeast that’s floating around in the air, then cover it.
Day 3, evening: Already, after just 48 hours from starting your new wild yeast culture, it should be gassy. It’s alive! Remove about half of the mixture from the container (with a wet hand is easiest) and throw it away. Add to the remainder another 100 grams of water (100°F/38°C) plus 100 grams of room temperature whole wheat flour, and mix it all together by hand. Leave it out at room temperature, covered.
Day 4, evening: Remove about three-quarters of the bubbly mixture and throw that away, then once again add 100 grams of water, this time between 85° and 90°F (29° and 32°C), and 100 grams of room temperature whole wheat flour to your new culture. Mix by hand until integrated. Leave it out at room temperature, covered.
Day 5, evening: Using the weight of the empty container for reference, remove and dispose of all but 50 grams of the culture. Add 150 grams of water (85°F/29°C), plus 75 grams of room temperature whole wheat flour and 75 grams of room temperature all-purpose white flour. Mix by hand until integrated. Leave it out at room temperature, covered.
Day 6, evening: Your wild yeast culture is now almost ready to go. Remove and discard all but 50 grams of your culture and add 100 grams of water (85°F/29°C) and 100 grams of room temperature all-purpose white flour. Mix by hand until integrated and let sit out overnight, covered.
Day 7, morning: The culture should feel gassy and goopy and like there’s life in there, and it will have a nice lactic, slightly alcoholic fragrance. Pop it in the fridge. Tonight you can mix a starter, and tomorrow morning a pizza dough for pizza tomorrow evening on day 8.
MAINTAINING THE LEVAIN
Once every week (to a week and a half), remove all but 25 grams of the levain from its container and discard. Add 100 grams of all-purpose white flour and 100 grams of 85°F (29°C) water, mix by hand, and let it sit out for 10 to 12 hours, then put it back in the fridge. Your culture should perform well for the next week and you should have enough to make four batches of this book’s levain dough. If you need more than this, double the feeding: 50 grams of culture, 200 grams of white flour, and 200 grams of water at 85°F (29°C).
Every environment is different: if you are in wine country, for example, there is likely to be more ambient yeast in the air, especially during harvest season, than in other locales, and your levain culture will certainly be more active with less effort than if you live, in say, Arizona.

I highly encourage you to measure your levain ingredients by weight rather than volume; volume conversions are approximate.
100 GRAMS WHOLE WHEAT FLOUR = ¾ CUP + ½ TABLESPOON
100 GRAMS WATER = ⅓ CUP + 4 TEASPOONS
50 GRAMS LEVAIN = 2 TABLESPOONS + 1 TEASPOON
OVERNIGHT LEVAIN PIZZA DOUGH
BUILD LEVAIN 6 days
MAKE LEVAIN STARTER 10 to 12 hours (overnight)
MIX FINAL DOUGH 10 minutes; knead 20 minutes later
BULK FERMENTATION 3 hours
DIVIDE, SHAPE, AND COVER DOUGH 10 minutes
SECOND FERMENTATION 5 to 6 hours at room temperature, with a hold time of 3 to 4 hours
SAMPLE SCHEDULE Mix your levain starter in the evening, mix the pizza dough the next morning at 9 a.m., shape into dough balls at noon, then make pizza between 5 p.m. and 9 p.m. Or refrigerate the dough balls at 4 p.m. and make pizza the next day, taking the dough out of the fridge 1 hour before you make pizza.
LEVAIN STARTER
|
INGREDIENT |
QUANTITY |
|
|
|
Wild yeast (levain) culture (see this page) |
50g |
2 tbsp + 1 tsp |
|
|
Water |
100g |
⅓ cup + 4 tsp |
|
|
High-protein bread flour; okay to substitute all-purpose or 00 flour |
100g |
¾ cup + 2 tsp |
|
FINAL DOUGH
|
INGREDIENT |
QUANTITY (FINAL MIX) |
BAKER’S % (TOTAL RECIPE) |
|
|
Water |
225g |
Scant 1 cup |
70% |
|
Fine sea salt |
14g |
2½ tsp |
2.8% |
|
Levain starter |
250g |
All, above recipe |
25% |
|
White flour, preferably 00 |
375g |
Scant 3 cups |
100% |
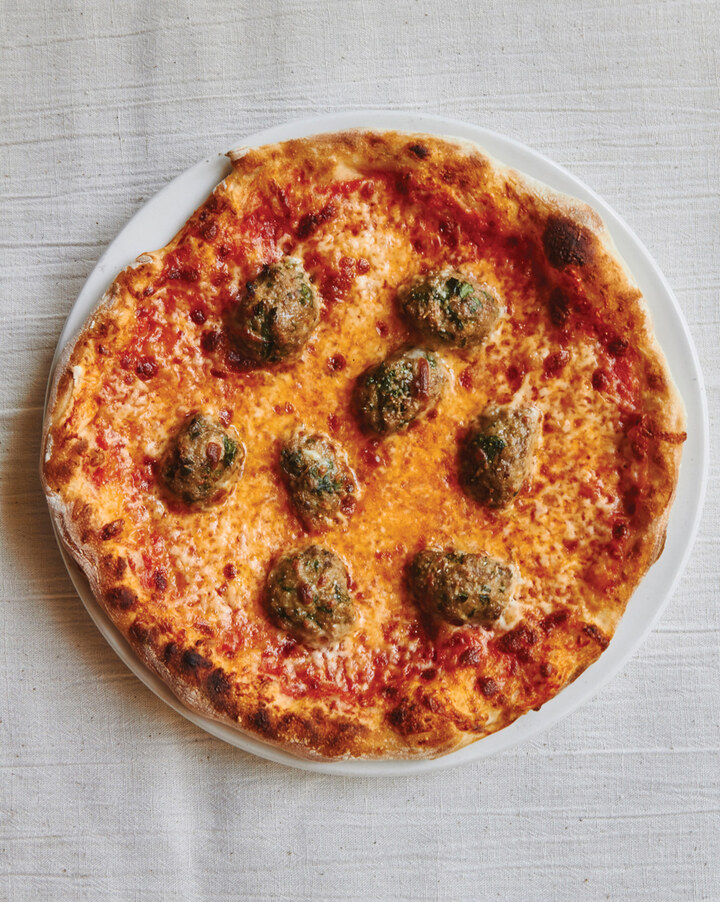
AL TAGLIO PIZZA DOUGH
BULK FERMENTATION 12 to 14 hours
TRANSFER DOUGH TO AN OILED DINNER PLATE 5 minutes
SECOND FERMENTATION 3 hours
SAMPLE SCHEDULE Mix dough at 8 p.m., layer it onto an oiled dinner plate at 9 a.m., bake at noon.
|
INGREDIENT |
QUANTITY |
BAKER’S % |
|
|
Water |
255g |
1 cup + 1 tbsp |
72% |
|
Fine sea salt |
10g |
Scant 2 tsp |
2.8% |
|
Instant dried yeast |
1.5g |
¼ of ¼ tsp |
0.07% |
|
White flour, preferably 00 |
355g |
2¾ cups + 1 tbsp |
100% |
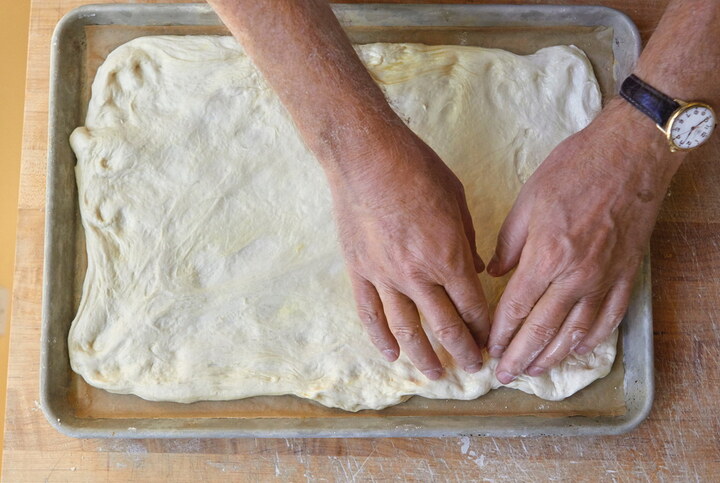
BAR PIZZA DOUGH
BULK FERMENTATION 6 hours
DIVIDE, SHAPE, AND COVER DOUGH 10 minutes
SECOND FERMENTATION 24 to 72 hours
SAMPLE SCHEDULE Mix the dough at noon; shape into dough balls, cover, and refrigerate at 6 p.m.; and make pizza the next evening or the day after that.
|
INGREDIENT |
QUANTITY |
BAKER’S % |
|
|
Water |
280g |
1 cup + 3 tbsp |
60% |
|
Fine sea salt |
12g |
Scant 2¼ tsp |
2.5% |
|
Instant dried yeast |
0.8g |
⅘ of ¼ tsp |
0.17% |
|
Canola or olive oil |
9g |
2 tsp |
5% |
|
All-purpose flour |
465g |
3¾ cups |
100% |
GLUTEN-FREE PIZZA DOUGH
SAMPLE SCHEDULE Because there’s no gluten to develop, the schedule is whatever you want it to be, but I like giving the dough time to rest before making dough balls, and then you can make pizza anytime. The dough balls will hold for at least 5 days, individually wrapped in the refrigerator.
|
INGREDIENT |
QUANTITY |
BAKER’S % |
|
|
Water |
365g |
2¾ cups + 2 tbsp |
73% |
|
Fine sea salt |
14g |
2½ tsp |
2.8% |
|
Instant dried yeast |
0.5g |
⅛ tsp |
0.1% |
|
Baking soda |
1.5g |
⅓ tsp |
0.3% |
|
Extra-virgin olive oil |
45g |
3 tbsp + 1 tsp |
0% |
|
Gluten-free flour |
500g |
3⅔ cups |
100% |
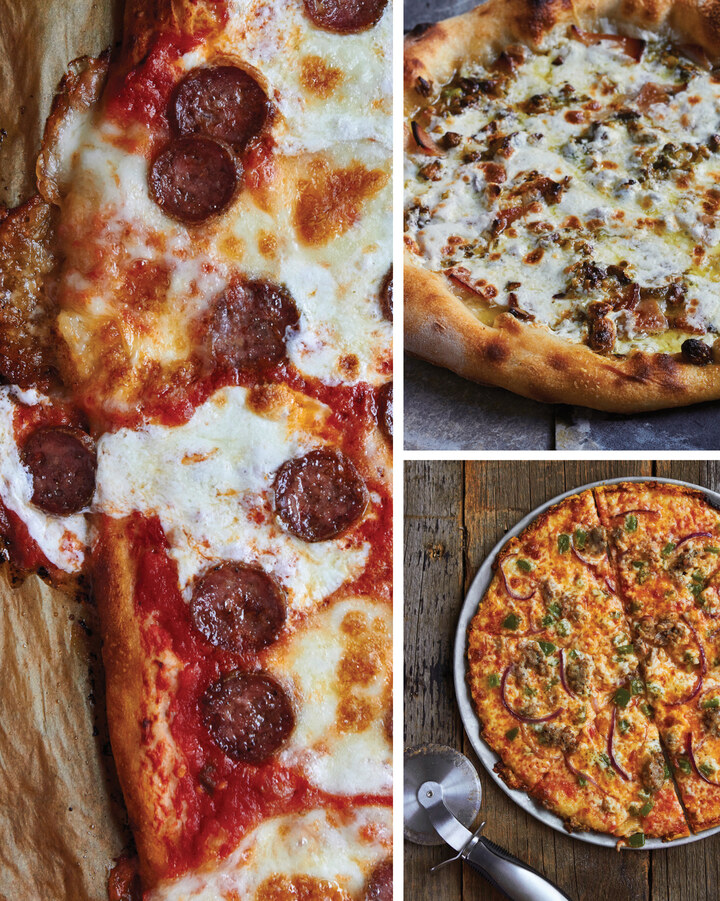
CHAPTER 7
PIZZA RECIPES
Much of the fun in writing this book was creating new recipes, both for pizza doughs and for composed pizzas. Some, like The Ferdinando, were my interpretation of something I’d read about, while others took a classic combination, like mortadella and pistachios or sausage and vodka sauce, and put it on pizza. Others—such as The White Owl, the Escarole Pizza, the Delicata Squash Pizza, the Tommy Habetz Pizza, and the Carbonara Pizza—were all in-the-moment pizzas that made sense when I was staring at the ingredients. Others, like Brooklyn Hot Honey Pie or A.J.’s Pie, were inspired by specific pizzas made by others that I’ve really enjoyed. Throw in a few classics, like Grandma Pie, Pizza Margherita, and Pizza Marinara; plus Ken’s Artisan Pizza classics, a Tarte Flambée, and some flatbreads from my Trifecta Tavern, and you get a wide range of pizza recipes to inspire your pizza-baking adventures. Why three New York cheese pizzas? Because they are all different! And any New Yorker knows how much variety there is from one pizzeria to another, though all are making pizza with the same name.
Before we get into the recipes, please take note of some compositional aspects. Dry cheeses like grated Parmigiano-Reggiano, Grana Padano, and Pecorino Romano are frequently used in combination with mozzarella cheese, and the dry cheese usually goes down underneath the mozzarella. This keeps the dry cheese from scorching in the high heat of the oven. Similarly, to protect other ingredients from extreme heat, lay them under the cheese. For example, the escarole goes underneath its provolone and mozzarella; the mortadella mostly goes under its cheese, but I like some bits above the cheese to get crunchy. Other toppings, like sliced garlic or raw onions, get a thin coating of olive oil to keep them from scorching.
I use mozzarella frequently, but I didn’t include a single pizza with smoked mozzarella. If you can find a good smoked mozz, please try it as a white pie and steal Chris Bianco’s (of Pizzeria Bianco) idea to top it with fennel sausage and roasted onions (he calls it the Wiseguy). Mozzarella is my pizza cheese of choice, frequently paired with grated parm, grana, or pecorino underneath. But the many types of provolone work great, too.
I mentioned this already, but I want to quickly restate it here: to make good pizza, use good-quality ingredients. Some things, like mozzarella, have a big range, not just in terms of quality but also in baking characteristics—every cheese is different in the oven, as age and water content vary. Some brands of low-moisture mozzarella brown a lot faster than others do. And don’t be discouraged if your first choice wasn’t perfect. Mine wasn’t either; it browned too fast, and I learned to look for brands whose color was whiter. Keep looking.
Most of the prep—even making the sauce—can happen while the oven is preheating, and a lot of the prep—roasting mushrooms, for example—takes place in the oven. Roasting butternut squash for an hour is probably the longest elapsed time step of any recipe, save for how long it takes for the dough to do its thing. Developing these recipes in my home kitchen was an excellent deterrent to creating recipes that involved a lot of work. Pizza doesn’t demand extreme labor to be great anyway.
You can control the size of the cornicione (the rim of the pizza) when you shape the dough into a disk. If you like a large rim, leave a thicker portion of the disk of dough uncompressed when you stretch it out. For New York–style pizzas, leave a much thinner portion (½ at most) of the outer rim uncompressed. The larger the rim, the more it pushes the toppings toward the middle of the pizza as it bakes.
The pizza recipes are arranged by type, but you can make many pizza recipes in any style—pick your dough, pick your sauce, and go. For example, you can make the Artichoke and Bacon Pizza in a Roman style, with a super-thin, crisp crust that you roll out with a pin, but you might want to go a tad lighter with toppings since it’s a thinner crust.
There are many good things you can do to pizza immediately after it comes out of the oven. If you have a nice, aromatic olive oil, drizzle it on top of a margherita or marinara right after it comes out, then hover over the top and inhale deeply. Oh yeah. Many pizzas like a dose of grated cheese right then: a hard cheese like Parmigiano-Reggiano, Grana Padano, Pecorino Romano, or caciocavallo. Lemon zest, orange zest, or tangerine zest on a white pie can be nice. Cured anchovies should go on the pizza after it’s baked, not before. Cured whole-muscle meats like prosciutto, culatello, coppa, speck, or bresaola should be sliced very thin and draped on the pizza right after it comes out of the oven; that way they just melt into the pie. We offer arugula (with a light toss in olive oil and sea salt) as a universal topping at Ken’s Artisan Pizza. Finishing salts have never been more available than they are now, and I’m very fond of the big flake salt from my friends at Jacobsen Salt Co. here in Oregon. None of these things happened to the pepperoni pizza I grew up eating. I’m glad I grew up.
Of course, you are going to improvise your own toppings and put stuff you like on your pizza. Here are two suggestions to guide you. One: balance saltiness and moisture content in the toppings. If the toppings are salty, like prosciutto or salami, use a fresh cheese like unaged mozzarella. Use saltier cheeses like aged mozzarella or top the pizza with freshly grated pecorino if the toppings are not as salty. Two: too much sauce with too much cheese will turn the top of your pizza into soup once it’s all melted, so be careful. Moist cheese, like a brine-packed mozzarella, is likely to release moisture into the crust while it bakes, so you might lay it on the pizza halfway through the bake, as I recommend in the margherita recipe.
Most of all, have fun. Try to do it well. And stay with it, because the more you do it, the better you’ll get.
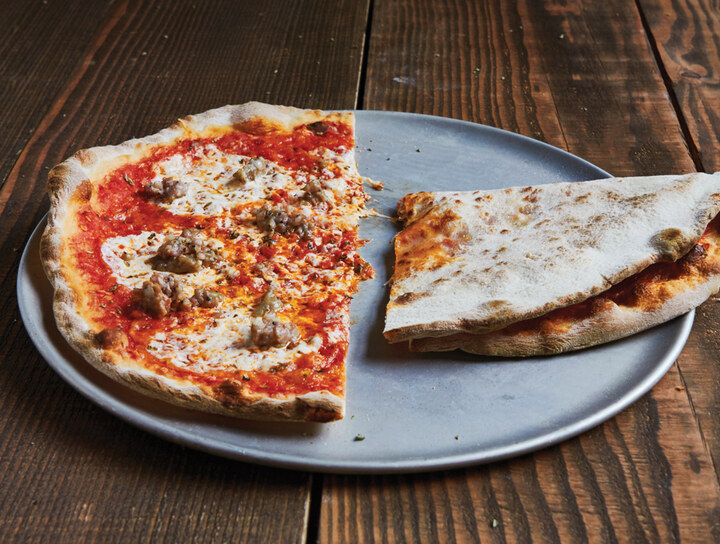
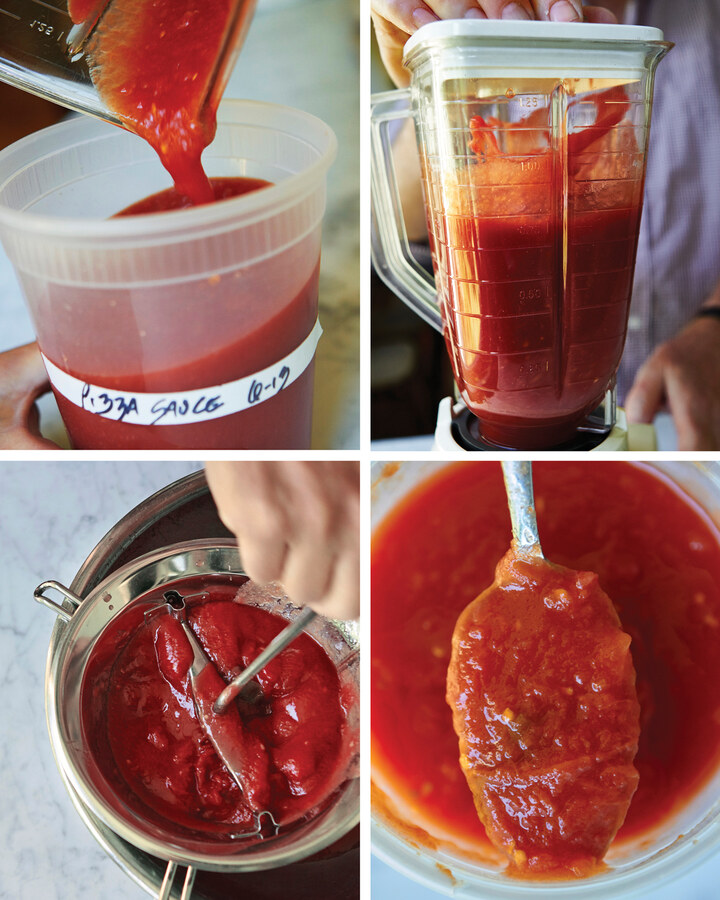
BASIC TOMATO SAUCE, TWO WAYS
1 can (800-gram/28-ounce) whole peeled tomatoes
8 grams (1½ teaspoons) fine sea salt
FWSY SAUCE
20 grams (1½ tablespoons) extra-virgin olive oil
1 clove garlic, chopped
8 grams (1½ teaspoons) fine sea salt
0.3 gram (¼ teaspoon) dried oregano
0.4 gram (¼ teaspoon) chile flakes
1 can (800-gram/28-ounce) whole peeled tomatoes
VODKA SAUCE
75 grams (⅓ cup) vodka
50 grams (¼ cup) heavy cream
750 grams (3 cups) FWSY Sauce
5 grams (1 tablespoon) grated Grana Padano or Parmigiano-Reggiano cheese
NEW YORK PIZZA SAUCE
750 grams (3 cups) FWSY Sauce
15 grams (1 tablespoon) sugar
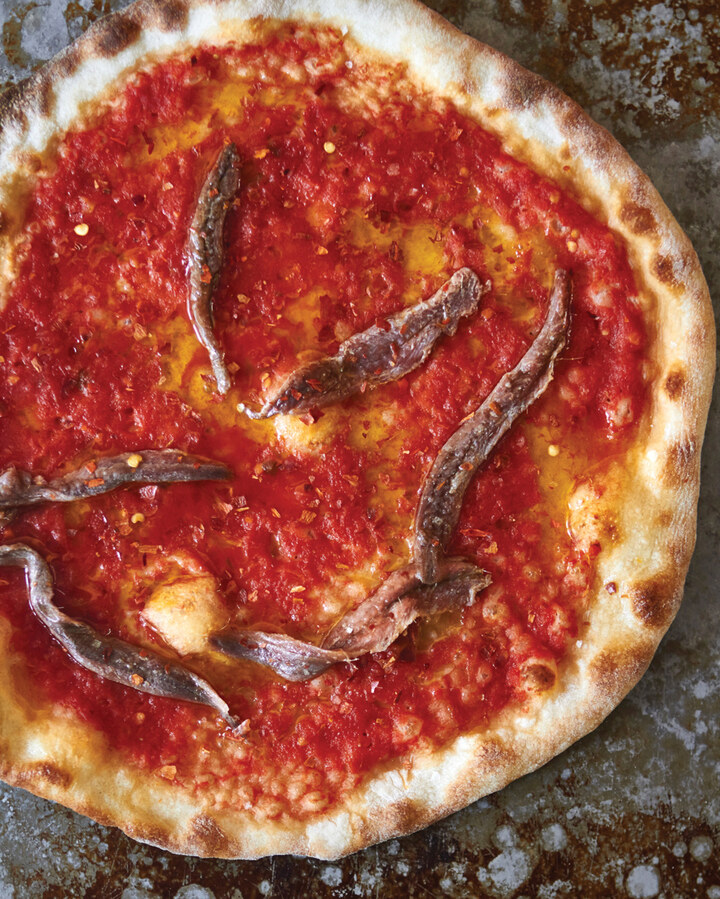
PIZZA MARINARA
1 dough ball
1 clove garlic
Extra-virgin olive oil
100 grams (⅓ cup + 1 tsp) Basic Tomato Sauce
0.5 gram (¾ teaspoon) best-quality dried oregano, preferably Calabrian
Sea salt
3 or 4 anchovy fillets (optional)
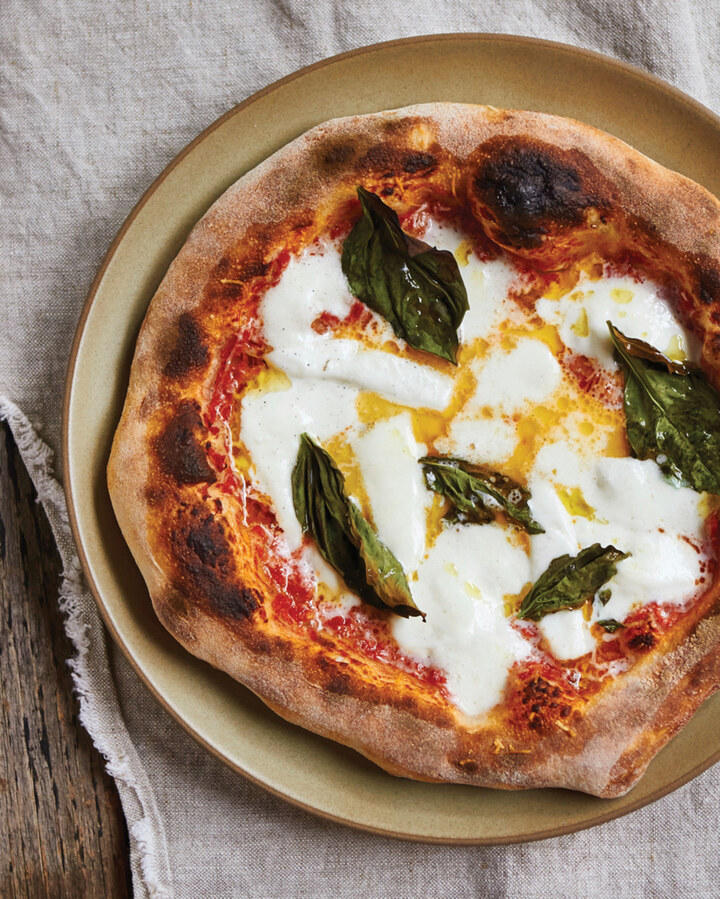
PIZZA MARGHERITA
1 dough ball
60 to 80 grams (¼ to ⅓ cups) Basic Tomato Sauce
Extra-virgin olive oil
10 to 15 grams (scant ¼ cup) grated Pecorino Romano or Parmigiano-Reggiano cheese
80 to 100 grams (3½ to 4 ounces) fresh whole-milk mozzarella cheese (fior di latte) or brine-packed mozzarella di bufala, sliced into short strips about ½ inch thick
3 to 5 fresh whole basil leaves
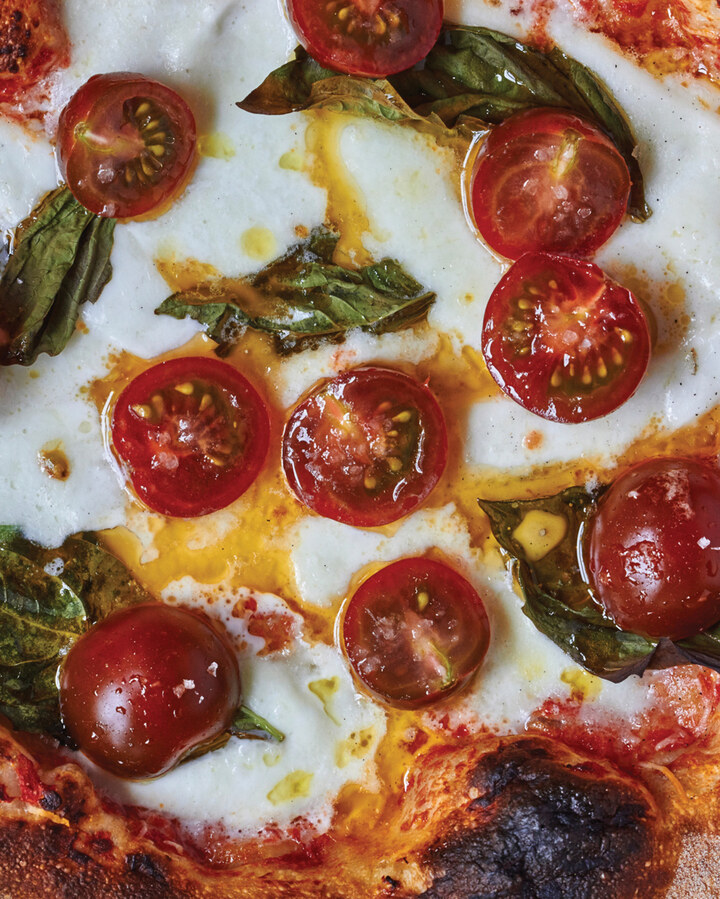
THE FERDINANDO
1 dough ball
Extra-virgin olive oil
3 or 4 cloves garlic
0.5 gram (¾ teaspoon) dried oregano
Sea salt
15 grams (about ¼ cup) finely grated pecorino cheese
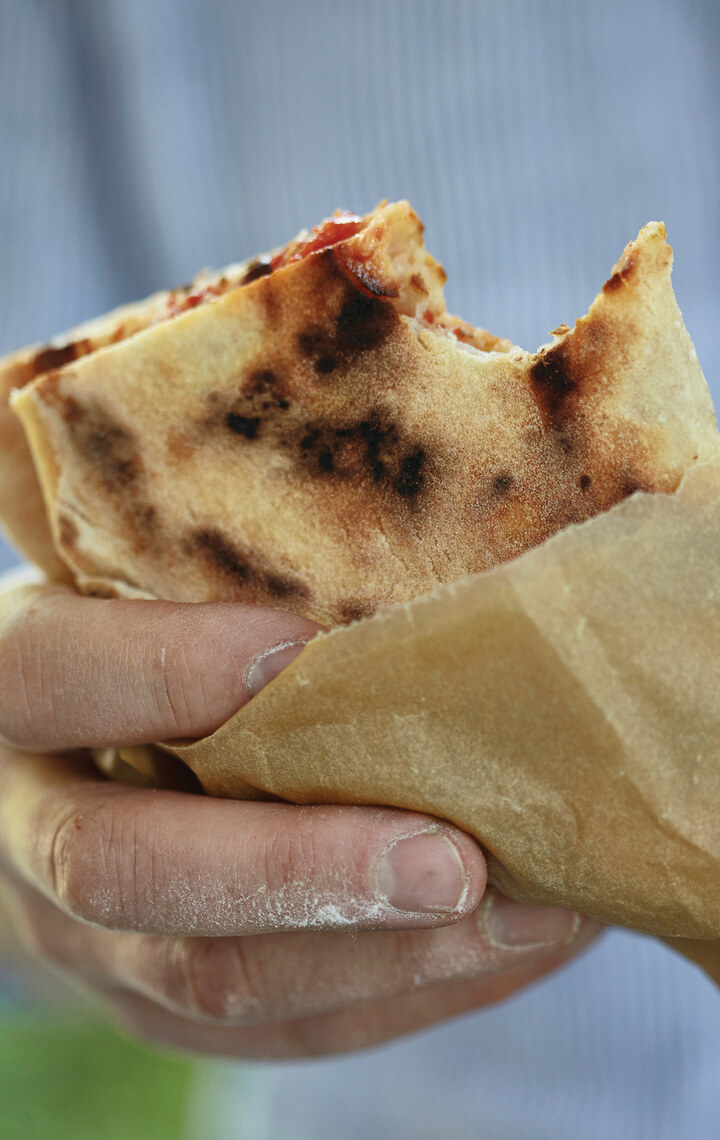
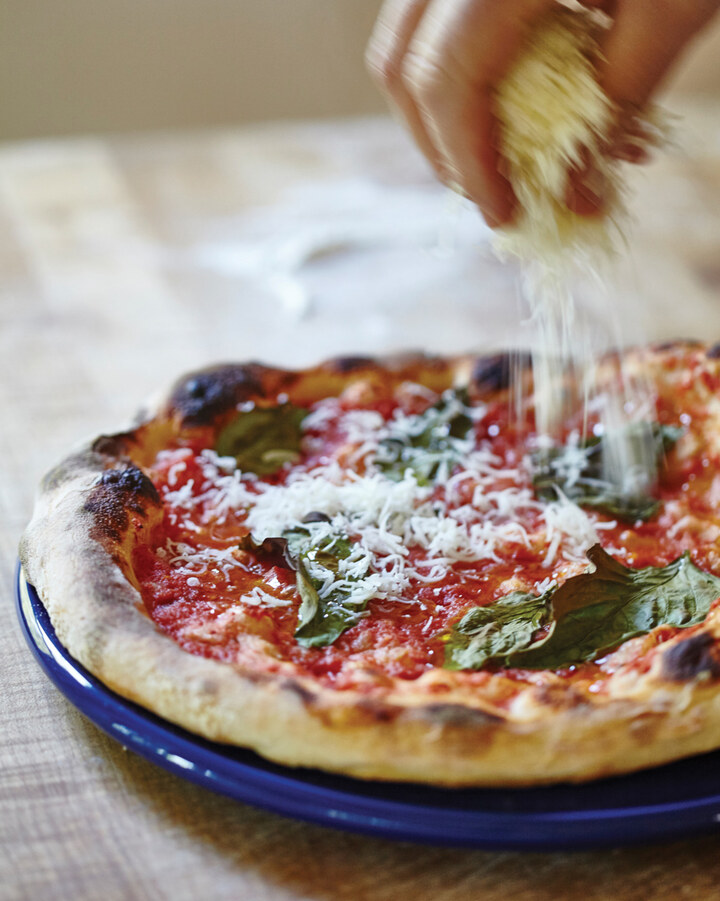
POMODORO ROYALE (WITH CHEESE)
1 dough ball
100 grams (⅓ cup plus 1 teaspoon) Basic Tomato Sauce
6 to 8 fresh basil leaves
Extra-virgin olive oil
20 to 30 grams (up to 1 ounce) caciocavallo or other firm cheese
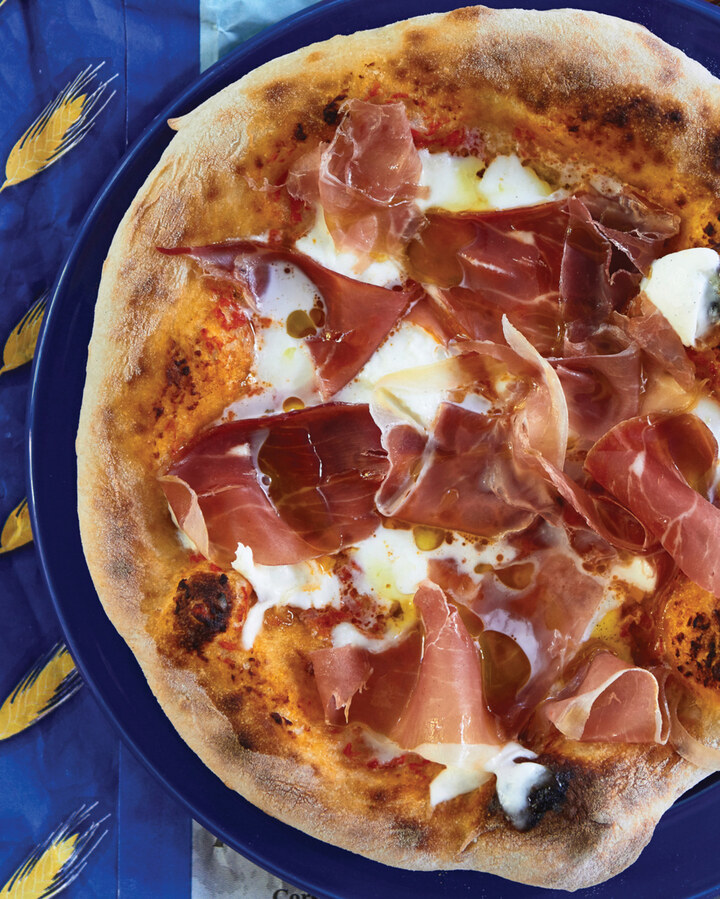
PROSCIUTTO AND BUFALA
1 dough ball
50 grams (scant ¼ cup) Basic Tomato Sauce
30 grams (1 ounce) fresh mozzarella di bufala, torn into bite-size pieces
Extra-virgin olive oil
55 grams (2 ounces) thinly sliced prosciutto (3 or 4 slices)
MORTADELLA AND PISTACHIO PIZZA
1 dough ball
25 grams (3 tablespoons) shelled pistachios
1 large or 2 medium cloves garlic, chopped
Extra-virgin olive oil
10 to 15 grams (scant ¼ cup) grated Parmigiano-Reggiano or Grana Padano cheese
75 grams (2½ ounces) deli-sliced mortadella, cut into bite-size 1-inch strips
120 grams (4 ounces) fresh whole-milk mozzarella cheese or Asiago fresco, sliced
Freshly cracked black pepper (optional)
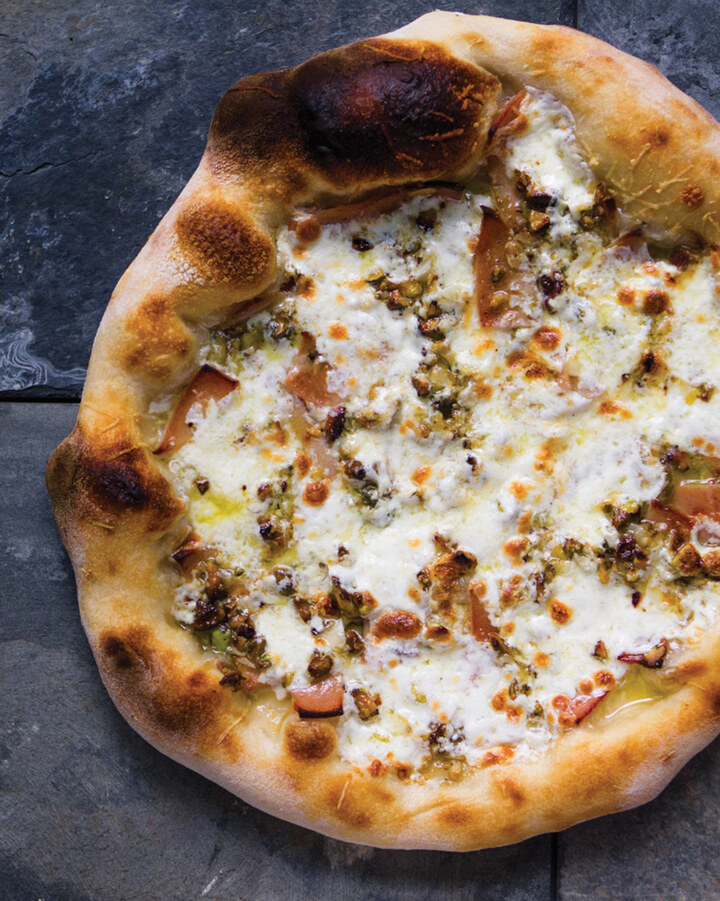
ZUCCHINI BLOSSOM PIZZA
1 (150-gram) dough ball
150 grams (½ cup) fresh ricotta cheese
15 grams (¼ cup) finely grated Pecorino Romano cheese
1 egg yolk
Zest of ¼ lemon
Sea salt
10 mint leaves, snipped or chopped
6 zucchini blossoms
Fragrant extra-virgin olive oil
75 grams (⅓ cup) Basic Tomato Sauce
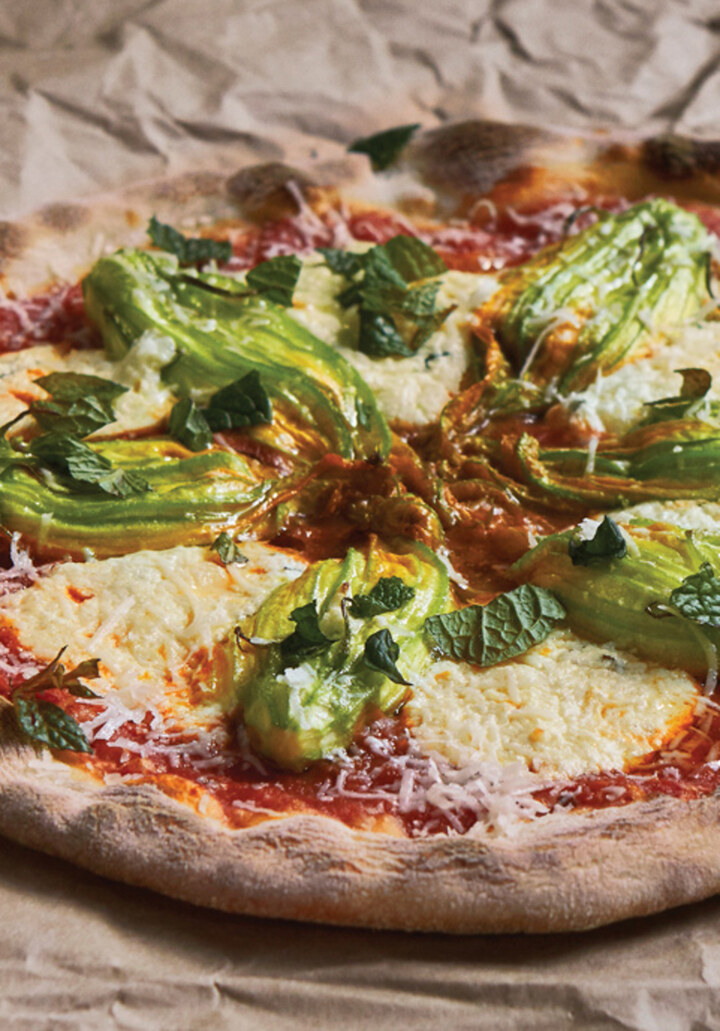
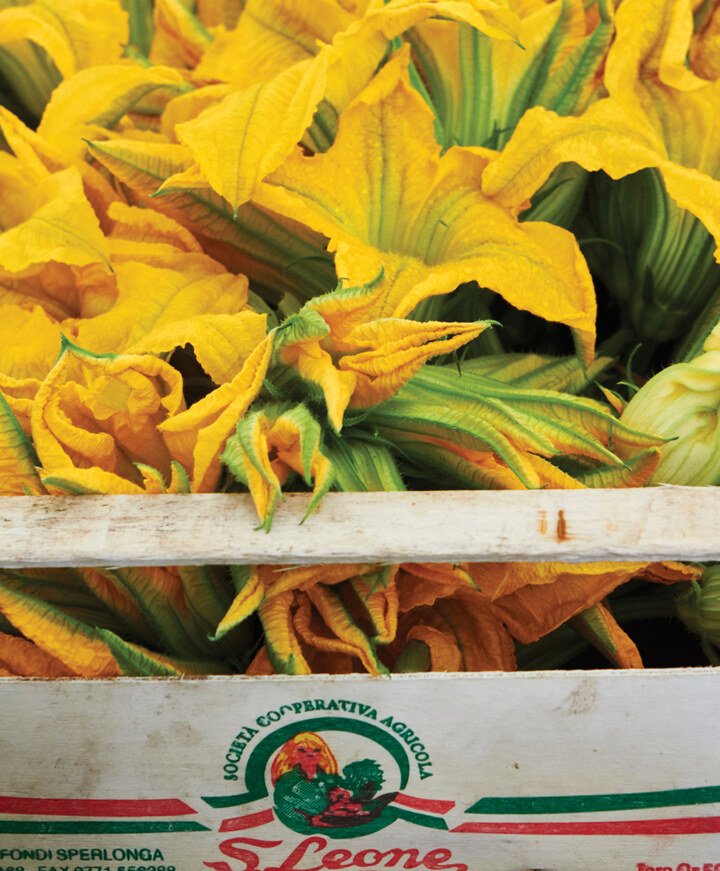
RIVER PO PIZZA
1 dough ball
35 grams (1¾ cups) arugula
10 grams (2¼ teaspoons) olive oil
70 grams (⅓ cup) Basic Tomato Sauce
10 grams (3 tablespoons) grated Parmigiano-Reggiano cheese
1 small lemon wedge
110 grams (4 ounces) fresh provolone, thinly sliced into 5 or 6 pieces
7 grams (¼ ounce) pine nuts
24 grams (just under 1 ounce) Felino salami, thinly sliced into about 10 pieces
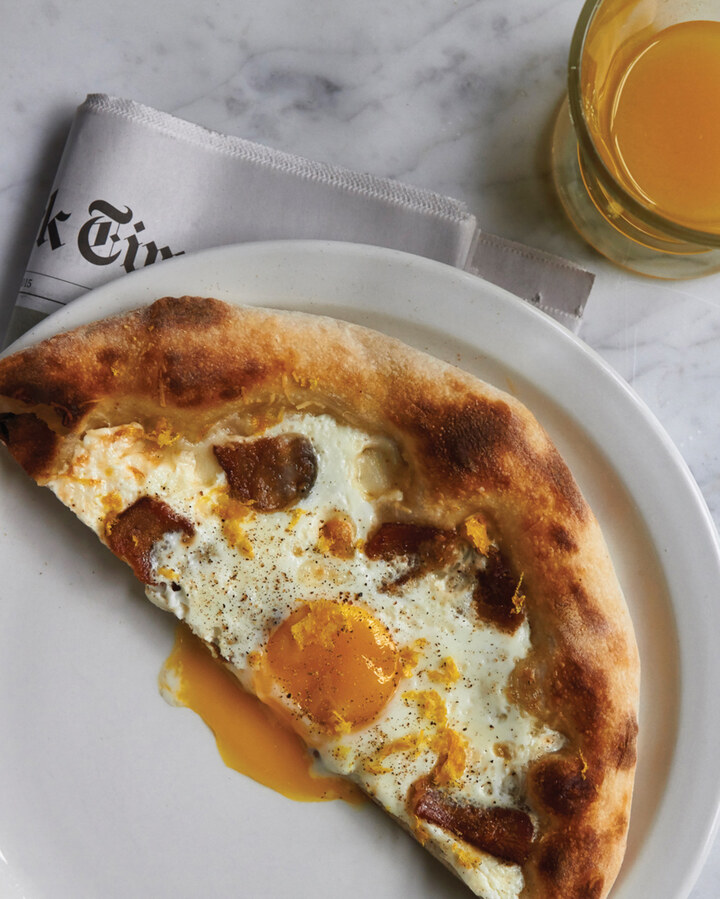
CARBONARA PIZZA
1 dough ball
75 grams (2½ ounces) uncooked bacon, cut into 1- to 2-inch slices, or substitute pancetta or guanciale
40 grams (¼ cup plus 2 tablespoons) grated Pecorino Romano
90 grams (3 ounces) fior di latte mozzarella
Freshly cracked black pepper
1 or 2 eggs, cracked into a small bowl, yolk intact
Extra-virgin olive oil
Zest of 1 lemon
PIZZA BIANCA AND PIZZA ROSSA
Al Taglio Pizza Dough shaped on a half sheet pan
30 grams (2 tablespoons) extra-virgin olive oil
Fine sea salt
Al Taglio Pizza Dough shaped on a half sheet pan
30 grams (2 tablespoons) extra-virgin olive oil, plus more for brushing
200 grams (¾ cup plus 1 tablespoon) Basic Tomato Sauce
Dried oregano, to taste
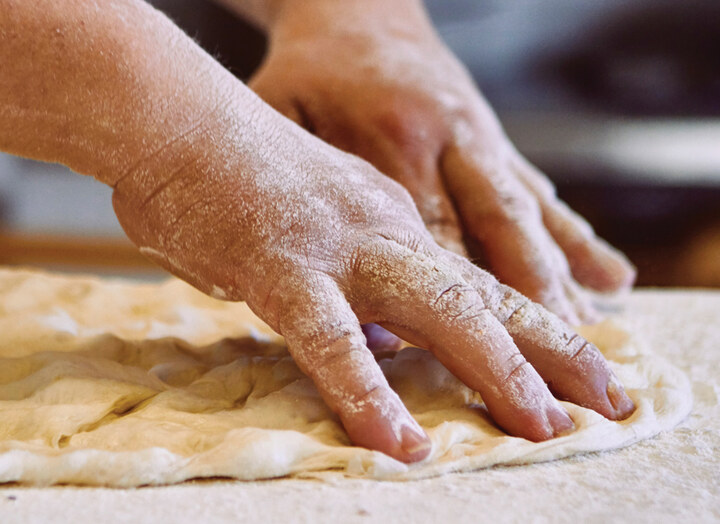
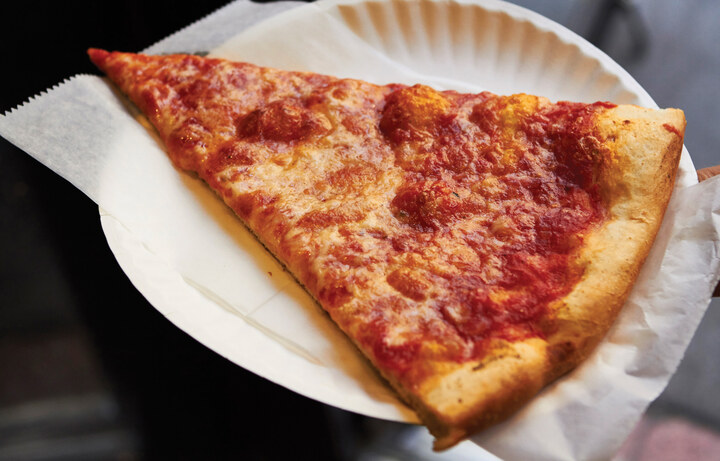
NEW YORK CHEESE PIZZA
1 dough ball from 48- to 72-Hour New York Pizza Dough
100 grams (⅓ cup plus 1 teaspoon) New York Pizza Sauce
10 to 15 grams (scant ¼ cup) grated Pecorino Romano or Grana Padano cheese
110 grams (3½ ounces) low-moisture mozzarella cheese, sliced or shredded with a box grater
Chile flakes (optional)
Dried oregano (optional)
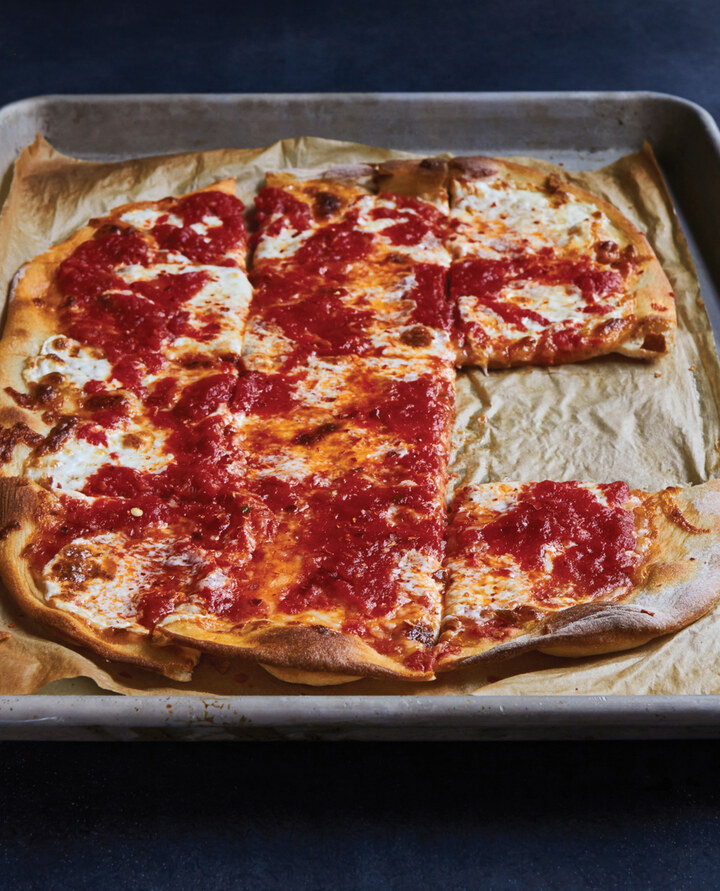
SIMPLE TOMATO PIE
1 dough ball
20 grams (⅓ cup) grated Pecorino Romano or Grana Padano cheese
75 grams (2½ ounces) low-moisture mozzarella, grated through a box grater’s large holes
125 grams (4½ ounces) fior di latte fresh mozzarella, thinly sliced
225 grams (¾ cup plus 4 teaspoons) tomato sauce
Chile flakes
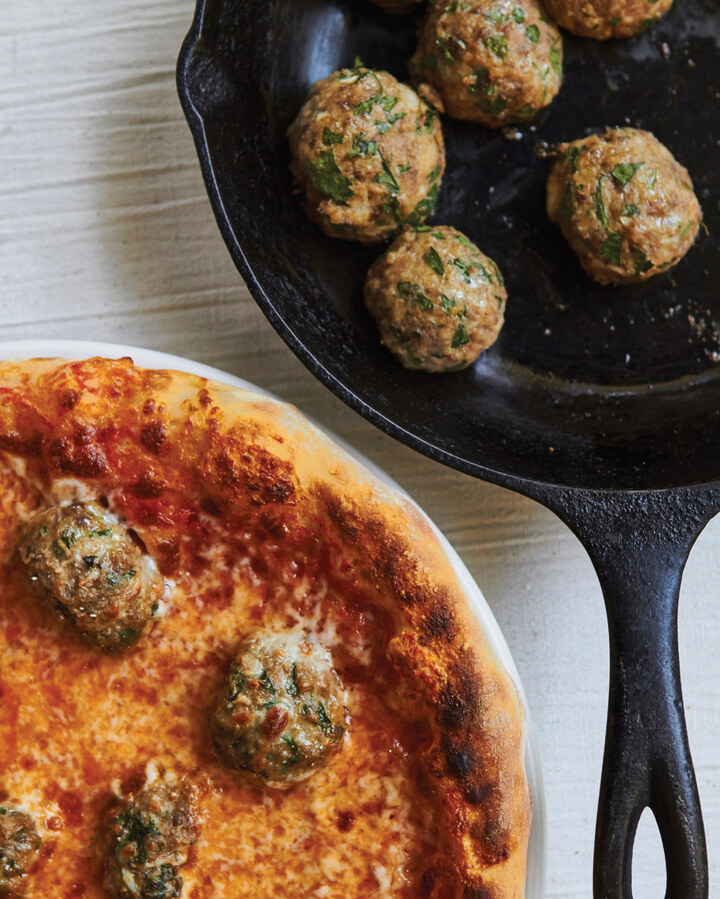
MEATBALL PIZZA
1 dough ball
4 meatballs (recipe follows), sliced in half
90 grams (⅓ cup) tomato sauce
15 grams (¼ cup) grated Pecorino Romano or Grana Padano cheese
90 grams (3 ounces) low-moisture mozzarella, grated through a box grater’s large holes, or fresh mozzarella, thinly sliced
110 grams (1 cup) bread crumbs
185 grams (¾ cup) whole milk
450 grams (1 pound) ground pork
450 grams (1 pound) ground beef (burger grind, not lean)
2 eggs
5 large cloves garlic (about 25 grams), chopped
40 grams (1 cup) chopped parsley
50 grams (½ cup) grated Parmigiano-Reggiano or Grana Padano cheese
6 grams (1 teaspoon) fine sea salt
Cracked black pepper
A.J.’S PIE
1 (150-gram) dough ball
110 grams (⅓ cup plus 2 teaspoons) tomato sauce
80 grams (3 ounces) fresh mozzarella, thinly sliced and cut into 1-inch squares
15 grams (¼ cup) Grana Padano cheese, grated
Extra-virgin olive oil
Dried oregano (optional)
Chile flakes (optional)
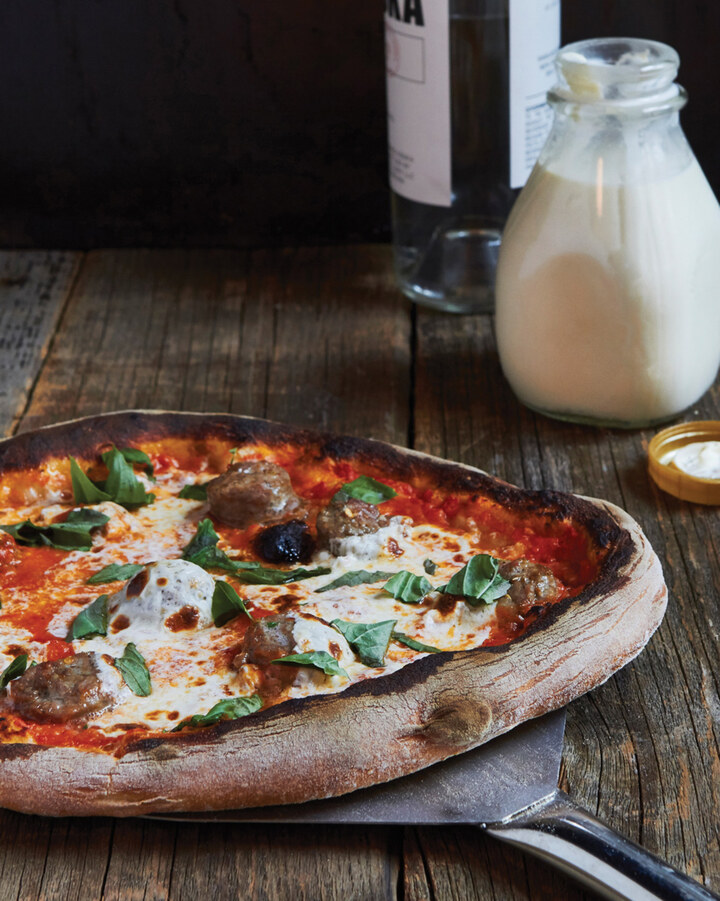
VODKA SAUCE AND SAUSAGE PIZZA
1 dough ball
150 grams (5 ounces) link fennel sausage or Italian sausage
90 grams (⅓ cup) Vodka Sauce
110 grams (4 ounces) fresh whole-milk mozzarella, thinly sliced
4 or 5 basil leaves
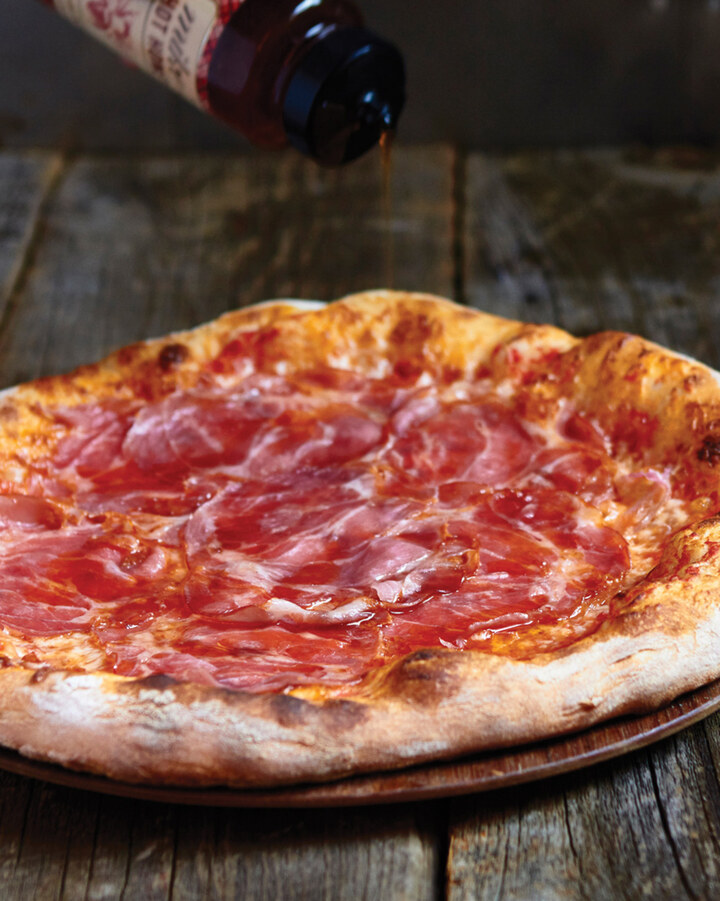
BROOKLYN HOT HONEY PIE
1 dough ball
90 grams (3 ounces) low-moisture whole-milk mozzarella
15 to 20 grams (¼ to ⅓ cup) Pecorino Romano cheese
100 grams (⅓ cup plus 1 teaspoon) tomato sauce
20 grams (⅔ ounce) Quick Pickled Onions (recipe follows; optional)
35 grams (1¼ ounces) coppa or prosciutto, thinly sliced
A drizzle of honey
Chile flakes
1½ red, yellow, or white onions, thinly sliced
240 grams (1 cup) vinegar
235 grams (1 cup) water
1½ cloves garlic
1 gram (½ teaspoon) mustard seed
½ dried hot chile
1 gram (½ teaspoon) dill seed
35 grams (2 tablespoons) salt
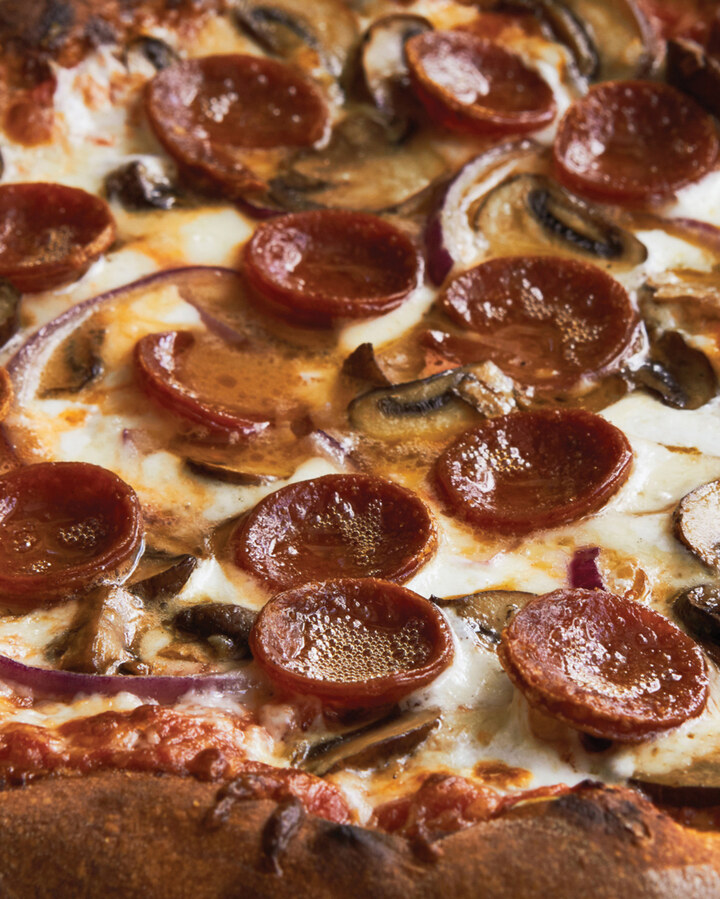
PEPPERONI, MUSHROOM, AND ONION PIZZA
1 dough ball
15 grams (1 tablespoon) extra-virgin olive oil
4 medium button mushrooms, thinly sliced and lightly coated in 1 tablespoon olive oil
1 clove garlic, chopped
Fine sea salt
110 grams (⅓ cup plus 2 teaspoons) tomato sauce
10 to 15 grams (scant ¼ cup) Pecorino Romano or Parmigiano-Reggiano cheese, grated
110 grams (3½ ounces) fresh mozzarella, thinly sliced, or low-moisture whole-milk mozzarella cheese, shredded with a box grater
16 thin slices pepperoni
¼ red onion, thinly sliced and tossed in olive oil
Chile flakes (optional)
Dried oregano (optional)
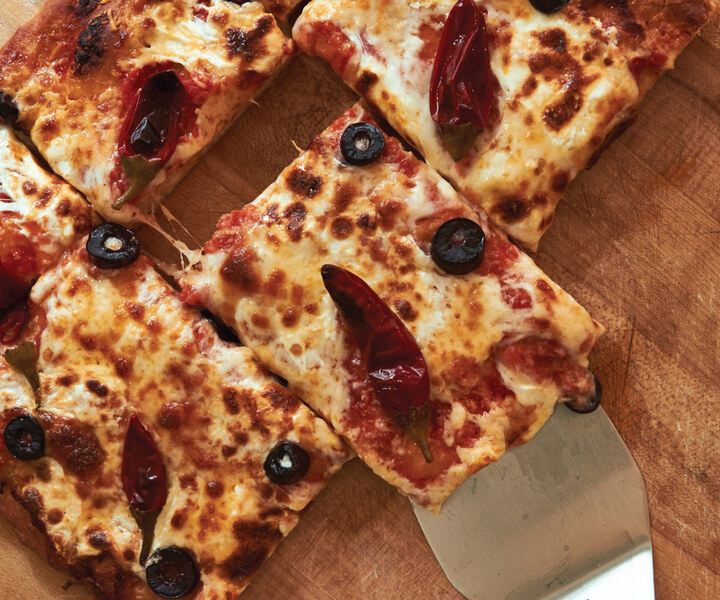
GRANDMA PIE
Saturday Pan Pizza Dough, parbaked
150 grams (½ cup) tomato sauce
50 grams (½ cup) Parmigiano-Reggiano or Grana Padano cheese, grated
150 grams (5 ounces) low-moisture mozzarella, grated
125 grams (4 ounces) fresh mozzarella, thinly sliced
30 grams (2 tablespoons) olive oil
10 to 12 fresh basil leaves
Other toppings of your choice (optional)
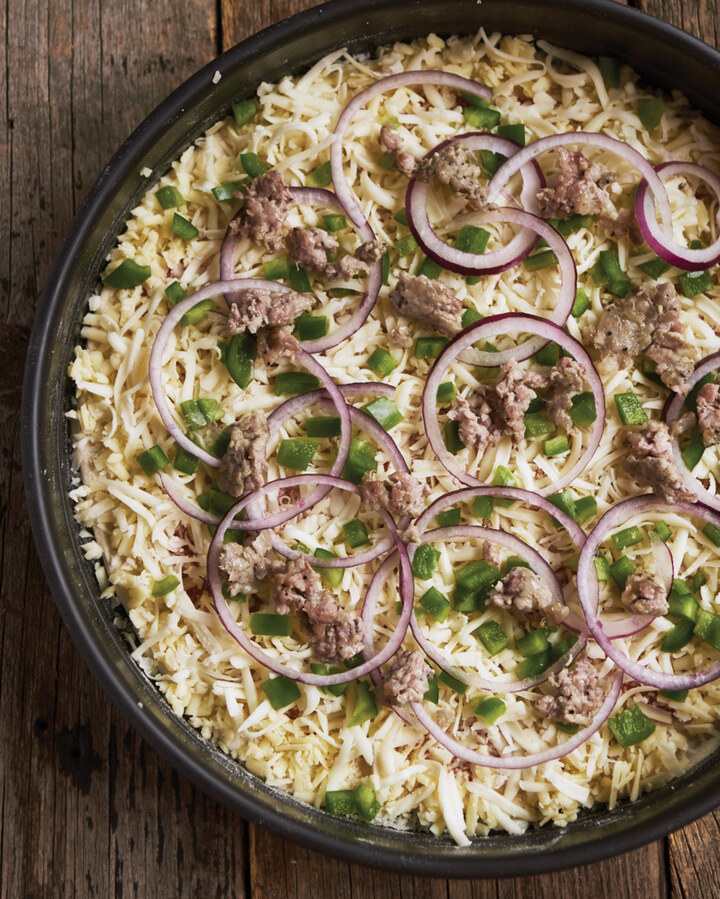
ADAM KUBAN’S “LOVE SUPREME” BAR PIZZA
1 dough ball from Bar Pizza Dough
90 grams (⅓ cup) tomato sauce
25 grams (⅓ cup) Pecorino Romano, finely grated
55 grams (2 ounces) mild white cheddar, coarsely grated
135 grams (4½ ounces) low-moisture whole-milk mozzarella, coarsely grated
½ small green bell pepper, diced
½ small red onion, sliced into thin semicircles
60 grams (2 ounces) loose Italian sausage
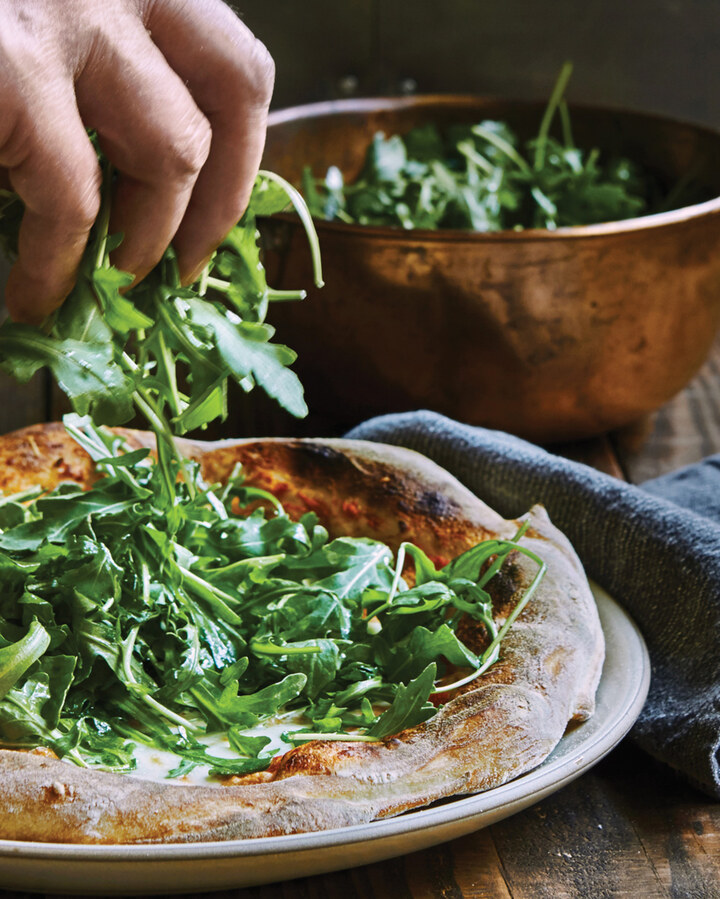
MARGHERITA AND ARUGULA, TWO WAYS
1 dough ball
90 grams (⅓ cup) tomato sauce
10 to 15 grams (scant ¼ cup) grated Pecorino Romano or Parmigiano-Reggiano cheese
110 grams (3½ ounces) fresh mozzarella cheese (fior di latte), cut into pieces ¼ to ½ inch thick, or thin strips
15 to 18 thin slices soppressata, about 2 inches in diameter (optional)
60 grams (2 ounces) arugula
Extra-virgin olive oil
1 lemon wedge (optional)
Fine sea salt
ARRABIATA PIZZA
1 dough ball
90 grams (⅓ cup) tomato sauce
10 to 15 grams (scant ¼ cup) Pecorino Romano or Grana Padano cheese, grated
90 grams (3½ ounces) fresh whole-milk mozzarella cheese (fior di latte), cut into ¼-inch-thick pieces or thin strips
10 grams (⅓ ounce) jarred whole chile peppers, stemmed, seeded, and sliced
4 or 5 whole basil leaves
Extra-virgin olive oil
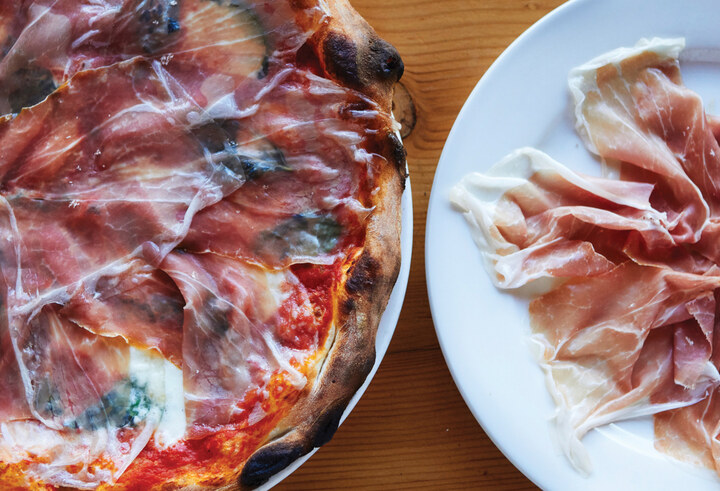
PROSCIUTTO PIZZA
1 dough ball
90 grams (⅓ cup) tomato sauce
110 grams (3½ ounces) fresh whole-milk mozzarella cheese (fior di latte), cut into ¼-inch-thick pieces or thin strips
4 or 5 whole leaves fresh basil
55 grams (2 ounces) prosciutto, about 6 very thin slices
Extra-virgin olive oil
FENNEL SAUSAGE AND ONION PIZZA
1 dough ball
½ medium yellow onion, thinly sliced
½ tablespoon butter
3 to 4 grams (½ teaspoon) salt
150 grams (5 ounces) loose fennel sausage (see headnote)
90 grams (⅓ cup) tomato sauce
90 grams (3½ ounces) fresh whole-milk mozzarella cheese (fior di latte), cut into ¼-inch-thick pieces or thin strips
10 grams (approximately 3) whole jarred chile peppers, stemmed, seeded, and sliced (optional)
6 or 7 whole basil leaves
Extra-virgin olive oil
40 grams (½ cup) ground fennel seed
30 grams (2 tablespoons) fine sea salt
20 grams (3 tablespoons) ground black pepper
15 grams (1 tablespoon) sugar
5 grams (2 teaspoons) pimentón or ground red pepper
SPRING ONION PIZZA
1 dough ball
3 spring onions, including their green stalks
Extra-virgin olive oil
Fine sea salt
90 grams (3½ ounces) fresh whole-milk mozzarella cheese (fior di latte), cut into ¼-inch-thick pieces or thin strips
15 grams (¼ cup) Grana Padano cheese, shaved with a peeler
55 grams (2 ounces) prosciutto, in 6 thin slices (optional)
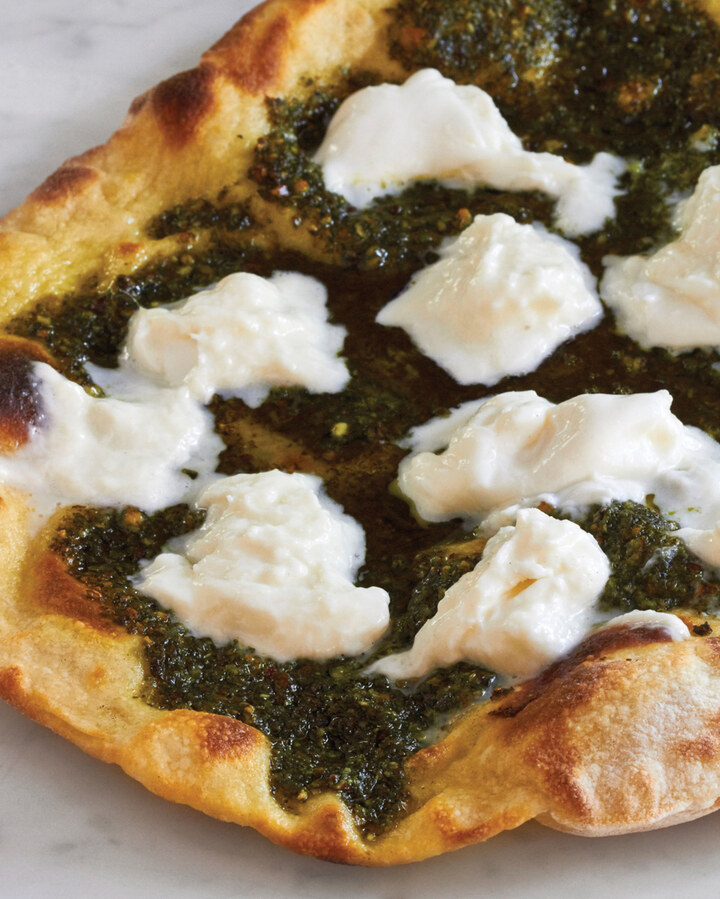
OREGON BASIL PESTO AND BURRATA FLATBREAD
1 (150-gram) dough ball
60 grams (¼ cup) pesto (recipe follows)
1 ball burrata cheese
Freshly cracked black pepper
115 grams (4 ounces) basil leaves
25 grams (1 ounce) untoasted hazelnuts
1 or 2 whole cloves garlic
½ teaspoon cracked black pepper
45 grams (½ cup) Grana Padano, Parmigiano-Reggiano, or Pecorino Romano cheese, grated
Pinch of fine sea salt
100 grams (scant ½ cup) extra-virgin olive oil
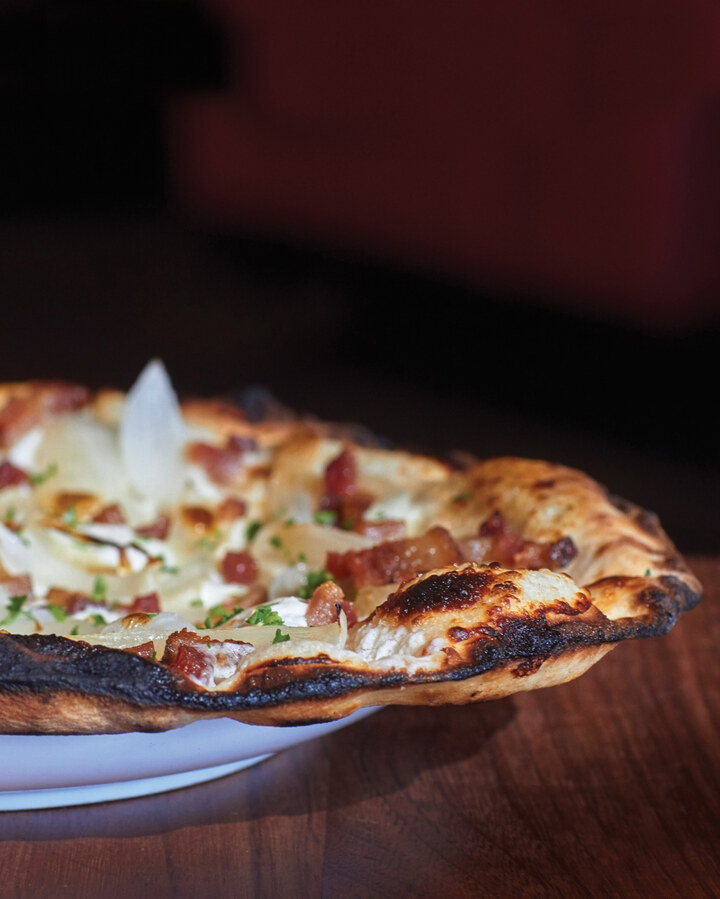
TARTE FLAMBÉE
1 (150-gram) dough ball
90 grams (3 ounces) fromage blanc
30 grams (2 tablespoons) heavy cream
½ medium yellow onion, thinly sliced
¼ teaspoon sea salt
35 grams (1¼ ounces) pork belly lardons, or bacon sliced into 1-inch pieces, or substitute guanciale or pancetta
1 or 2 sprigs flat-leaf parsley, chopped
Freshly cracked black pepper (optional)
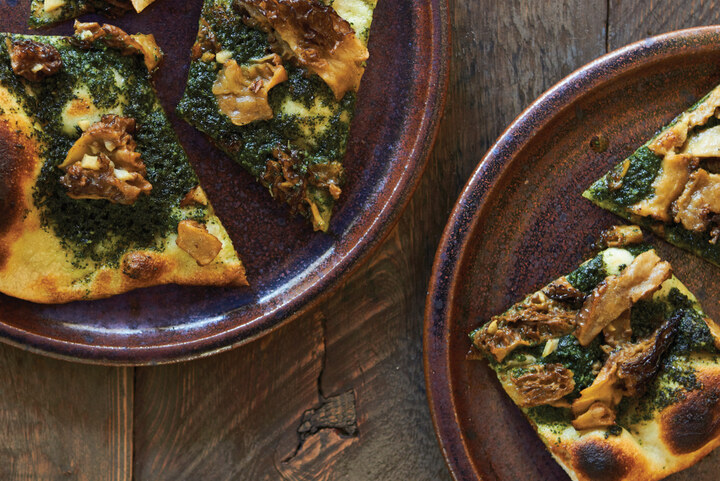
NETTLE PESTO FLATBREAD WITH MOREL MUSHROOMS
1 (150-gram) dough ball
60 grams (¼ cup) nettle pesto (recipe follows)
Roasted morel mushrooms (recipe follows)
About 1 tablespoon aromatic olive oil
225 grams (8 ounces) fresh nettles, with stems on
90 grams (½ bunch) Italian parsley, leaves and small stems only
30 grams (¼ cup) untoasted walnuts
1 or 2 cloves garlic
1 gram (½ teaspoon) cracked black pepper
45 grams (½ cup) Grana Padano, Parmigiano-Reggiano, or Pecorino Romano cheese, grated
Pinch of fine sea salt
120 grams extra-virgin olive oil
90 grams (3 ounces) fresh morel mushrooms
15 grams (1 tablespoon) olive oil
2 cloves garlic, chopped
Fine sea salt
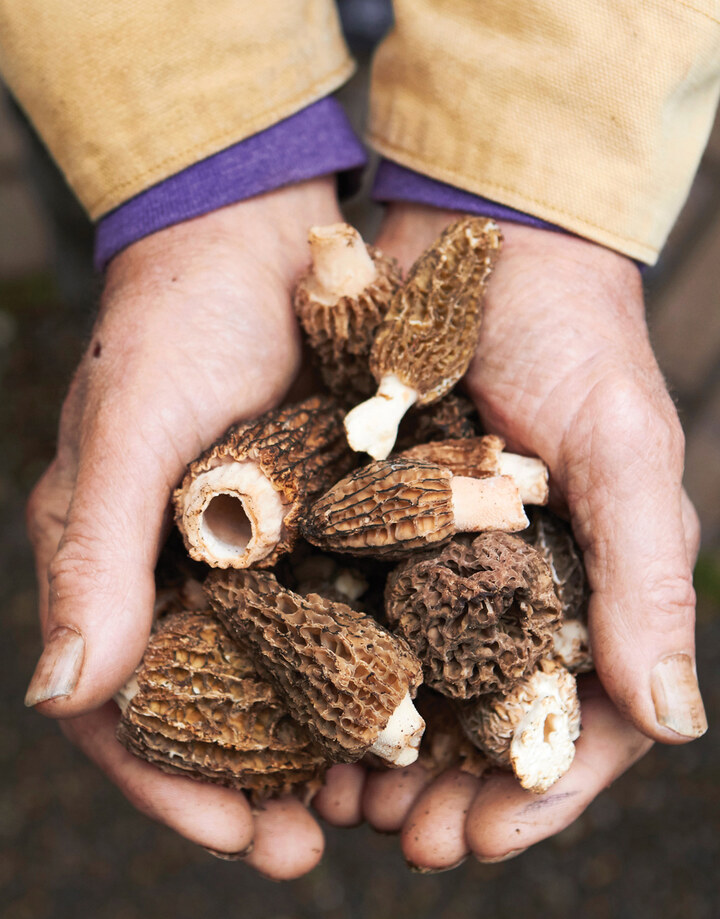
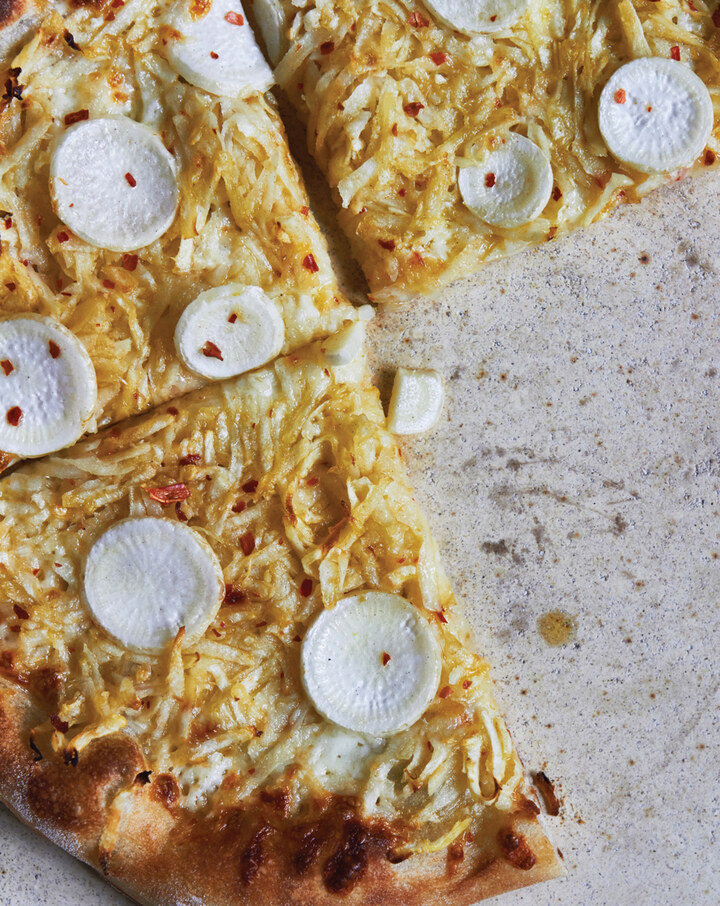
THE WHITE OWL
1 dough ball
125 grams (4½ ounces, about ⅓ of a whole) celery root
Extra-virgin olive oil
Sea salt
Chile flakes
2 baby white turnips (each about 2 inches in diameter)
90 grams (3 ounces) low-moisture mozzarella cheese
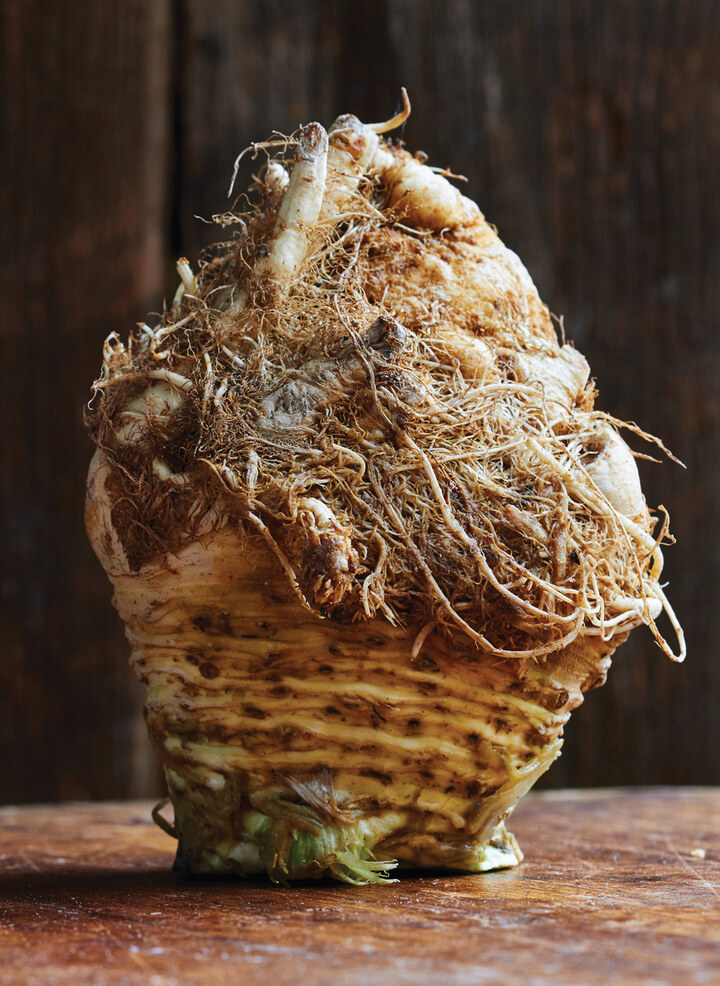

ESCAROLE PIZZA
1 dough ball
3 or 4 escarole leaves
Extra-virgin olive oil
60 grams (2 ounces) provolone
60 grams (2 ounces) fresh mozzarella
2 or 3 cloves garlic
60 grams (¼ cup) tomato sauce
1 lemon wedge
Black pepper
DELICATA SQUASH PIZZA
1 (150-gram) dough ball
1 delicata squash
Extra-virgin olive oil
100 grams (⅓ cup plus 1 teaspoon) tomato sauce
40 grams (1½ ounces) fontina cheese, grated
80 grams (about 3 ounces) fresh mozzarella, sliced
Sea salt
Chile flakes
8 to 10 basil leaves
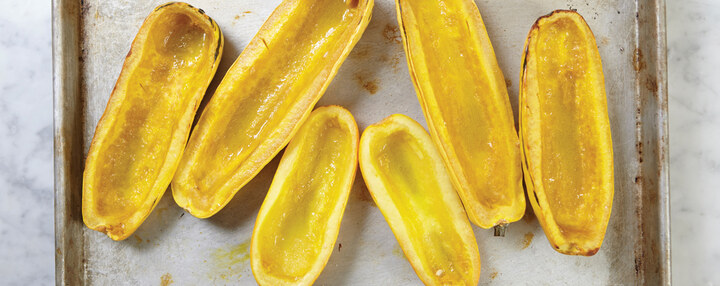
BUTTERNUT SQUASH PIZZA
1 dough ball
115 grams (4 ounces) uncooked bacon, sliced into 1- to 2-inch lengths
4 or 5 sage leaves
15 grams (½ ounce) Pecorino Romano cheese
120 grams (4 ounces) mozzarella di bufala or fior di latte mozzarella, cut into ¼-inch to ½-inch-thick slices
Extra-virgin olive oil
140 grams (5 ounces) roasted butternut squash, in walnut-sized chunks
ARTICHOKE AND BACON PIZZA
1 dough ball
75 grams (2½ ounces) uncooked bacon, cut into 1- to 2-inch slices
15 grams (1 tablespoon) extra-virgin olive oil
1 lemon
55 grams (2 ounces) provolone cheese, grated
4 marinated artichoke hearts, sliced into quarters
55 grams (2 ounces) fresh goat cheese
Freshly cracked black pepper
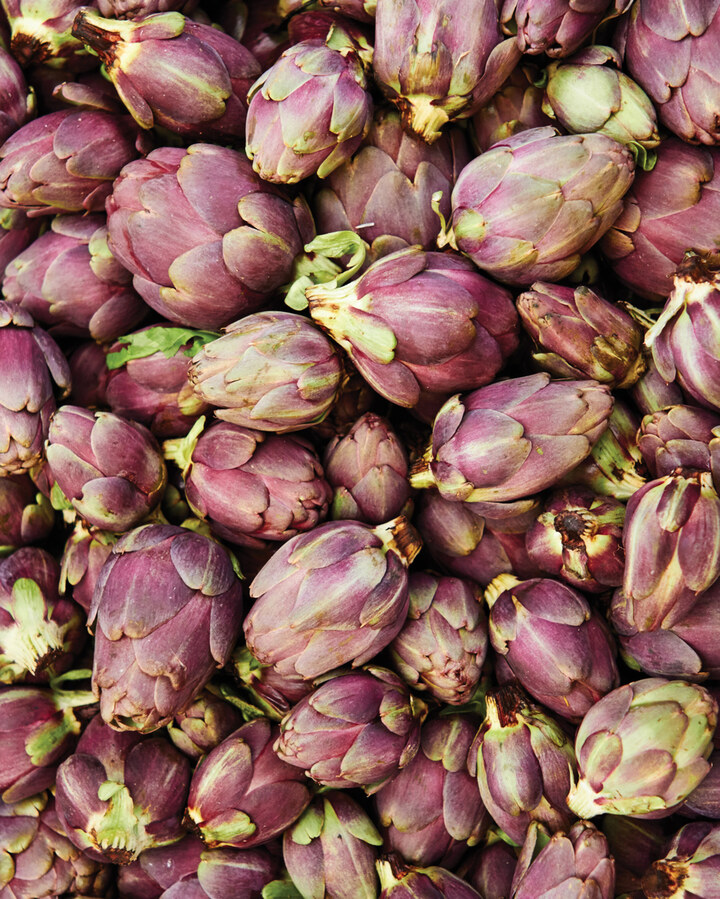
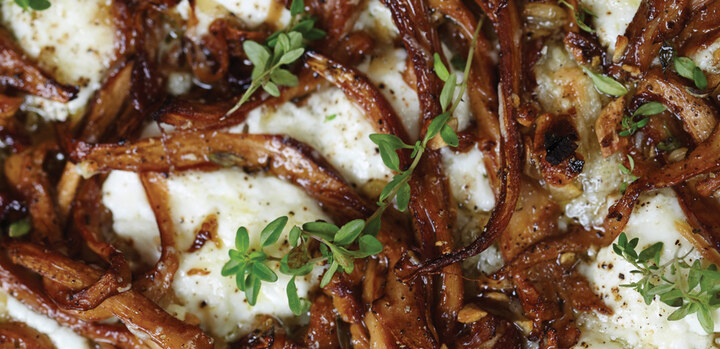
CHANTERELLE AND GARLIC PIZZA
1 dough ball
225 grams (8 ounces) fresh chanterelle mushrooms, shredded by hand into ¼-inch-thick strands
3 cloves garlic, chopped
50 grams (scant ¼ cup) extra-virgin olive oil
Fine sea salt
6 to 8 sprigs fresh thyme (lime thyme if you can find it), half picked, half left whole
70 grams (3½ ounces) fresh goat cheese
8 grams (2 tablespoons) grated Pecorino Romano cheese
Fresh cracked black pepper
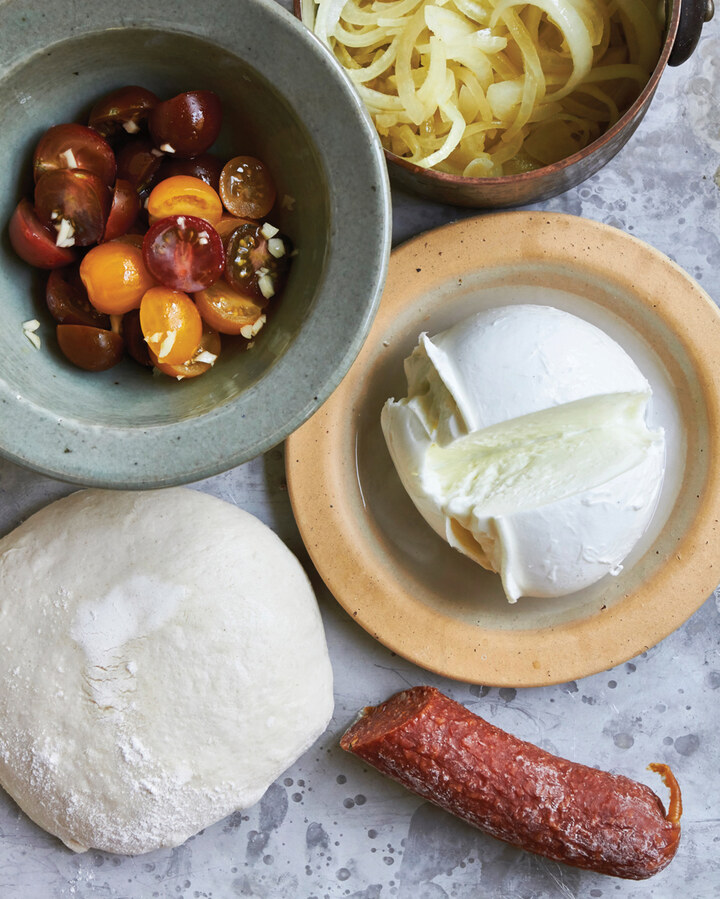
THE TOMMY HABETZ PIZZA
1 dough ball
12 ripe cherry tomatoes
Extra-virgin olive oil
A very short splash (about ¼ teaspoon) red wine vinegar or another tasty vinegar
½ sweet onion, cut in half and sliced vertically
60 grams (2 ounces) stick salami, such as soppressata, thinly sliced into 12 to 15 pieces
115 grams (4 ounces) fresh mozzarella di bufala or whole-milk mozzarella (fior di latte), cut into ½-inch-thick pieces
7 grams (¼ ounce) Pecorino Romano cheese, grated
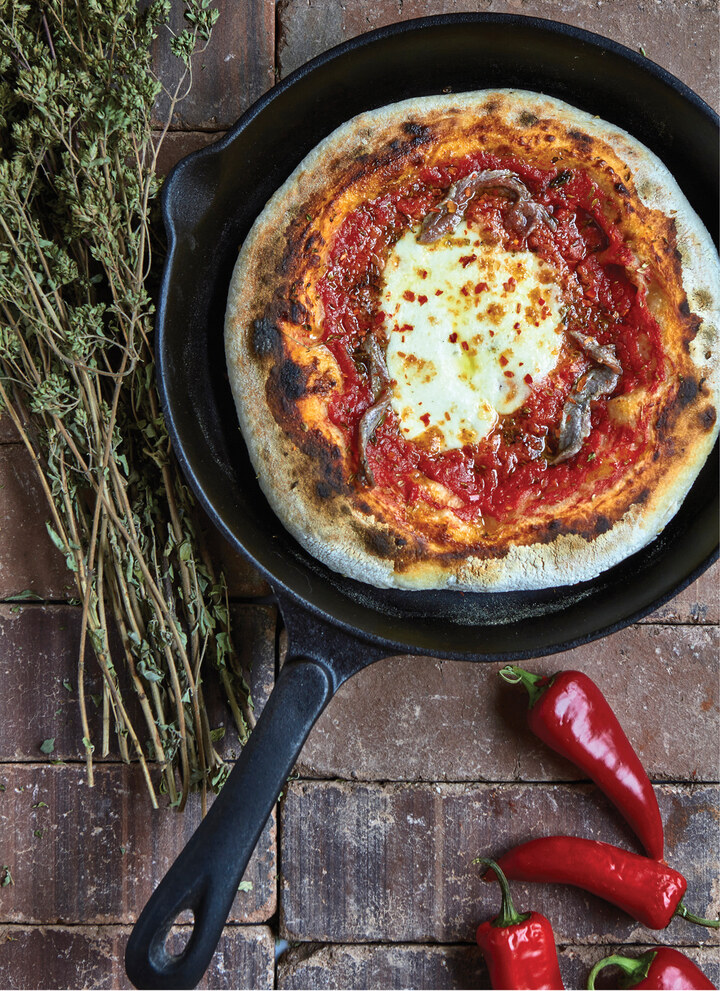
THE PIE HOLE SKILLET PIZZA
1 (275-gram) dough ball
115 grams (⅓ cup plus 2 teaspoons) tomato sauce
2 grams (1 teaspoon) dried oregano
50 grams (2 ounces) fresh whole-milk mozzarella cheese (fior di latte) or mozzarella di bufala, packed in brine
Extra-virgin olive oil
Sea salt
Chile flakes
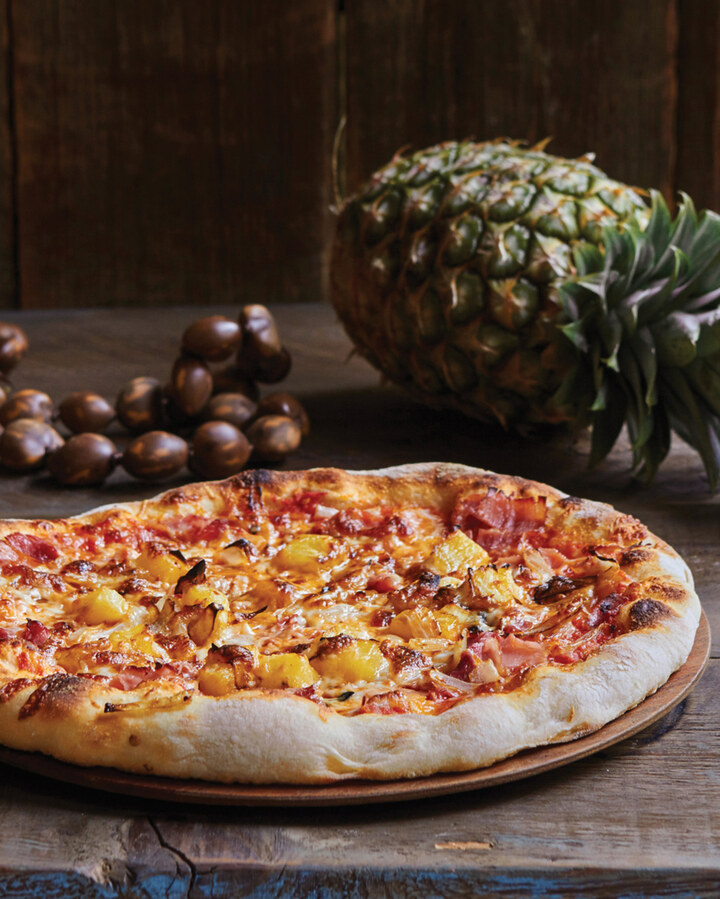
HAWAIIAN PIZZA
1 dough ball
1 whole pineapple
¼ to ½ sweet onion, preferably torpedo or Maui, or substitute Vidalia or Walla Walla
15 grams (1 tablespoon) extra-virgin olive oil
Fine sea salt
Chile flakes
15 grams (1 tablespoon) or less rendered bacon fat (optional)
90 grams (⅓ cup) tomato sauce
15 grams (¼ cup) Pecorino Romano cheese, finely grated
50 grams (about 2 ounces) cooked (deli-counter) ham, sliced medium-thick in 2- to 3-inch lengths
40 grams (1½ ounces) low-moisture, whole-milk mozzarella cheese, coarsely grated
RACLETTE PIZZA
1 dough ball
1 large leek or 2 medium leeks
15 grams (1 tablespoon) butter
250 grams (1 cup) nonhoppy beer, such as farmhouse ale or Saison Dupont
35 grams (1½ ounces) pork belly lardons or pancetta, sliced into 1-inch pieces (optional)
1 medium yellow potato, roasted and crumbled
125 grams (4½ ounces) raclette cheese, grated
VOLUME
Formulas
1 teaspoon = 4.93 milliliters
1 tablespoon = 14.79 milliliters/3 teaspoons
1 cup = 236.59 milliliters/16 tablespoons
1 liter = 202.88 teaspoons/67.63 tablespoons/4.23 cups
| U.S. | IMPERIAL | METRIC |
| 1 tablespoon | ½ fl oz | 15 ml |
| 2 tablespoons | 1 fl oz | 30 ml |
| ¼ cup | 2 fl oz | 60 ml |
| ⅓ cup | 3 fl oz | 90 ml |
| ½ cup | 4 fl oz | 120 ml |
| ⅔ cup | 5 fl oz (¼ pint) | 150 ml |
| ¾ cup | 6 fl oz | 180 ml |
| 1 cup | 8 fl oz (⅓ pint) | 240 ml |
| 1¼ cups | 10 fl oz (½ pint) | 300 ml |
| 2 cups (1 pint) | 16 fl oz (⅔ pint) | 480 ml |
| 2½ cups | 20 fl oz (1 pint) | 600 ml |
| 1 quart | 32 fl oz (1⅔ pints) | 1 l |
WEIGHT
Formulas
1 ounce = 28.35 grams
1 pound = 453.59 grams/16 ounces
1 kilogram = 2.2 pounds
| U.S./IMPERIAL | METRIC |
| ½ oz | 15 g |
| 1 oz | 30 g |
| 2 oz | 60 g |
| ¼ lb | 115 g |
| ⅓ lb | 150 g |
| ½ lb | 225 g |
| ¾ lb | 350 g |
| 1 lb | 450 g |
LENGTH
Formulas
1 inch = 2.54 cm
1 foot = 0.3 m/12 inches
1 cm = 0.39 inch
1 m = 3.28 feet/39.37 inches
| INCH | METRIC |
| ¼ inch | 6 mm |
| ½ inch | 1.25 cm |
| ¾ inch | 2 cm |
| 1 inch | 2.5 cm |
| 6 inches (½ foot) | 15 cm |
| 12 inches (1 foot) | 30 cm |
TEMPERATURE
Formulas
9/5 C + 32 = F
(F − 32) × 5/9 = C
| FAHRENHEIT | CELSIUS/GAS MARK |
| 250°F | 120°C/gas mark ½ |
| 275°F | 135°C/gas mark 1 |
| 300°F | 150°C/gas mark 2 |
| 325°F | 160°C/gas mark 3 |
| 350°F | 175° or 180°C/gas mark 4 |
| 375°F | 190°C/gas mark 5 |
| 400°F | 200°C/gas mark 6 |
| 425°F | 220°C/gas mark 7 |
| 450°F | 230°C/gas mark 8 |
| 475°F | 245°C/gas mark 9 |
| 500°F | 260°C |
Three short months after opening Trifecta Tavern, I was crazy enough to decide to write this book. There is no way I could have completed this project without the excellent work—every day—of my staff at Trifecta, Ken’s Artisan Bakery, and Ken’s Artisan Pizza, where pride of place and product drive my talented teams. A very heartfelt thank-you to you all.
The greatest joy for me came from the people who welcomed me into their worlds—who generously taught me about their approach to pizza, their tomatoes, their water buffalo cheese, or their flour. A special thank-you to Fred Mortati of Orlando Foods and John Magazino of Chef’s Warehouse, for making the introductions to producers in Italy and opening doors to the land of Campania, where I found the true soul of pizza. Likewise, heartfelt thanks go out to Costantino Cutolo of Compagnia Mercantile D’Oltremare, Bernardino De Vita of Agricola Casearia Lupara, and Mauro and Antimo Caputo of Antico Molino Caputo in Naples.
Two of Italy’s greatest pizzaiolos, Enzo Coccia and Franco Pepe, gave me a strong sense of pizza’s place in Campania; they have devoted their lives to advancing the craft that is not only theirs, but also their fathers’ and their grandfathers’ professione. The pride, professionalism, artistry, and just plain magnificence of their pizzas touched me deeply.
Alan Weiner took so many great photos for this book that we were greatly challenged deciding what to place and which shots needed a separate gallery of their own. A giant thanks to Alan, a photojournalist extraordinaire.
First level editing and recipe testing from Kat Merck was indispensable.
Finally, a very special thanks to the team at Ten Speed Press. I am very proud to be one of your authors. Designer Kara Plikaitis put text and photos into a beautifully designed book, and copyeditor Clancy Drake kept my words on the straight and true. Most of all, senior editor Emily Timberlake has the magic to inspire and guide, encourage, and even laugh at my marginal jokes.
Much love to all. Especially Gomez, who never has a bad day.
Al taglio pizzas
American pizzas, 1.1, 1.2, 1.3, 1.4. See also Bar pizzas; New York pizzas; Pan pizzas
Arugula
Margherita and Arugula, Two Ways
Asiago fresco
Mortadella and Pistachio Pizza
Associazione Verace Pizza Napoletana (AVPN), 1.1, 2.1, 2.2, 3.1, 3.2, 3.3, 3.4, 4.1, 6.1, 7.1
Autolyse process, 3.1, 5.1, 6.1
Bacon
See also Pancetta
Bar pizzas
Adam Kuban’s “Love Supreme” Bar Pizza
Beef
Bell peppers
Adam Kuban’s “Love Supreme” Bar Pizza
Biga Pizza Dough, 48- to 72-Hour
Caciocavallo
Celery root
Cheddar cheese
Adam Kuban’s “Love Supreme” Bar Pizza
See also individual cheeses
Chile peppers
Fennel Sausage and Onion Pizza
Coccia, Enzo, 1.1, 1.2, 1.3, 1.4, 3.1, 3.2, 5.1, 6.1
Coppa
Cutolo, Costantino, 1.1, 4.1, 4.2
Da Michele, 1.1, 1.2, 4.1, 4.2
De Lorenzo’s Tomato Pies, 1.1, 1.2
Denominazione di Origine Protetta (DOP), 4.1, 4.2
Detroit-style pizza, 1.1, 2.1, 2.2
Eggs
Flatbreads
Nettle Pesto Flatbread with Morel Mushrooms
Oregon Basil Pesto and Burrata Flatbread
Flour
protein content of, 3.1, 4.1, 4.2
Fontina cheese
Frank Pepe Pizzeria Napoletana
Fromage blanc
Mortadella and Pistachio Pizza
Grandma pizzas. See Pan pizzas
Ham
See also Prosciutto
Ingredients
measuring by weight, 3.1, 4.1, 5.1
order in adding, 1.1, 3.1, 5.1, 5.2
See also individual ingredients
“I Slept In But I Want Pizza Tonight” Dough
Ken’s Artisan Pizza (KAP), itr.1, 1.1, 2.1, 3.1, 3.2, 4.1, 4.2, 4.3, 5.1, 7.1, 7.2, 7.3, 7.4, 7.5, 7.6
Kuban, Adam, 2.1, 4.1, 6.1, 7.1
La Notizia, 1.1, 1.2, 1.3, 1.4, 3.1, 5.1, 6.1
Margherita and Arugula, Two Ways
Maria Carolina, Queen, 1.1, 7.1
Mortadella and Pistachio Pizza
Mozzarella cheese, 4.1, 4.2, 4.3, 7.1
Adam Kuban’s “Love Supreme” Bar Pizza
Fennel Sausage and Onion Pizza
Margherita and Arugula, Two Ways
Mortadella and Pistachio Pizza
Oregon Basil Pesto and Burrata Flatbread
Pepperoni, Mushroom, and Onion Pizza
Mushrooms
Nettle Pesto Flatbread with Morel Mushrooms
Pepperoni, Mushroom, and Onion Pizza
Neapolitan pizzas
history and traditions of, 1.1, 1.2
Mortadella and Pistachio Pizza
Nettle Pesto Flatbread with Morel Mushrooms
New York (and New York–inspired) pizzas
48- to 72-Hour New York Pizza Dough
Pepperoni, Mushroom, and Onion Pizza
Onions
Adam Kuban’s “Love Supreme” Bar Pizza
Fennel Sausage and Onion Pizza
Pepperoni, Mushroom, and Onion Pizza
Pancetta
Pan pizzas
adapting dough recipes for, 5.1, 6.1, 6.2
Margherita and Arugula, Two Ways
Mortadella and Pistachio Pizza
Pepperoni, Mushroom, and Onion Pizza
Adam Kuban’s “Love Supreme” Bar Pizza
Margherita and Arugula, Two Ways
Pepperoni, Mushroom, and Onion Pizza
Pepe, Franco, 1.1, 1.2, 3.1, 6.1, 7.1
Pepe in Grani, 1.1, 1.2, 1.3, 6.1, 7.1
Pepperoni, Mushroom, and Onion Pizza
Nettle Pesto Flatbread with Morel Mushrooms
Oregon Basil Pesto and Burrata Flatbread
Pineapple
Pistachio Pizza, Mortadella and
Pizza (general)
step-by-step process for making
See also individual styles
Pizza (recipes)
Adam Kuban’s “Love Supreme” Bar Pizza
Fennel Sausage and Onion Pizza
Margherita and Arugula, Two Ways
Mortadella and Pistachio Pizza
Pepperoni, Mushroom, and Onion Pizza
Pizza dough (general)
dividing and shaping into balls, 5.1, 5.2
fermentation of, 3.1, 3.2, 5.1
hydration of, and oven temperature
seasonal and climate adjustments for
time and temperature as ingredients for
Pizza dough (recipes)
adapting for pan pizzas, 5.1, 6.1, 6.2
48- to 72-Hour Biga Pizza Dough
48- to 72-Hour New York Pizza Dough
“I Slept In But I Want Pizza Tonight” Dough
Pork
See also Bacon; Ham; Pancetta; Prosciutto; Sausage
Potatoes
Prosciutto
Provolone cheese
Ricotta cheese
Roman-style pizzas
Prosciutto and Bufala, 7.1
Salami
Sauces
See also Pesto
Sausage
Adam Kuban’s “Love Supreme” Bar Pizza
Fennel Sausage and Onion Pizza
Margherita and Arugula, Two Ways
Mortadella and Pistachio Pizza
Pepperoni, Mushroom, and Onion Pizza
Soppressata
Margherita and Arugula, Two Ways
Squash
Tomatoes
Adam Kuban’s “Love Supreme” Bar Pizza
Fennel Sausage and Onion Pizza
Margherita and Arugula, Two Ways
Pepperoni, Mushroom, and Onion Pizza
Trifecta Tavern & Bakery, itr.1, 5.1, 5.2, 7.1, 7.2, 7.3, 7.4
Turnips
Vodka
Yeast